This step-by-step guide to rolling fresh spring rolls will help you learn how to make your own fresh spring rolls at home so that you can always have perfect rolls. Naturally vegan and gluten-free, these veggie-packed spring rolls are bursting with flavor and nutrition and will impress all your dinner guests.
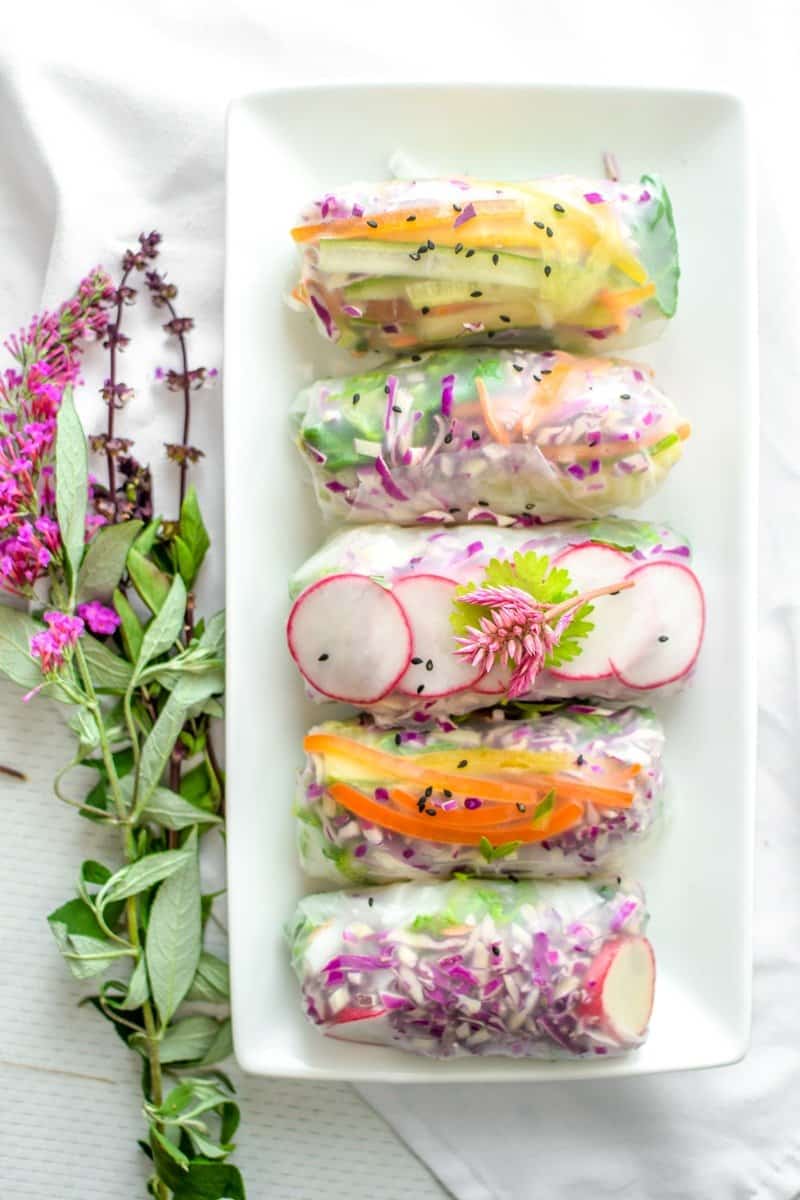
Table of Contents
- Features
- Why You Will Love This Guide
- What Are Spring Rolls?
- Ingredient Options
- Step-by-Step Pictures
- The Secret to Easy Rolling
- Benefits of Rolling Your Own
- Notes & Expert Tips
- Step by Step Guide to Rolling Fresh Spring Rolls Recipe
- Cookbook Feature
- More Anti-Inflammatory Recipes
- More Anti-Inflammatory Recipes
Features
- How to roll spring rolls with rice paper
- All of the ingredient options to try
- Step-by-step pictures to guide you
Why You Will Love This Guide
Have you ever wished you could make your own spring rolls at home?
Did you know it is surprisingly easy once you get the hang of it?
I always make this recipe at home, and I LOVE to use this recipe in my live cooking demos.
Everybody is always so excited to make them!
But – everyone is always intimidated to make them the first time, which is why I love teaching people how easy it is.
So sit back and relax; this post contains everything you need to know about how to roll your own rolls perfectly – every time, including step-by-step picture instructions and helpful tips and tricks.
What Are Spring Rolls?
You may have had fresh spring or summer rolls at a Chinese or Vietnamese restaurant before, but did you know there is a difference between the commonly known and Vietnamese spring rolls?
Spring rolls have a looser definition.
They can be fresh or fried and originate from many different countries, while summer rolls are almost always served fresh raw and originate from Vietnamese cuisine.
Many people use the terms spring and summer rolls interchangeably, but for this post, we will be focusing on making fresh, not fried, spring rolls.
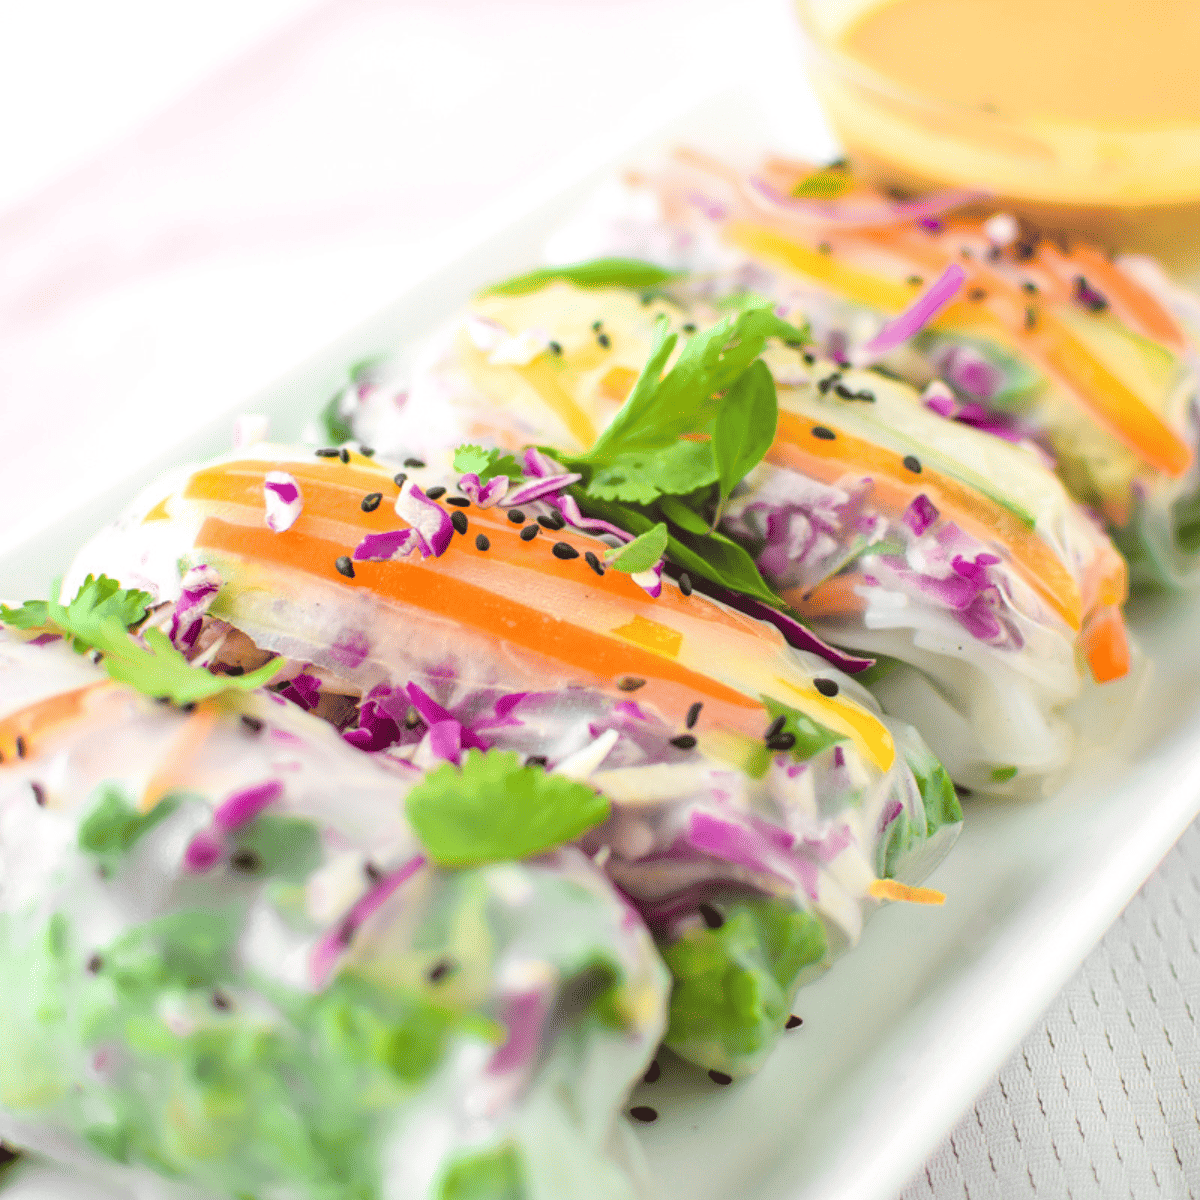
Ingredient Options
- Carrots
- Zucchini
- Bell Pepper
- Red Cabbage
- Romaine Lettuce
- Avocado
- Scallions
- Cilantro
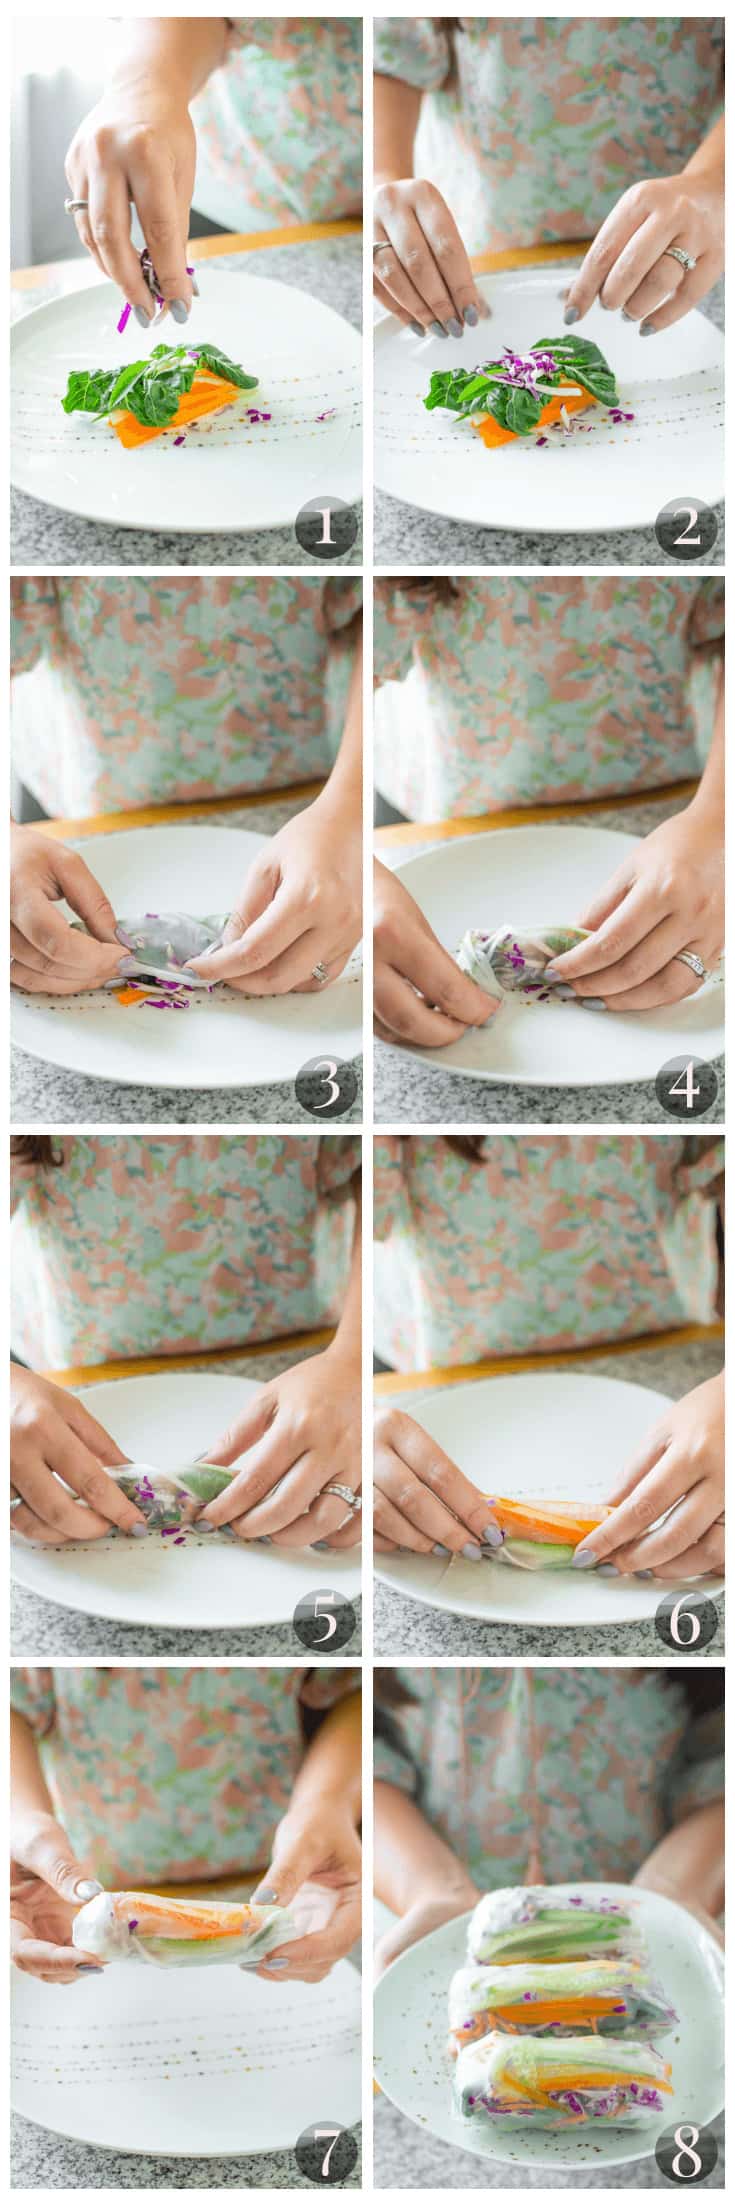
Step-by-Step Pictures
The Secret to Easy Rolling
Do you want to know how to make rice paper rolls perfect every single time?
Setting up the mise en place BEFORE getting started. Mise en place is a French term meaning “putting in place”.
Before you start rolling your rice paper rolls, you want to ensure all ingredients are cut and prepped, your work area is set up, and everything is ready to go.
Do not skip this step.
This includes chopping all of your vegetables, preparing any extra ingredients, and having your work surface organized, set up, and ready to go.
Mise en place is generally a good idea anytime you cook or bake, but it is especially important when rolling fresh spring rolls.
Set up an assembly line of ingredients so you can easily add a little to each rice paper wrapper as you move along.
SAVE THIS GUIDE 💌
Mise En Place
The best and easiest way to make great spring rolls is to make sure your mise en place is set up!
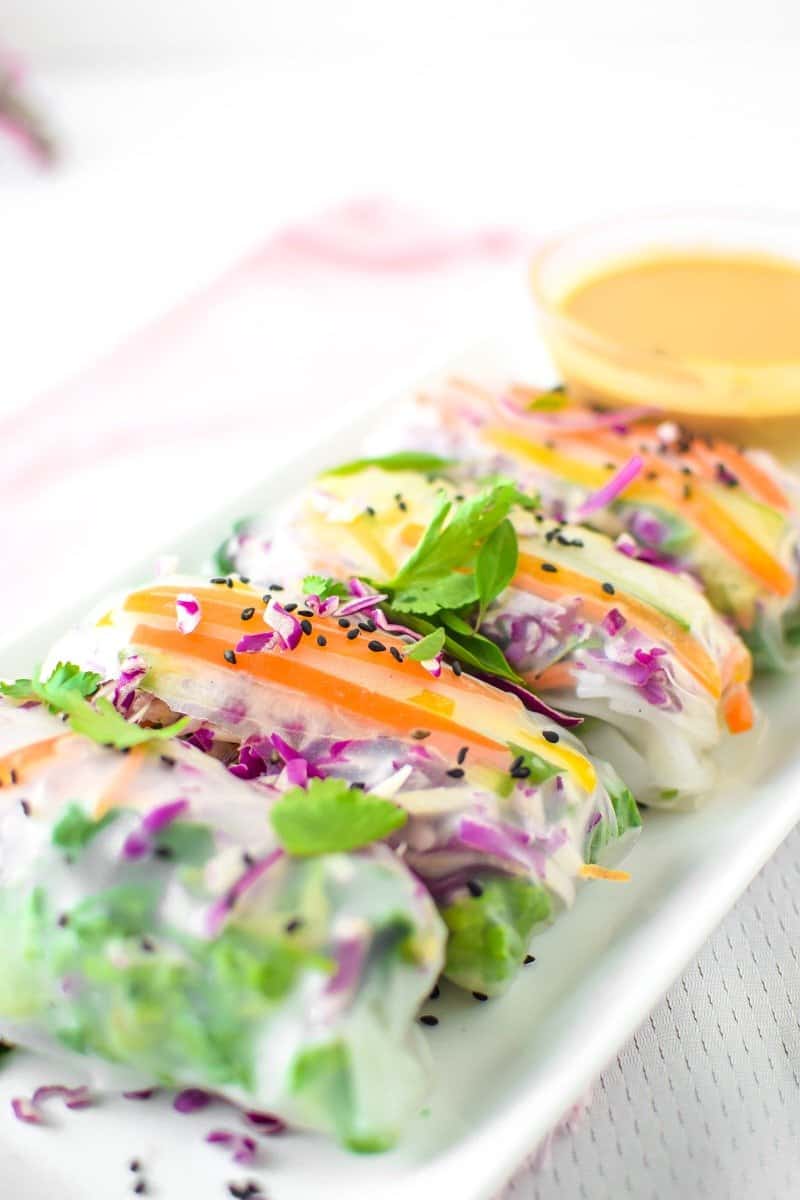
- Veggies: You can use any vegetable combination in your rolls. However, keep in mind that it is important to incorporate some ‘hard’ vegetables such as carrots, cucumber, or green pepper. Bean sprouts also work well here. These will serve as the backbone of your roll and keep them from folding over or folding together. It is also smart to cut your vegetable julienne style; think skinny sticks approximately 3-4” long. Be mindful of sharp edges or ends, which may poke holes or tear your rice paper.
- Extra additions: Feel free to get creative when deciding what to put in rice paper rolls. You can also add some protein; shredded chicken or fresh shrimp are two of my favorites, but I have also used beans and cooked quinoa too. Prepare your extra additions however you like; make sure the pieces are cut small before you start rolling.
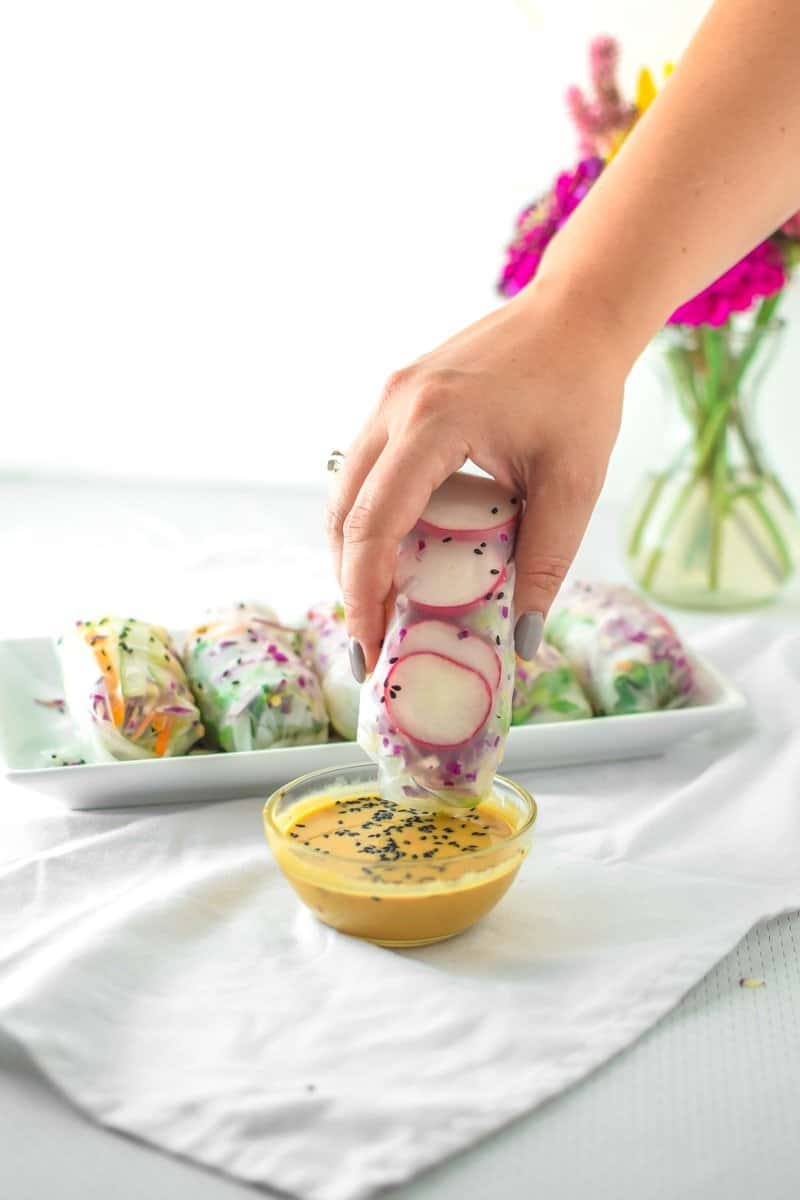
- Warm Water Bath: Select a bowl that is large enough to submerge your sheet of rice paper into the liquid without needing to bend it. Fill that bowl with 1-2” of warm-hot water, then dip the rice paper into it. Optional: I add a few dashes of soy sauce or coconut aminos, a 1/4 teaspoon of minced garlic, and squeeze fresh lime into my water for a bit of added flavor. After the rice paper has soaked for a few seconds, lift it out of the water with two hands and let it drain before laying it on your work surface.
- Work Surface: You want a spacious, flat surface to work on that can get wet. I find that both my countertop and a plastic cutting board work just fine.
Benefits of Rolling Your Own
The beauty of rolling your own spring rolls at home is that you can add any ingredient you want and customize them to any dietary or flavor preference.
- Everything is customizable, from the wrapper to the sauce you dip it in.
- They are a delicious way to get in two or more servings of vegetables.
- They are a perfect meal idea for Meatless Monday or any day of the week.
- They are versatile; you can add almost any ingredient you would like. Even the pickiest of eaters can’t complain.
- You can even set these up buffet style and let everyone in the family make their own, which helps to encourage kids to make and enjoy new foods as well
Rice Paper Wrappers
At the most basic level, the only thing you really need to start rolling your spring rolls is a rice paper wrapper, which should be made of a few simple ingredients, most commonly rice flour, tapioca starch, water, and salt.
This means that the rice paper wrappers are naturally vegan, dairy-free, gluten-free, low FODMAP, and free of the top 8 most common allergens: dairy, wheat, eggs, fish, shellfish, tree nuts, peanuts, and soy.
Each wrapper contains approximately 30 calories, 13 grams of carbohydrates, 1 gram of protein, and no fat.
However, exact nutrition will vary from brand to brand depending on what is available at your grocery store.
Packed with Vegetables
The second standard ingredient that gets added to fresh rice paper rolls is vegetables and fresh herbs, two of the most nutritious fresh food options available.
While the nutrition will vary depending on the vegetables you choose, all vegetables are typically still a highly nutrient-dense, high-fiber addition to this meal.
Most vegetables contain a high concentration of the different nutrients we need for optimal health, including vitamins, minerals, phytonutrients, and antioxidants.
Consuming just two vegetable rolls is an excellent way to get in two of the recommended servings of vegetables each day. The more veggies you add, the healthier these rolls will be!
Can Be Vegan or Not
It is entirely your choice whether or not to enjoy these spring rolls as a vegan or vegetarian dish or as a high-protein meal with the addition of ingredients like shrimp, fish, or chicken.
Making these fresh spring rolls is a great option for families who live with both vegetarians and omnivores because each spring roll can be made individually to reflect each person’s preference.
Feel free to make a half batch of vegetable spring rolls and a half batch of shrimp spring rolls to please everyone in the family.
Naturally Gluten-Free
Many people adopt a gluten-free lifestyle for a variety of reasons, and it is helpful to know that these rice paper wrappers are completely gluten-free.
As long as you do not add any ingredients with hidden gluten, like traditional soy sauce, you can rest easy knowing that this dish is wheat, barley, and rye-free.
Low FODMAP
Many people are excited to learn that rice paper wraps are low in FODMAP.
The term FODMAP is an acronym derived from “Fermentable Oligo-, Di-, Mono-saccharides And Polyols”.
For those following this specific diet, these rice paper wraps are a great addition to expand your food options.
Just be careful to ensure that the ingredients you add to your rolls are FODMAP-friendly.
Notes & Expert Tips
- Remember that getting this right will likely take you a few tries. Have a little patience, and don’t be afraid to start over if you have to.
- Rolling a really good spring roll takes practice my first one or two- every time I make them – they usually turn out pretty shaky. But once you get the hang of it and feel comfortable, you’ll learn how to do it quickly and easily.
- The only downfall to these spring rolls is that they are best eaten freshly and are not good after a few hours. If you have leftovers, you could probably keep them for 24 hours in the refrigerator.
- Individually wrap each one in plastic wrap to preserve the freshness so that they don’t stick to each other and fall apart. After that, the wrapper will get tough and gummy.
- However, if you have your mise en place all ready to go, you could pull the leftover veggies out of your fridge and roll up some more the next day.
Step by Step Guide to Rolling Fresh Spring Rolls
Video
Ingredients
- 12 each rice paper spring roll wrappers
- 2 large carrots peeled and sliced julienne style
- 1 small zucchini sliced julienne style
- 1 large bell pepper any color, sliced julienne style
- 1 cup shredded red cabbage
- 1 large avocado sliced thin
- 2 cups shredded romaine lettuce
- 1 whole scallion green and white parts, chopped
- 1 bunch cilantro chopped
- ½ cup peanut sauce or sauce of choice
Instructions
- Before getting started, lightly wet your work surface (as this will keep your rice paper wrapper from sticking).
- Take a single dry rice spring roll wrapper and place it in the bowl of lukewarm warm water. Let the the rice paper sit in the water for 10-20 seconds, or until it becomes pliable.
- This is the hard part: continue to feel how flexible the rice paper is. You want it to be soft and workable without being mushy.
- When you feel like the rice paper is ready , take the spring roll wrapper out of the water and lay it down flat on your wet surface. You will want to work quickly from here.
- Starting in the center of the wrapper, place the carrot, zucchini and bell pepper slices in a rectangular shape, staying away from the edges of the wrapper.
- Continue to add all of the fillings, from the purple cabbage to the cilantro, by placing everything in the center, one by one, maintaining the rectangle shape in the middle.
- Work quickly, you don’t want your wrapper to fall apart. When you’ve placed all of your ingredients in a nice little pile in the middle of the spring roll wrapper, it’s time to roll it shut!
- Note: Be careful not to overfill your spring roll wrapper because it will cause the rice paper to tear.
- Start by folding the top and bottom sections of the rice paper in over the vegetables.
- Starting on the left-hand side, stretch the left side of the wrapper around the pile of ingredients, tucking and rolling until you can rest the wrapper just under the ingredients.
- Tuck the corners in and then continue to roll the spring roll all the way, making your roll as tight as possible without ripping the rice paper wrapper.
- That’s it, you just rolled your very own spring roll! Now, roll as many spring rolls as you would like and enjoy immediatley.
- Enjoy with your favorite dipping sauce. I recommend a Thai Peanut Sauce, anything with Ginger, Soy Sauce or Coconut Aminos!
Notes
SAVE THIS GUIDE 💌
Cookbook Feature
Because of their simplicity and versatility, these delicious spring rolls made their way into my first cookbook, The 30-Minute Thyroid Cookbook: 125 Healing Recipes for Hypothyroidism and Hashimoto’s. They are part of the plant-based recipe section and are among the book’s 73 vegan and vegetarian adaptable recipes. The entire cookbook is gluten-, and dairy-free and specifically designed to help support those living with Hashimoto’s.
More Anti-Inflammatory Recipes
Holistic Health
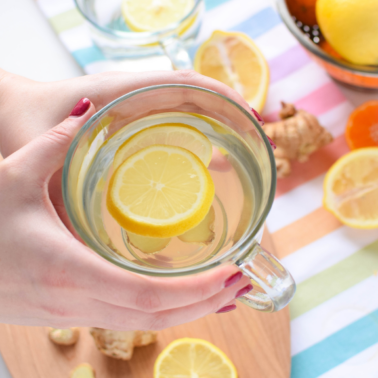
Honey, Ginger, Warm Lemon Water Recipe + Benefits
Holistic Health
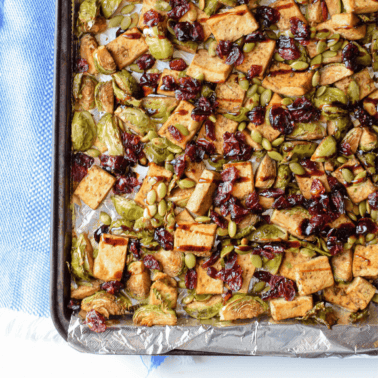
Sheet Pan Garlic Tofu & Brussels Sprouts
Holistic Health
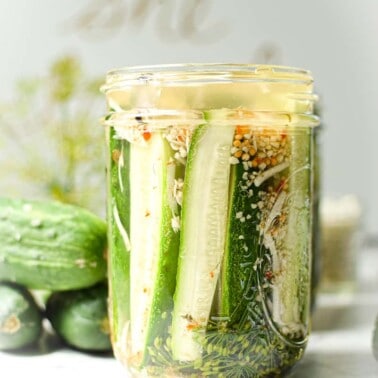
Horseradish Pickles, Quick Refrigerator Style
Holistic Health