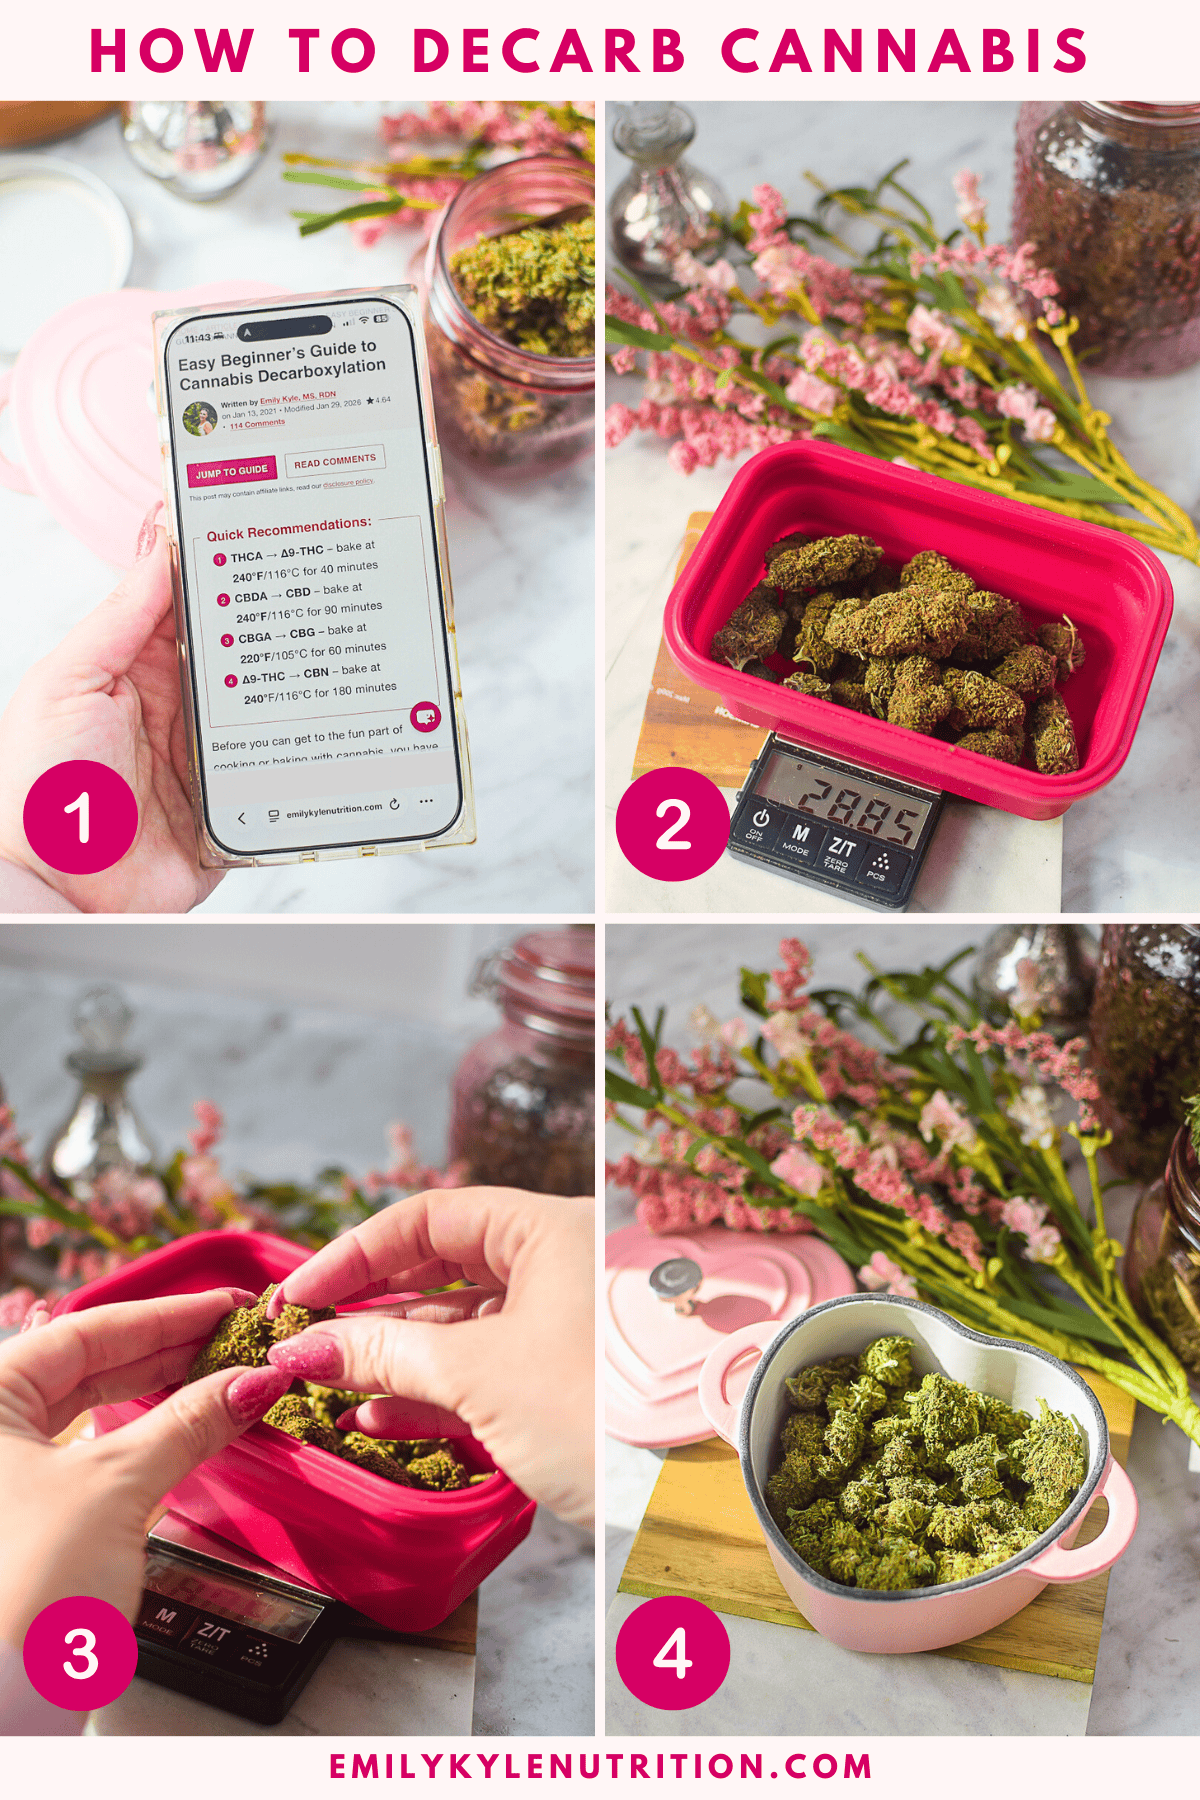
Quick Recommendations:
- THCA → Δ9-THC – bake at 240°F/116°C for 40 minutes
- CBDA → CBD – bake at 240°F/116°C for 90 minutes
- CBGA → CBG – bake at 220°F/105°C for 60 minutes
- Δ9-THC → CBN – bake at 240°F/116°C for 180+ minutes (approximate; CBN forms slowly, mostly through aging and oxygen exposure, so a single bake yields only a little)
Before you can get to the fun part of cooking or baking with cannabis, you have to “activate” the good stuff, like THC and CBD. That’s all decarboxylation is! I’m here to walk you through everything I’ve learned about why we do it, how to do it in your own kitchen, and how you can get started today. Think of me as your experienced friend, here to show you the ropes. 👯
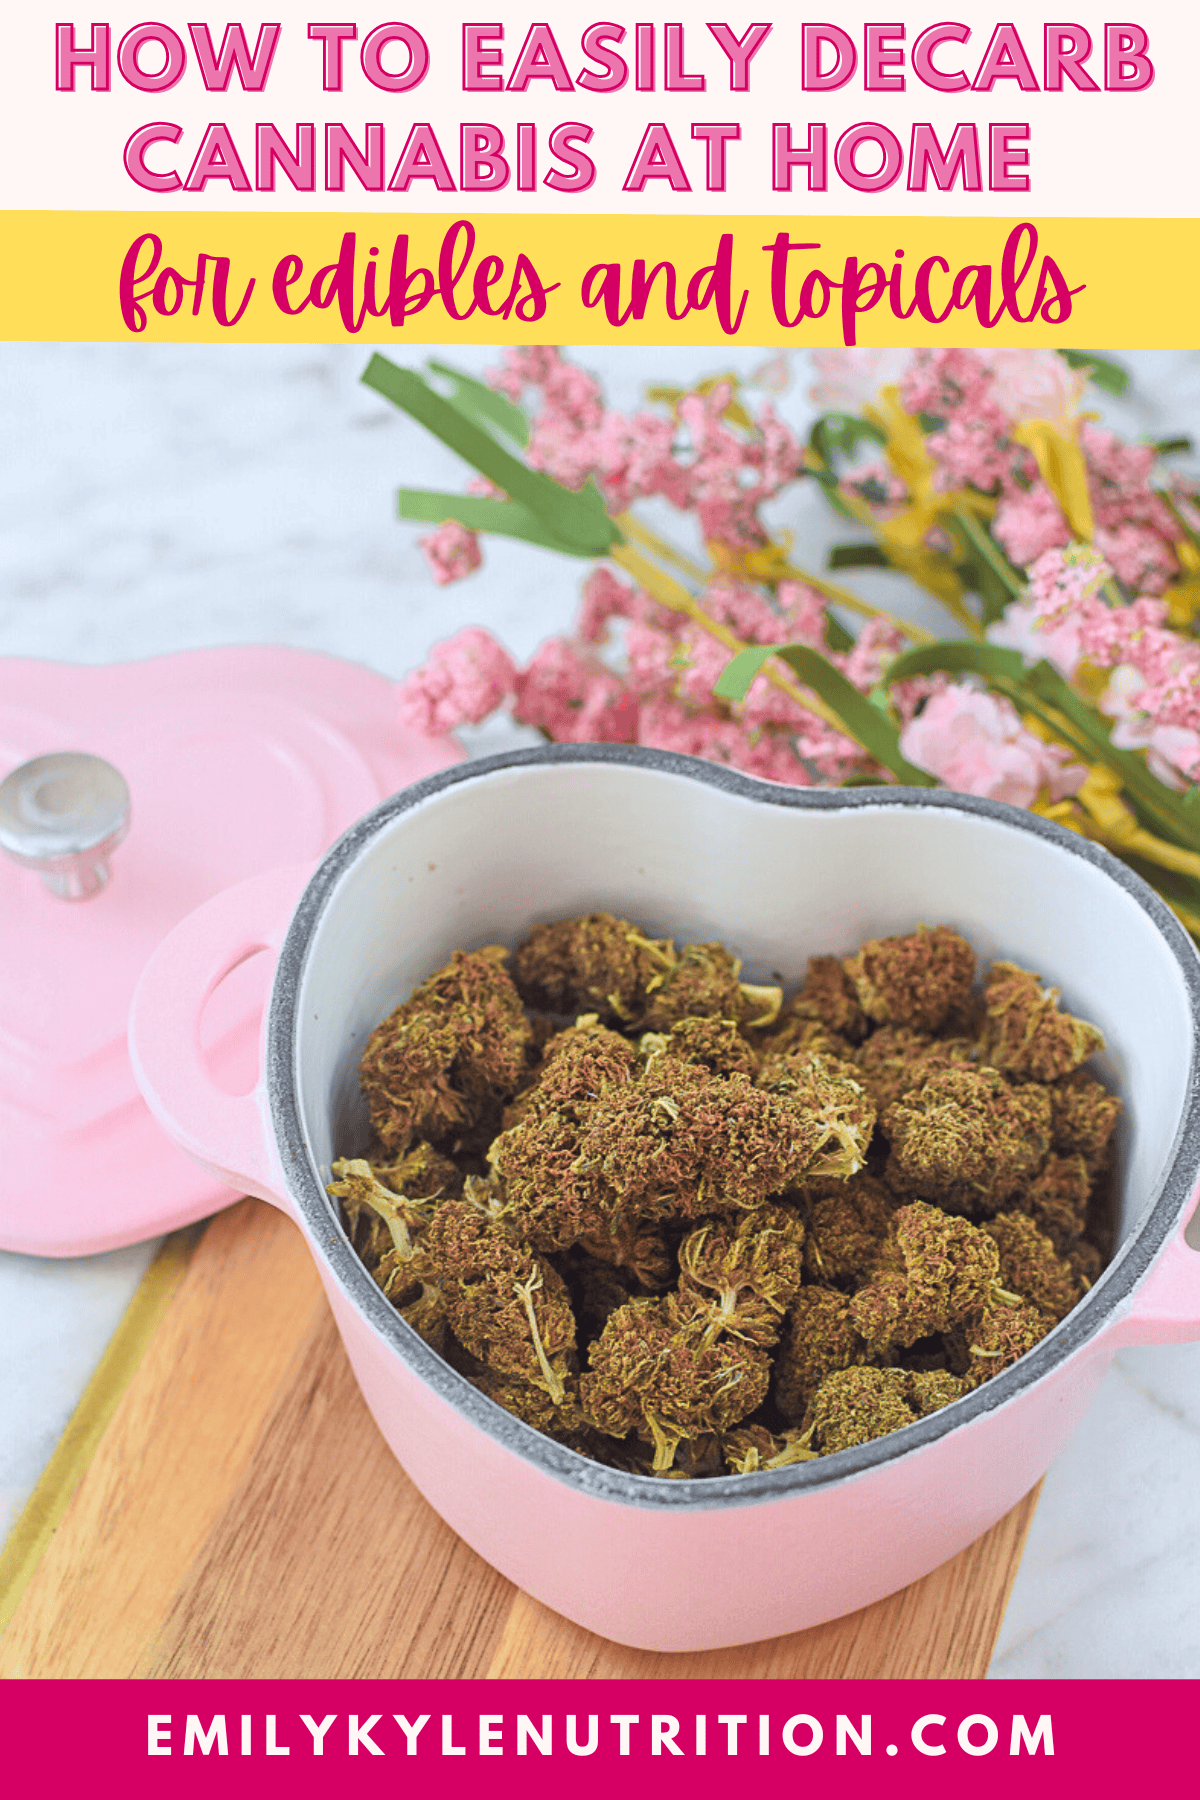
Table of Contents
- Quick Recommendations:
- Why You Will Love This Guide
- How to Decarb Cannabis Before Making Edibles or Topicals Recipe
- What You’ll Need
- See It In Pictures
- Why You Need to Decarb
- How to Decarb at Home
- Lab Tests
- What If I Don’t Decarb?
- It’s Not Going to Be Perfect
- Estimating The Potency
- How to Use Decarbed Cannabis
- 🌿 Quick Quiz: Have You Mastered Decarbing?
- Frequently Asked Questions
- More Articles You Will Love
Want to skip the hard work? Shop with me and have premium, high-quality cannabis products delivered directly to your door! Now shipping across the US.
Why You Will Love This Guide
Not long ago, a member of my Well With Cannabis Community asked me, “What exactly is decarboxylation, and why do we even need to do it?” It’s such a great question and one I had myself when I started this journey.
Decarboxylation is the essential first step you need to take before infusing cannabis into oil, butter, tinctures, edibles, topicals, and more.
Here’s a little secret: if you just ate a piece of raw cannabis, you wouldn’t feel the intoxicating effects of THC.
That’s because the plant doesn’t naturally contain a lot of THC. Instead, it has something called cannabinoid acids, like THCA.
These acids have their own benefits, but they won’t get you “high.” To transform THCA into the THC we know and love, we need to apply a little heat.
🪄 That’s the magic of decarboxylation.
You can easily do this at home by baking your dried cannabis in the oven or decarb machine at a low temperature.
In this guide, I’ll show you my simple oven method, break down the science in a way that makes sense, and share my personal tips so you can feel totally confident doing it yourself.
How to Decarb Cannabis Before Making Edibles or Topicals
Watch the Video
Equipment
What You Need
- 1 ounce cannabis *any amount is fine
Instructions
Oven Decarboxylation Instructions
- Look at the chart below and preheat your oven to the right temperature. For most THC-dominant flower, you will want to set the oven to 240°F.
- If you have a digital scale, weigh your cannabis in grams or ounces. This step is optional, but helps with dosing later on if you plan to use my edible dosage calculator.
- Gently break up the cannabis buds with your fingers into small, popcorn-sized pieces. I pull out any obvious stems or seeds but I don't grind it. Grinding can make your final product taste a bit grassy.
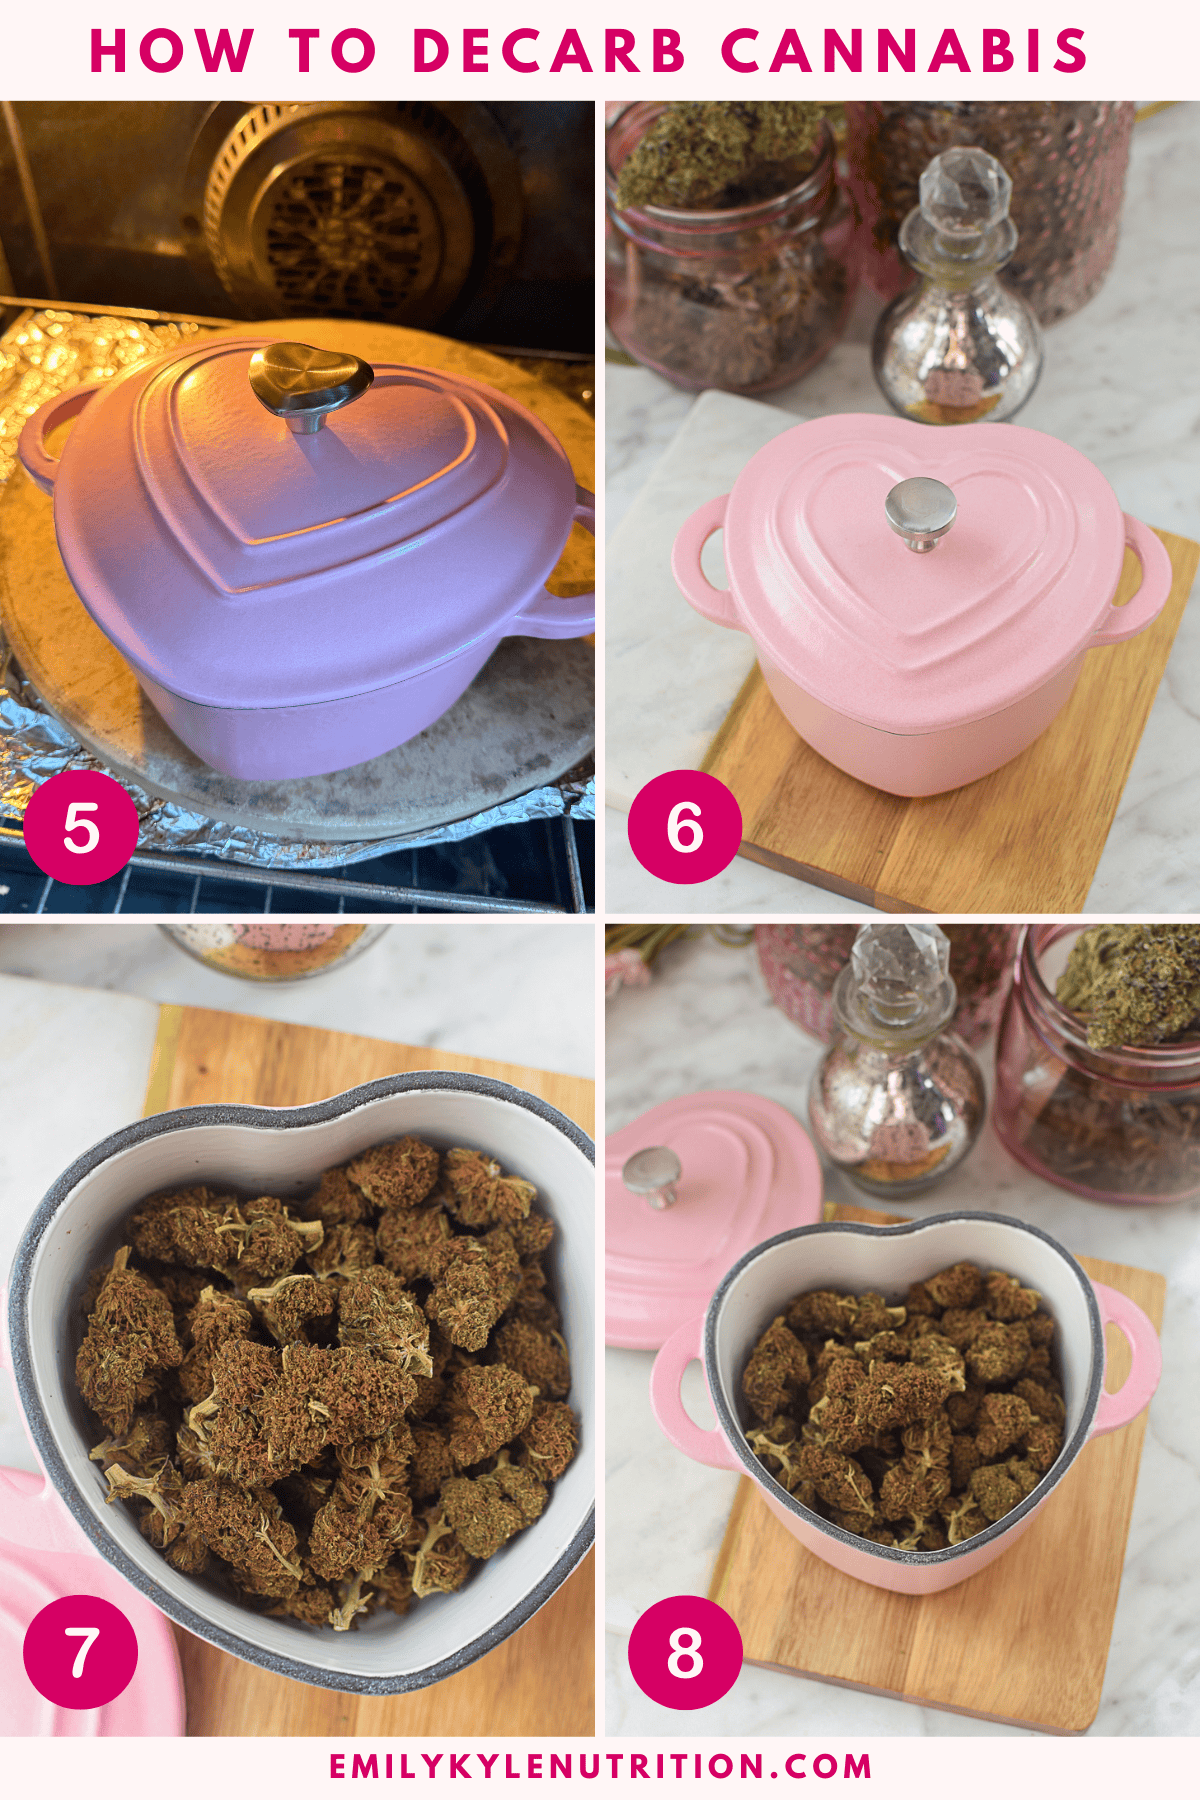
- Spread the flower in your oven-safe dish and put the lid on. If you don't have a lid, cover it tightly with foil. This helps contain the smell and preserves the flavorful terpenes.
- Place the dish in the oven and bake for the recommended time for your available cannabinoid. For THC, that's usually 40 minutes.
- Resist the urge to open the oven, lift the lid, or otherwise check on the material. Let it bake uninterrupted for the desired amount of time.
- When the timer goes off, carefully take the dish out of the oven. Here’s a key tip: let it cool down completely with the lid still on. This lets all those amazing aromas settle back into the flower.
- That's it! Your cannabis is now decarbed and ready to use.
- If you notice any moisture accumulated during the process, make sure to allow the cannabis flower to dry out completely before storing it. Moisture can lead to mold and compromise the quality of your decarbed cannabis, so lay it out on a clean, dry surface in a well-ventilated area until it feels dry to the touch.
Storage Instructions
- Once your cannabis is decarbed, cooled and dried, store it in an airtight container, like a mason jar, and keep it in a cool, dark place like a pantry. To keep it fresh, you can add a humidity control pack (like a Boveda pack).
- If you want to store it for a longer time, the freezer is a great option. It does a fantastic job of preserving the potency of the THC, CBD, and other cannabinoids.
Notes
Time & Temperature Recommendations:

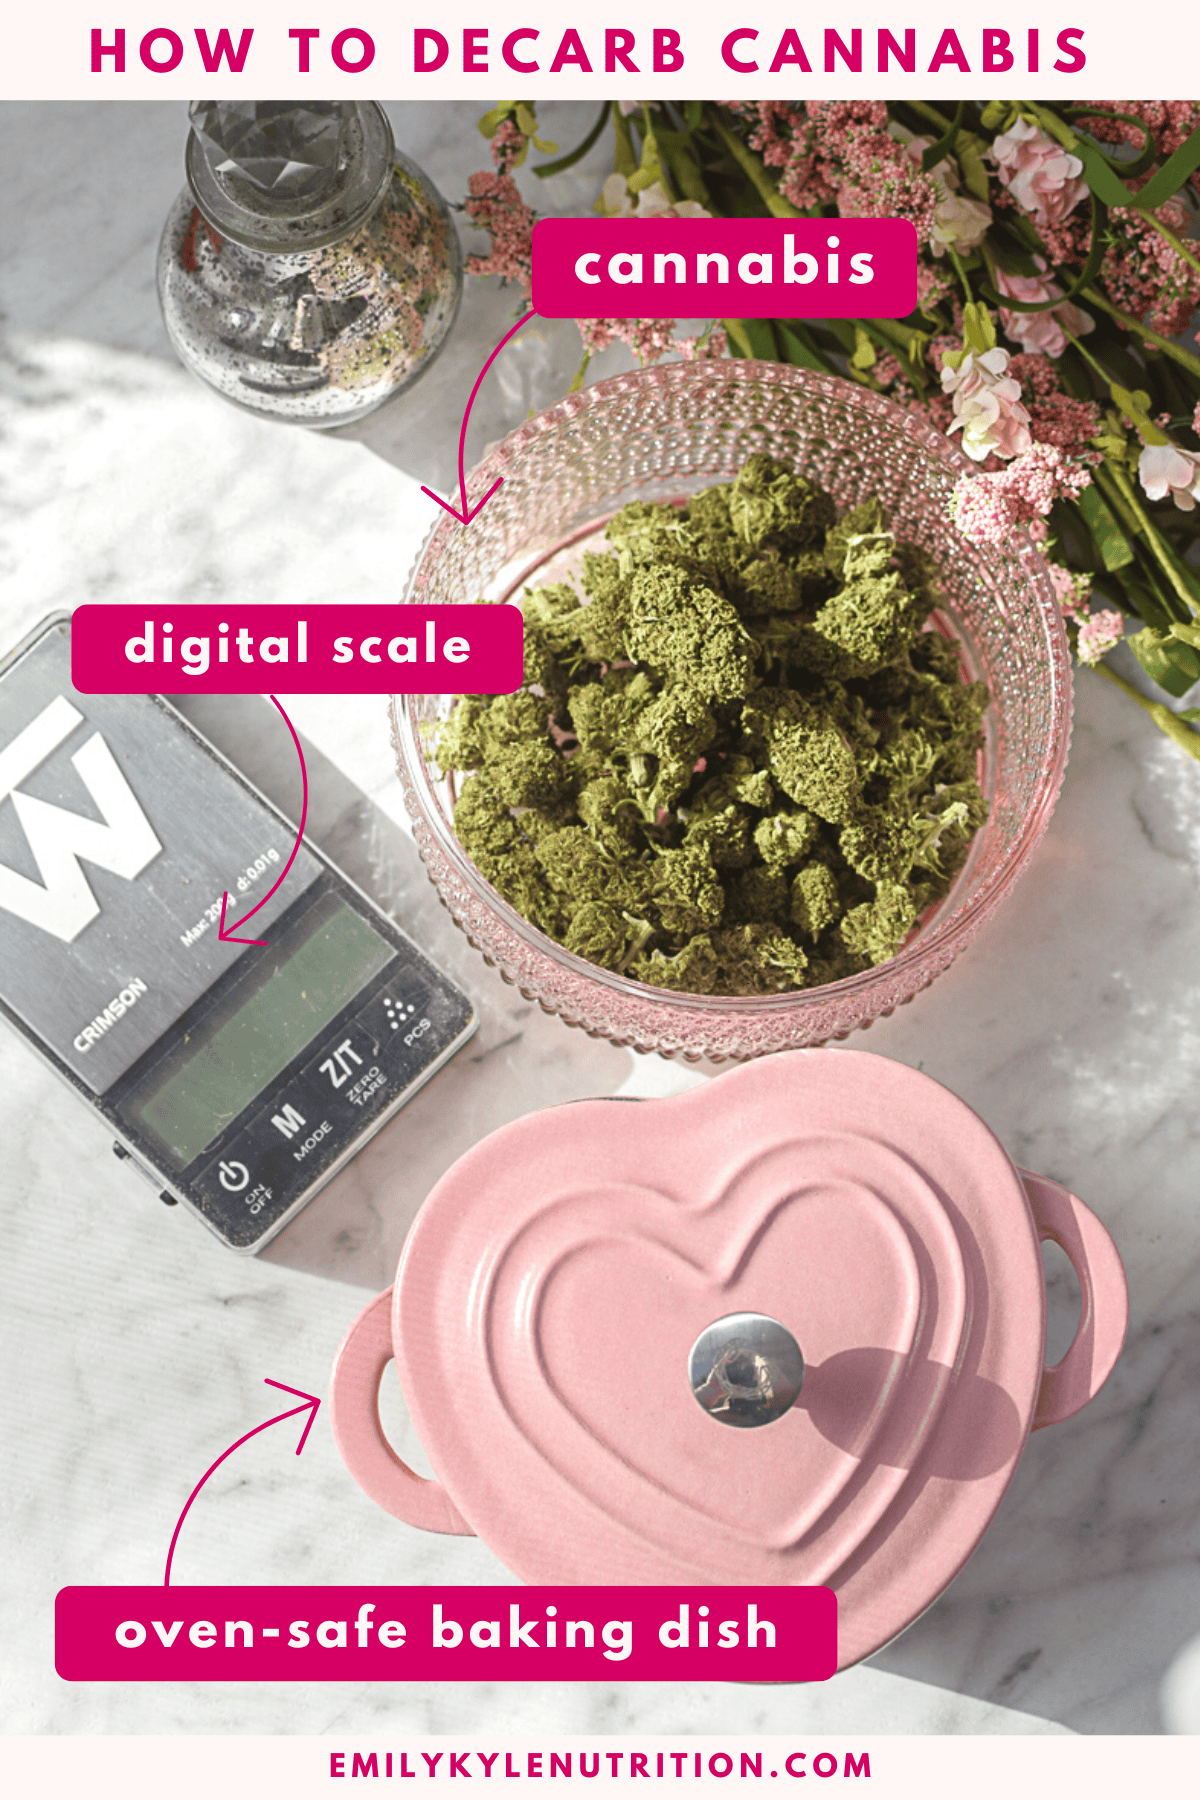
What You’ll Need
Besides your cannabis (any amount works) and an optional scale and thermometer, the only real decision is what you bake it in. Here are the best options, each with a slightly different trade-off:
Choose One:
- Oven-safe baking dish: Using an oven-safe baking dish is the best practice. From a glass pie pan covered with foil to an old Pyrex baking dish with a lid, you want to ensure you are using something specifically designed to be used in an oven. It is not recommended to place mason jars in the oven; see FAQ below for more details.
- Stasher Silicone Bags
Made from food-grade silicone, Stasher bags are an eco-friendly and reusable solution. These bags are perfect for sealing in the aroma during decarbing while also being easy to clean and durable. - Aluminum Foil Pouches
Creating a pouch with aluminum foil is a simple, effective, and budget-friendly method. Make a secure, airtight envelope using foil to wrap the cannabis, which helps contain the smell and ensures even heating. - Decarb Boxes or Trays
Specialized decarb boxes or trays, designed for cannabis enthusiasts, can also make the process straightforward. These tools are purpose-made for even heating and odor management.
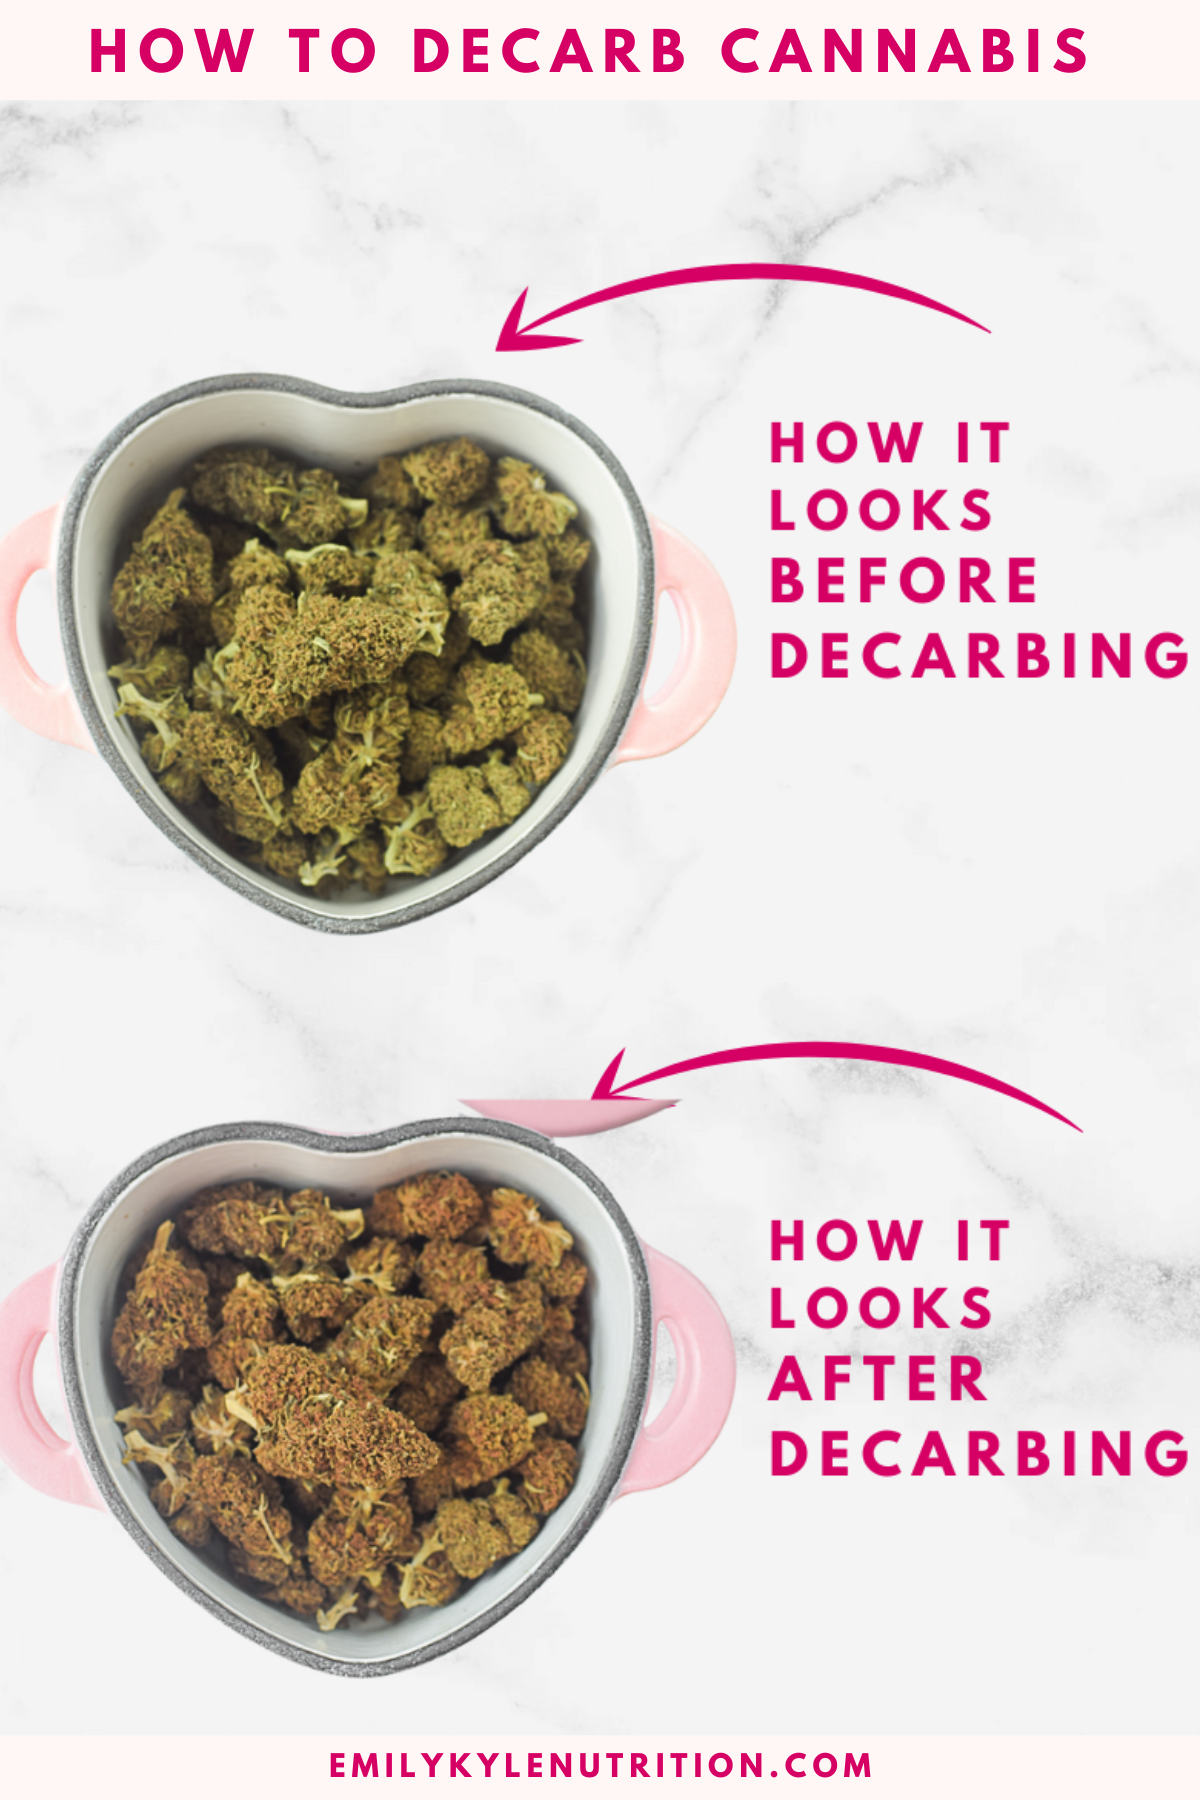
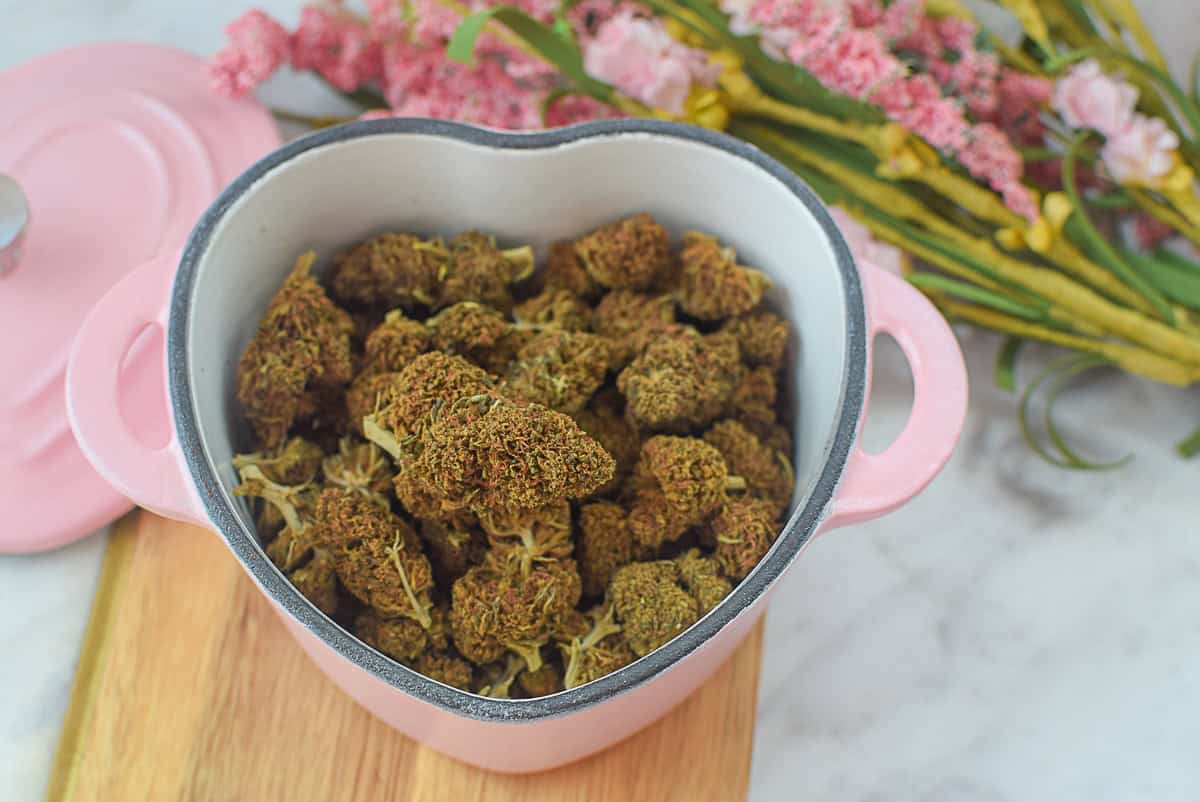
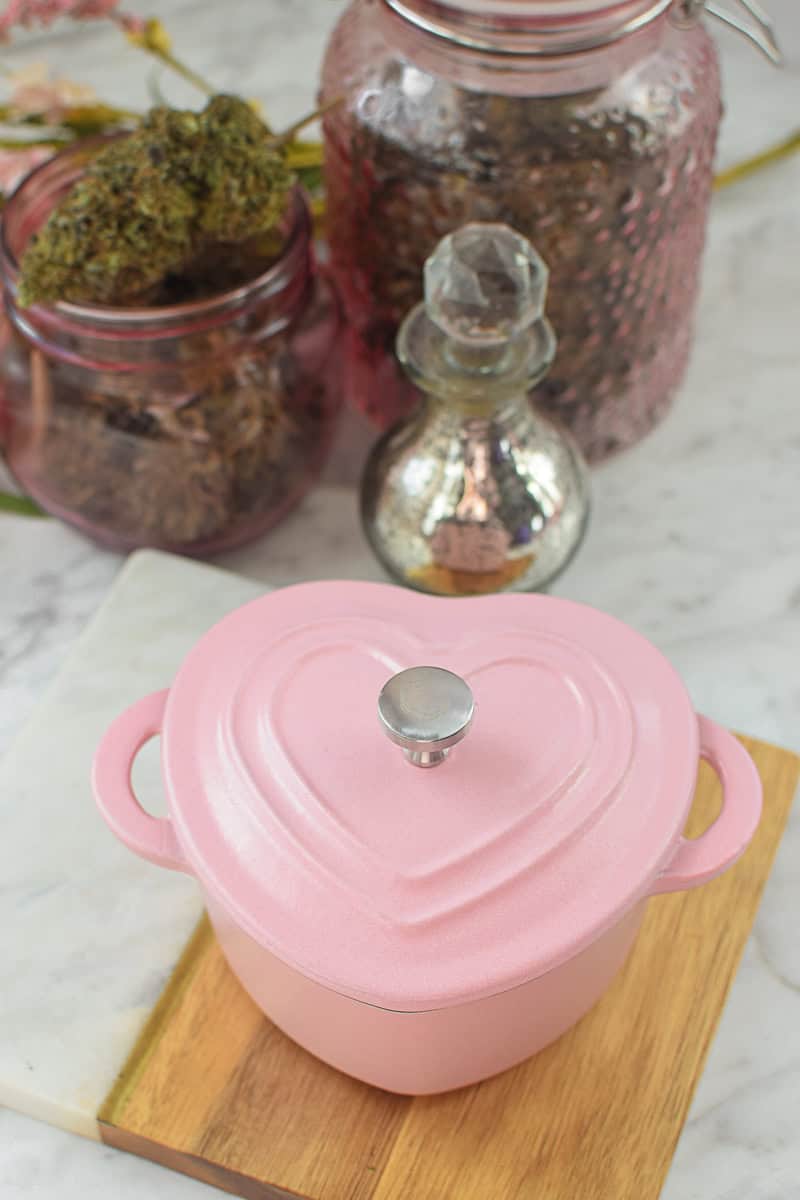
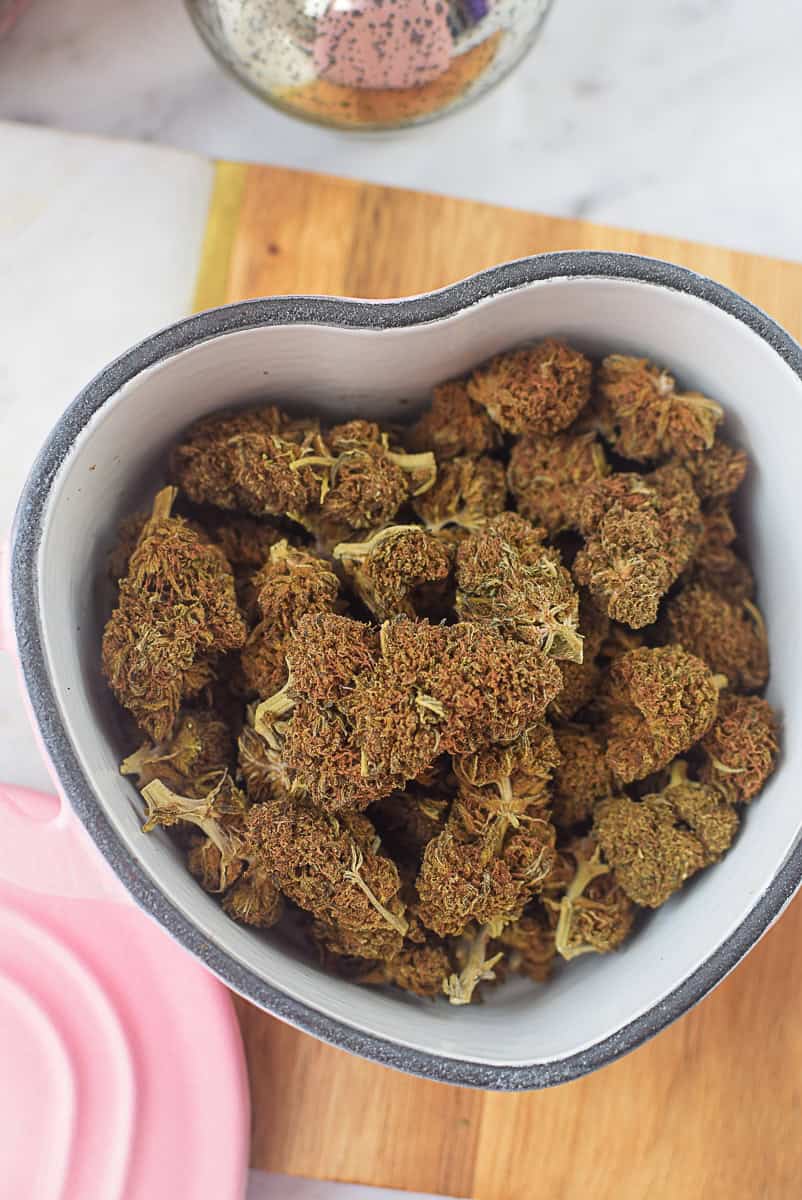
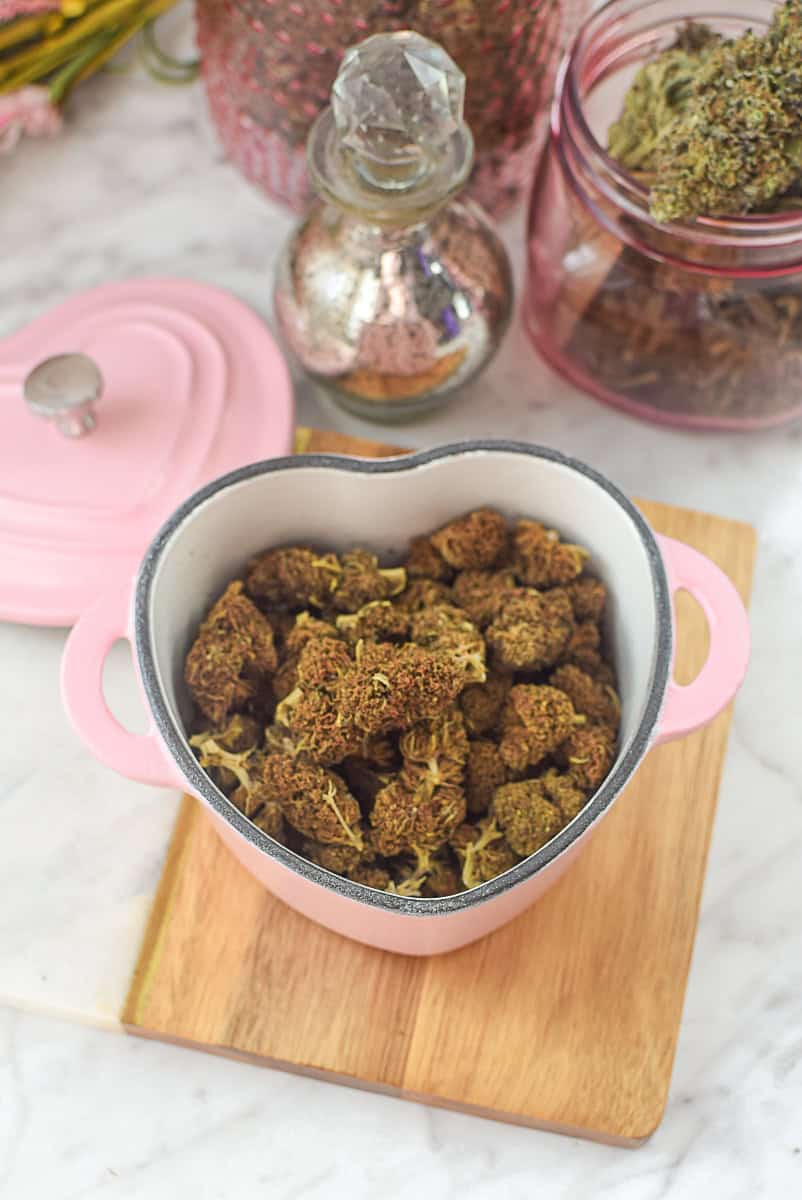
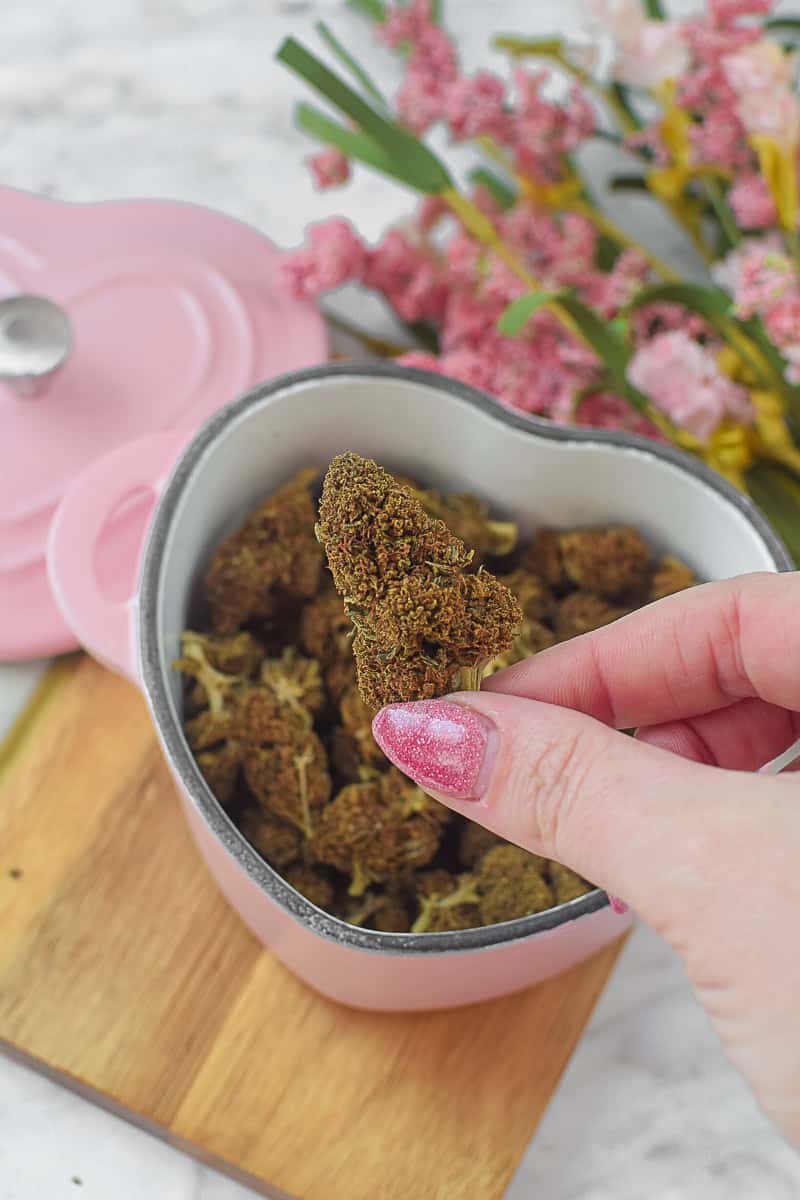
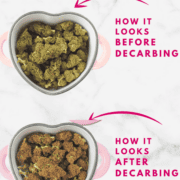
See It In Pictures
Want to see what the process looks like? Here are photos of the cannabis before and after decarbing so you know exactly what to look for. The full written steps, times, and temperatures are in the guide card above.
Why You Need to Decarb
When I first started making edibles, I was so confused.
“What is this? Why do I need to do it? And why didn’t I know this sooner?”
But the truth is, you’ve probably already done it without even realizing it!
If you’ve ever smoked cannabis, the flame from the lighter does the decarbing for you instantly. Same with a vape pen, the heat activates the compounds right before you inhale.
So, if you just eat raw cannabis, you won’t get that familiar “high.”
That’s because raw cannabis has THCA and CBDA, cannabinoid acids which are non-intoxicating.
Through decarboxylation, we gently heat it to remove a part of the molecule (a carboxyl group), which turns the THCA into the psychoactive Δ9-THC we’re looking for.1
This process also works to convert CBDA into CBD, though neither of those will get you high. While THCA and CBDA have their own unique wellness benefits, most of us decarb to get the full effects of active THC and CBD.
It’s really just a fun little kitchen experiment to get you to your desired result.
How to Decarb at Home
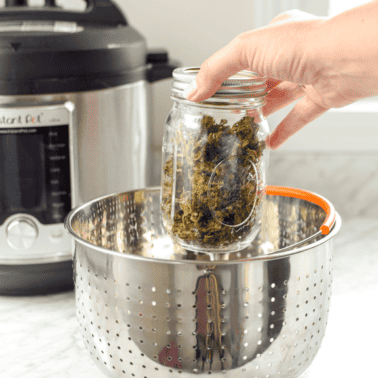
The easiest way to decarb at home is by using heat. Your oven or an Instant Pot is the perfect tool for the job.
The goal is to heat the cannabis at a low temperature for a specific amount of time. This activates the cannabinoids without destroying other beneficial compounds like terpenes, which give cannabis its unique aroma and flavor.
It gets a little tricky because each cannabinoid and terpene has its own ideal temperature.
THCA starts to convert at around 220°F, but it needs more time and a slightly higher temperature to convert almost completely. That’s why I recommend 240°F for about 40 minutes as a reliable setting for full activation, rather than the lower onset temperature2.
If you are working with CBD-dominant flower, keep in mind that CBDA requires more time to fully activate. I have a complete guide for decarbing CBD here.
Also, know that the type and strain of cannabis you are using will impact your final results.
This is why I recommend starting with the temperatures and times I listed above. They are a great, reliable starting point.
Experiment With Different Temperatures
Feel free to play around with different times and temperatures to see what works best for you. There are many paths to the same destination!
Remember, if you want to decarb at a higher temperature, you’ll need less time to achieve activation.
Just be careful with extreme heat, like from a broiler or microwave. High temperatures can destroy the very compounds you’re trying to activate.
While heat is needed to decarboxylate, extreme temperatures can destroy many important compounds that contribute to positive health outcomes3.
We want to be gentle to preserve all that goodness.
Lab Tests
When I first wrote about this years ago, I didn’t have access to lab testing. I just went with the standard advice: bake at 240°F for 40 minutes. But now, I can run my own tests, and I was so excited to see the real-world data from my own kitchen.
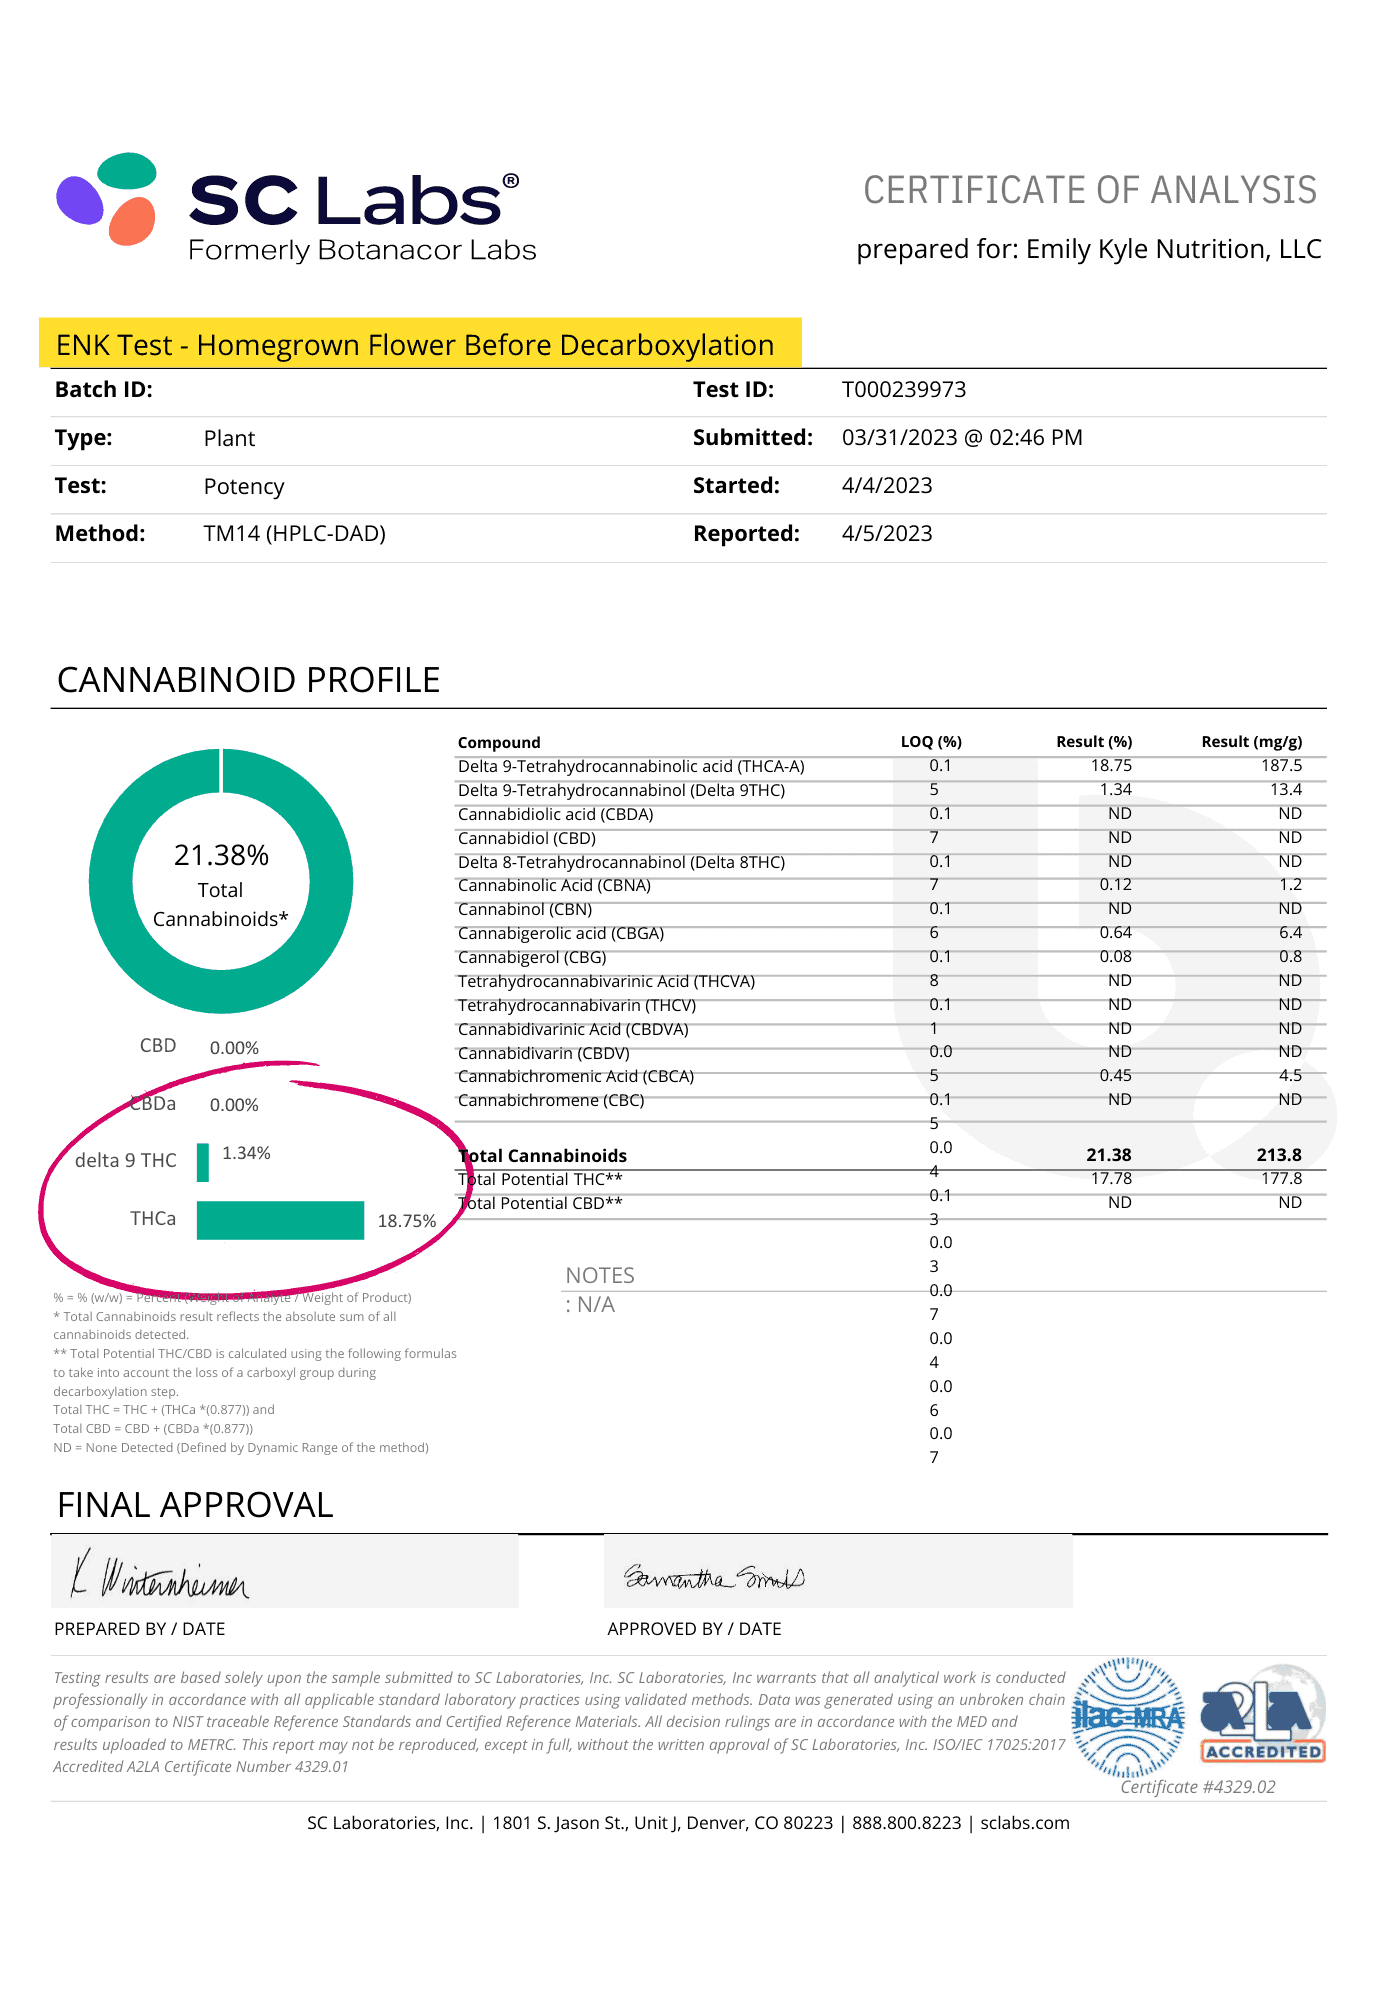
I sent a sample of the same flower for testing before and after decarbing using my go-to method.
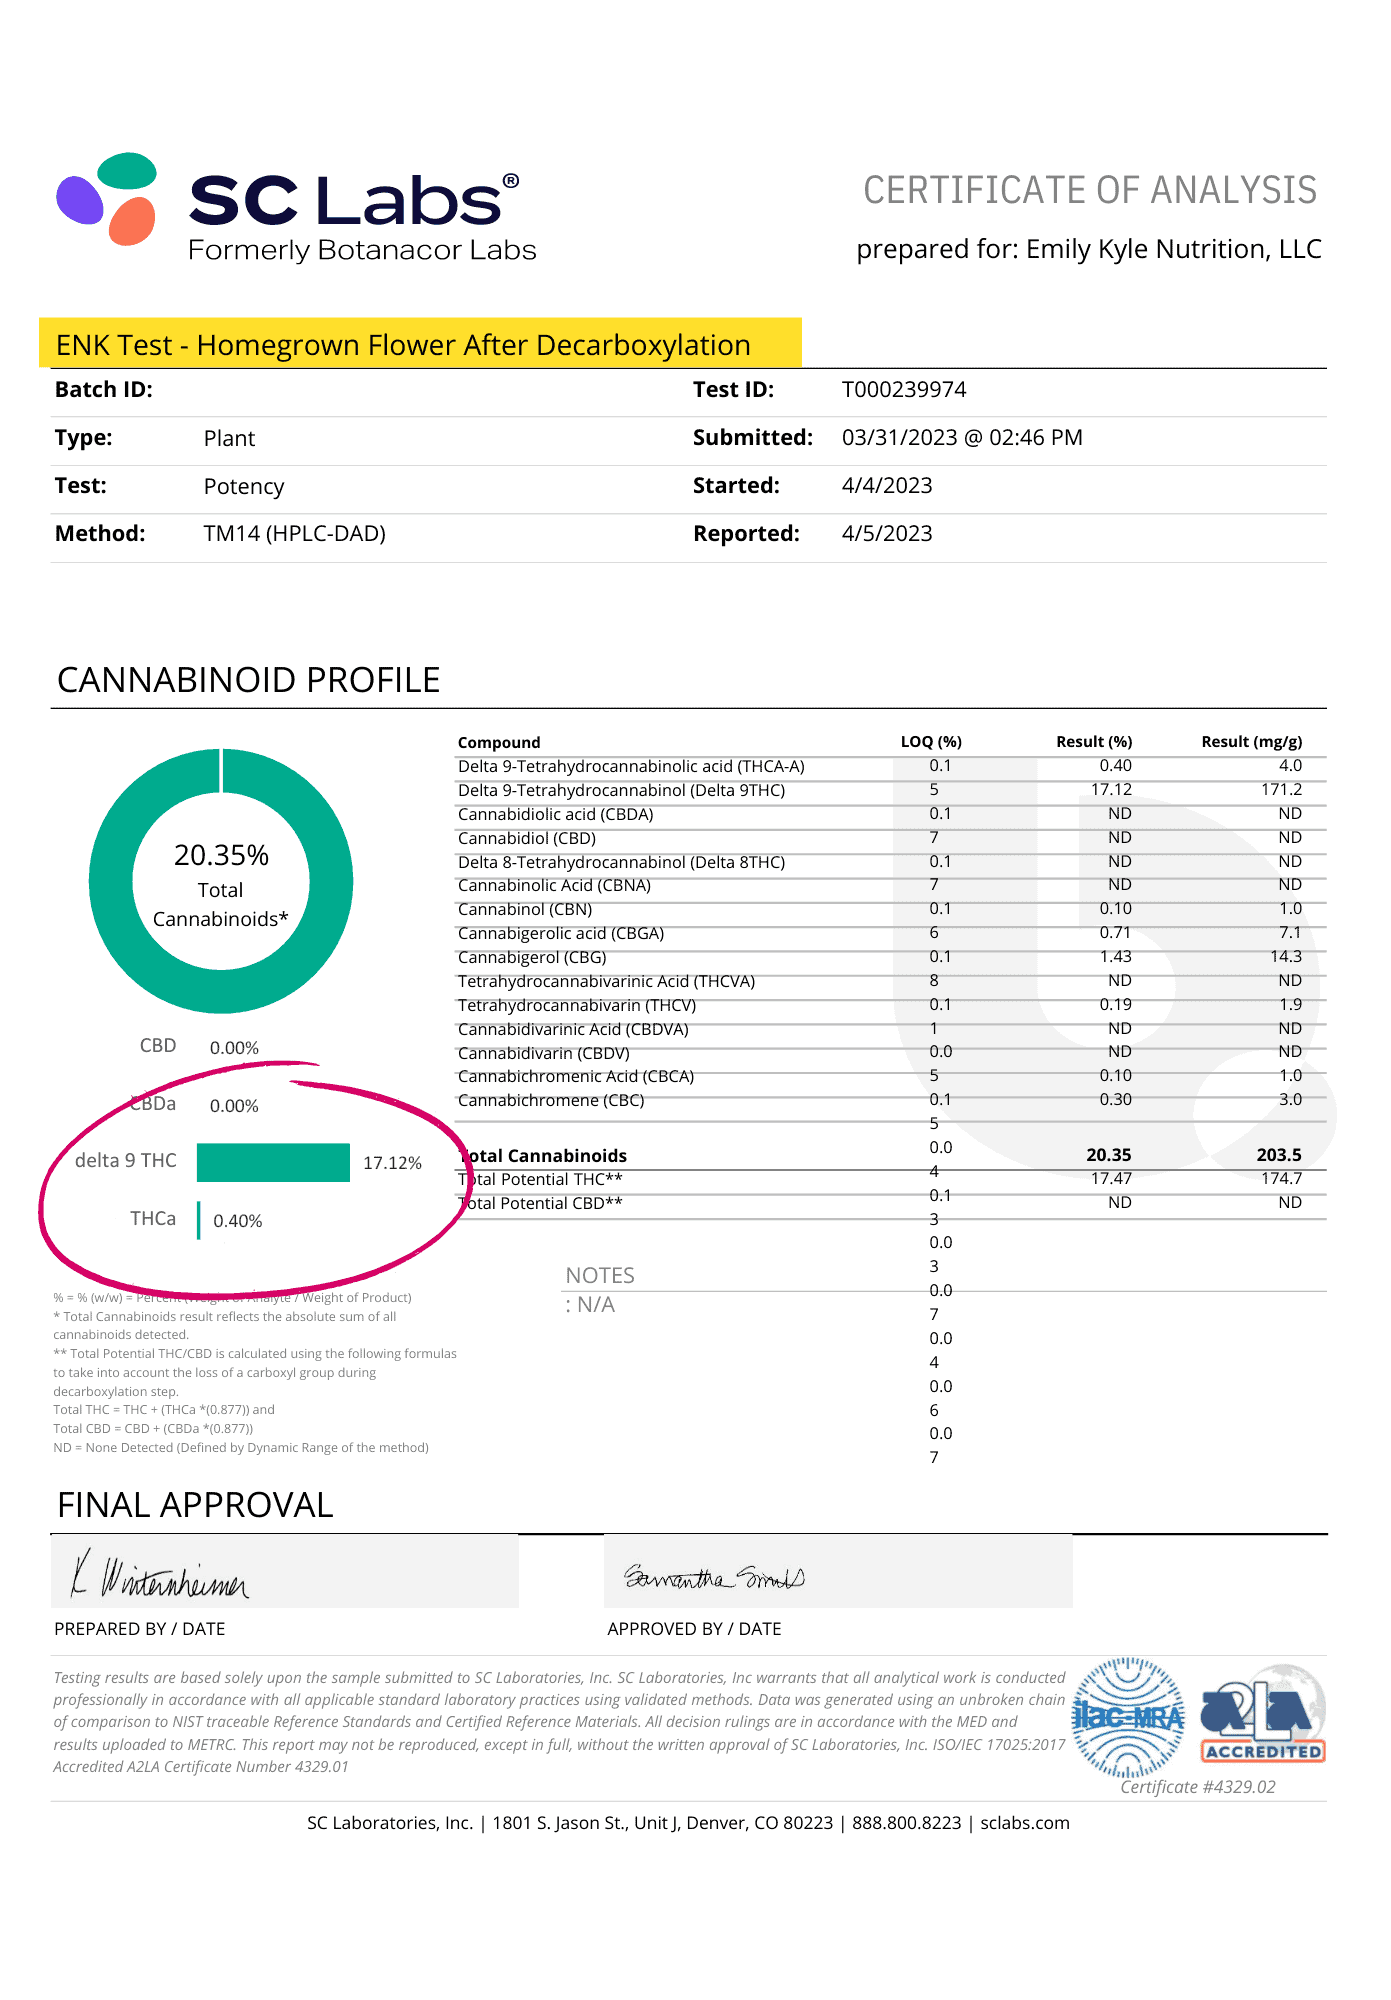
The “before” test showed the flower had 1.34% THC and 18.75% THCA. After baking it at 240°F for 40 minutes, the “after” test came back with 17.12% THC and only 0.40% THCA.
That’s a nearly perfect conversion!
💡It gave me so much peace of mind to know that the method I’ve been sharing for years is both effective and accurate.
Lab Tests Before Decarboxylation:
Lab Tests After Decarboxylation:
SAVE THIS GUIDE 💌
What If I Don’t Decarb?
I hear this all the time: “Back in the day, we didn’t do that decarb thing. We just left it in the crockpot for 24 hours, and it was plenty strong!”
And you know what? They’re absolutely right. I bet the butter was super strong, and green and grassy.
Decarboxylation happens on a time-and-temperature scale. Leaving cannabis in a low-heat crockpot (around 160°F) for a whole day will definitely cause decarb to happen, it’s just a much slower process.
So why do I recommend the quicker oven method first?
A few reasons. It ensures maximum activation of the cannabinoids and helps preserve those delicate terpenes.
But honestly, the biggest reason for me is taste. Long infusion times can pull a lot of chlorophyll (the green stuff in plants) into your butter or oil. Chlorophyll isn’t harmful, but it can give your edibles a strong, grassy flavor.
By decarbing first and then doing a shorter infusion (around 4 hours), you get a more potent and much better-tasting final product.
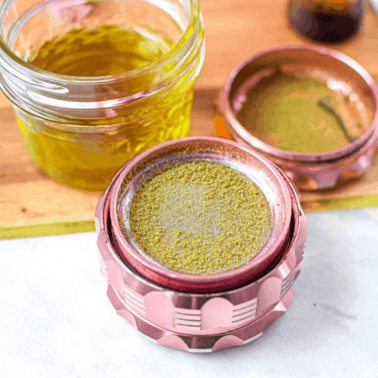
This is my favorite way to create all of my popular staple oils, including:
Cannabis Infusions & Extractions
Easy Crockpot Cannabutter 🧈 with Photos & Video
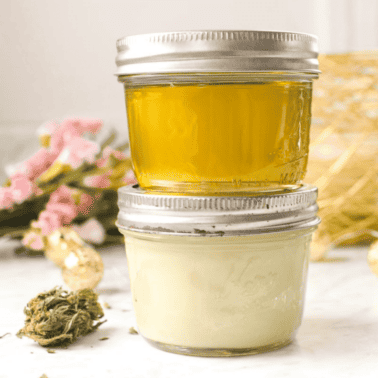
Cannabis Infusions & Extractions
Easy Cannabis Coconut Oil Recipe
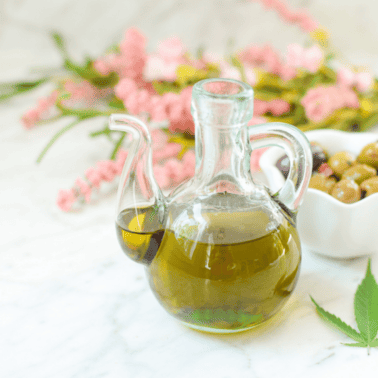
All Things Cannabis Oil
How to Make Cannabis Olive Oil
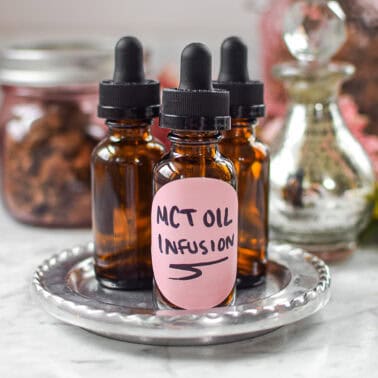
All Things Cannabis Oil
Easy Cannabis-Infused MCT Oil
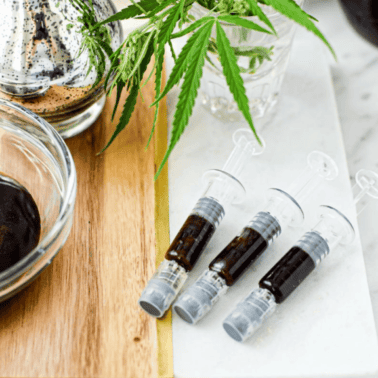
Cannabis Infusions & Extractions
How to Make Full-Extract Cannabis Oil (FECO)
⭐ Remember, without decarboxylation, you will not experience the full range of active ingredients like THC and CBD.
It’s Not Going to Be Perfect
If you ask ten members of my Well With Cannabis Community how they decarboxylate cannabis, you will likely get ten different answers.
And that’s okay! It’s important to remember that we’re not working in a sterile lab. This is home cooking!
Every plant is different, and every kitchen setup is different. Your oven might run a little hotter or cooler than mine. Don’t let that discourage you!
While this sounds like one big science experiment going on in your kitchen, it really is as simple as putting cannabis in the oven and baking it.
Ultimately, we all arrive at the same goal, activated THC and CBD that can be used in homemade edibles, topicals, and more.
If you want to be as precise as possible, here are a few things I’ve learned to keep in mind.
Temperature Control
Ovens can have temperature swings. I really recommend getting an oven-safe thermometer to see what’s actually happening in there.
Also, try not to open the oven door while it’s baking. Every time you peek, the temperature drops and can throw off your timing.
Different Equipment
You don’t have to use an oven! I’ve seen people use an Instant Pot, decarb machine, an air fryer, sous vide, and even a pressure cooker.
I’ve even seen a guy use a toaster oven outside in the garage because his wife didn’t want him to decarb inside.
Basically, anything that can hold a steady temperature around 240°F will work.
If you’re concerned about the smell, using an Instant Pot or a dedicated decarb machine can help keep the aroma contained.
Different methods will have different temperature controls, so I recommend you use a thermometer as needed throughout the process.
Small variables in the different types of cooking equipment may impact your final product, but it is a great idea to experiment with different options to find what works best for you.
Estimating The Potency
One of the only downsides to making edibles at home is that it’s hard to know the exact potency without lab testing, which makes precise dosing tricky.
However, you can get a pretty good estimate. I created an edibles dosage calculator that helps you do the math.
It even accounts for the natural weight change during decarboxylation. THCA is a heavier molecule than THC, so when it loses its carboxyl group as carbon dioxide, the most THC you can get is about 88% of the starting THCA by weight. So roughly 100mg of THCA converts to a maximum of about 87–88mg of THC. This isn’t lost potency, it’s just the carbon dioxide leaving the molecule.
Thankfully, my calculator does all the math for you, and all you need to do is check the box.
How to Use Decarbed Cannabis
Once the decarbing process is over, the world is your oyster!
You can use it to make butter, oils, tinctures, topicals, and a wide range of cannabis products – you dream it, you can make it.
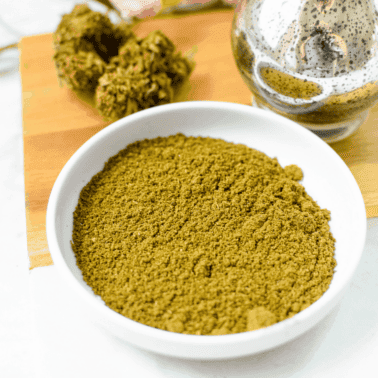
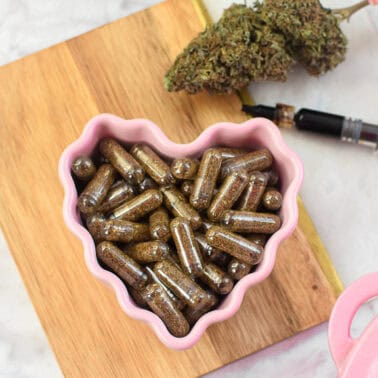
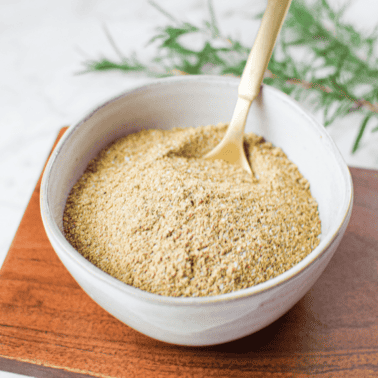
Or, you don’t have to do anything at all; you can grind the weed into a fine powder and enjoy the decarbed weed as-is, similar to how other dried herbs are used.
This powder can be sprinkled onto food, added to your favorite recipe like my cannabis ranch dressing, or put into capsules for easy consumption.
Members of my Well With Cannabis Community make their own tea, honey, or seasoning blends with their decarboxylated cannabis flower.
Others will move forward to use the decarbed cannabis flower to make a cannabis-infused oil or cannabis-infused butter with a simple infusion process.
What to Do with Decarbed Cannabis
Articles & How-To Guides
How To Use Just Decarbed Cannabis in Edibles
Cannabis Infusions & Extractions
How to Make Cannabis Capsules: Filling and Dosing Guide
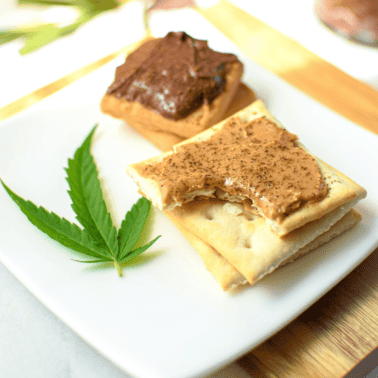
Cannabis Sides & Snack Recipes
Cannabis Firecrackers » The Easiest Edible Ever
Gluten-Free
Easy Savory CBD Seasoning & Rub
🌿 Quick Quiz: Have You Mastered Decarbing?
Test your decarboxylation know-how with this quick quiz — no email required, just a fun way to check what you’ve learned!
Frequently Asked Questions
No worries, I am here to help you! If you haven’t already, check out my guide to help you on your cannabis journey. And be sure to grab your free copy of my printable terms & abbreviations chart.
Yes – the decarboxylation process can cause your house to smell like weed. This is because, when we bake cannabis, we activate and release certain terpenes, which give cannabis its distinct smell. While some enjoy the wonderful aroma, others are concerned about the smell affecting a loved one, a neighbor, or someone else in the home. That is why we recommend baking in a sealed, oven-safe dish with a lid (or in an Instant Pot): it holds in many of the terpenes, which both improves your final product and significantly reduces the odor.
While it is very common and popular to decarb cannabis in a mason jar, Ball canning jars are not recommended to be used in the oven. A lid sealed too tight could cause a jar to crack, break, or explode. For this reason, we recommend baking the cannabis in an oven-safe baking dish with a lid.
If you don’t have a dish safe in the oven, you can use a baking sheet or tray covered with aluminum foil or parchment paper. Just know that this will not hold in the smell as well as a covered option.
This is a matter of personal preference. Grinding can knock some of the trichomes off into the grinder instead of leaving them on your material. Grinding will also expose more surface area, allowing more chlorophyll to be absorbed into the final product. This is why I recommend skipping the grinding process and breaking up large buds by hand into smaller, popcorn-sized pieces instead.
Yes, decarbed cannabis can be stored for quite a long time. It is recommended to store the decarbed cannabis in an airtight container, like a mason jar, in a cool, dark space. The freezer works well to help preserve the potency of THC and CBD.
Yes, you can eat decarbed cannabis as-is. Some people prefer grinding it into a fine powder and using it like any dried herb, sprinkled on food or put into capsules. Just go slow: depending on your material, this method can be surprisingly potent, and even a small amount can deliver a strong dose, so start with a little and wait before taking more.
It depends on the cannabinoids in your flower, the dose, and your own body, since everyone’s endocannabinoid system responds a little differently. THC-dominant cannabis will produce intoxicating effects once decarbed, while CBD-dominant flower will not get you high. Eating decarbed cannabis can also take longer to set in than smoking, so wait at least an hour or two before deciding whether to have more.

Take your edibles to the next level…
My Edibles Made Easy Online Cooking Course will teach you how to easily make cannabis edibles and topical recipes at home. This step-by-step video course will teach you how to infuse, extract, and create edibles with many different product types – all from the comfort of your own home.
More Articles You Will Love
Articles & How-To Guides
How To Decarb In An Instant Pot » Low Smell Method
Articles & How-To Guides
How to Decarb Kief & Make Edibles
Articles & How-To Guides
How To Use Just Decarbed Cannabis in Edibles
Articles & How-To Guides


If I bake Brownies, I never decarb!
My Cookies are potent anyway 😋
Guess the baking is decarbing!?
Yes, if you mix raw cannabis or cannabutter directly into your batter and bake at the right temperature, the heat from baking will decarb the cannabinoids during the cooking time. For even more potent results, many recommend decarbing the cannabis beforehand to ensure full activation before it hits the oven!
Loved how you broke things down. The tips are actionable and clear.
I am so glad to hear this was helpful, thank you for telling me!
Hello, Thanks for all the well explained info. I’m using your directions for the first time and am confused over how long to leave my pot in the oven as it is 10.6% THC and 12.6% CBD, so almost identical. So, do I following the timing for the THC (40 minutes) or for the CBD (90 minutes)? That’s quite the range and I don’t want to get it wrong.
Thanks in advance for your reply.
Hey Kat, great question—and you’re right, the timing is different depending on which cannabinoid you want fully activated. If your goal is to fully activate both CBD and THC in a 1:1-type flower, follow the CBD decarb: 240°F (116°C) for 90 minutes. This duration is generally fine for THC and won’t push it all the way to CBN at that time frame.If you only did 40 minutes, you’d activate THC well, but you’d leave a significant portion of CBDA not fully converted to CBD. If you want tighter control, another option is to decarb two separate batches, one for each time and then blend the two together. But, for a single mixed flower like yours, 90 minutes at 240°F is the way to go.
Hi, Emily, I’m very happy that you’ve educated me on how to prepare the flowers for decarbing, but I want to make sure about a couple of things. Would you say that “popcorn-sized” pieces would be grape-sized or smaller?
Another thing – I put two quart mason jars, about half full (3/4 oz each) into my oven, digitally set at 240, for 40 minutes. After 20 minutes, I shook and rotated them, then returned them to the oven.
Judging by the color as compared to your illustrations, the oven was not hitting 240. I’m waiting delivery on a thermometer to help me determine, as nearly as possible, what the actual temperature was for that 40 minutes and finish it accordingly. Should it be that golden-brown when done in a jar as opposed to spread out on a baking sheet?
Thanks – love the info and the presentation.
Hello Chris, I’m so happy that you’re finding the information helpful, thanks for your kind words! To answer your question, when I say “popcorn-sized,” I mean pieces that are smaller than a grape, typically around the size of an actual piece of popcorn. This allows for even heating and consistent decarbing.
Your process with the mason jars sounds great! Shaking and rotating them halfway through is a smart step to ensure even heat distribution. The color shift you’ve described can happen when jars are used, as they can sometimes trap more moisture or affect heat transfer compared to an open baking sheet. While spread-out flowers on a tray tend to turn golden-brown when done, the jar method might result in slightly less even coloring. Once your thermometer arrives, it’ll definitely help you fine-tune the process to match your target temperature better. Thank you again for your kind words about the info and presentation, it means a lot! Keep the questions coming, and I’m happy to guide you further.
Thanks for the website and info!!! Much appreciated!!!
You state to decarb to go with 240°F for 40 minutes for THC and 90 minutes for CBD. If I wanted a good blend of both…relaxation, less anxiety, but with a bit of a buzz, would going 240°F for 65 minutes get me in the ballpark??? I’ve smoked for decades but getting older I find it doesn’t take nearly as much to get high so I figured to lean to the CBD side. Thanks for your help! Swamp
Hello Swamp, thank you so much for your question and kind words! I’m so happy to hear that the information has been helpful to you so far. When it comes to creating a blend for relaxation, less anxiety, and a light buzz, it’s really important to first check if the flower you’re using already contains both CBDA and THCA. They both need to be present to achieve that balance you’re looking for. If you’re not sure about the flower’s content, it might be better to grab a THC flower and a CBD flower, decarb them separately at their respective times (240°F for 40 minutes for THC and 240°F for 90 minutes for CBD), and then combine them at the end. Decarbing for 65 minutes isn’t quite ideal—it might over-convert THC into CBN and leave some CBDA not fully converted into CBD. Taking the separate decarb approach gives you the most control over the final product and helps you get the desired effects. I hope this clears things up, and feel free to reach out if you have more questions!
Thanks for the reply! The problem I have is that I’m in a anti-cannabis environment and have to be rather low profile with things. The plants are from mutt seeds that were saved from a bag of cannabis procured several years ago. From looking at the leaves I believe it has a good dose of indica dna in it. So, mixing different types is not possible for me. I’m getting some age on me and this will probably be my last grow…maybe not. 🙂 With clarification that you’ve given me I’m thinking that I might try decarb an amount of cannabis for a certain time, then removing half of it, and continuing on for a longer time with the remainder. Would that be worth trying?
Also, I’ll be decarbing in an old mobile home with a non-working oven. I picked up a small digital toaster oven the other day at a thrift shop. After looking it up on the Internet it appears to actually be a rather good one with a noted digital temperature control so I think it will produce good, constant temperatures. The problem with it is that the temperature settings are only in 25F-degree increments…thus, I have a choice of 225, 250, 275, etc.,. In regards to temperature, I’ve seen conflicting temperature suggestions/recommendations to decarb at…some at lower temperatures and some at higher temperatures. Which would be better in my situation? I’m thinking 225F or 250F, but keep bouncing around with it. Thanks for the help! Swamp
Thank you so much for your reply Swamp, I completely understand why you’d want to keep things low-profile. It really sounds like you’ve put a lot of thought into your setup and plans, so happy to hear that! Plus, using seeds with a story behind them is such a cool and personal touch to your grow. Your idea of splitting the decarbed cannabis into two portions and extending the time for one half is super creative and definitely worth exploring. It’s a great way to test and compare the effects of different decarb levels based on what you’re looking to achieve. Speaking of the toaster oven, it’s awesome that it has a digital control—totally makes things easier to manage, even with those 25-degree increments. If you’re thinking about keeping more terpenes intact, going with a lower temp like 225F might be the way to go since higher temperatures can cause some of those delicate compounds to fade. On the other hand, if efficiency is your goal or you need faster results, 250F could be a better option. Either way works, it just depends on which aspect is more important for your project. If you’re able, experimenting with small batches at both settings could be super useful to find what works best for you. It sounds like you’re already on the right track, and I’m cheering you on! Don’t hesitate to reach out if you have any other questions—I’m happy to help.
Hi Emily your recipe is great used it several times but I always decarb in a mason jar I’m worried now cause you don’t recommend it thanks your a good teacher.
Thank you so much for your kind words, Ralph – I’m so happy to hear that you’ve enjoyed the recipe! 😊 Personally, I do still decarb in a mason jar occasionally, but I always like to remind others that there is a small risk of the jar shattering, especially if it has a tight-fitting lid. If you continue to decarb this way, just be mindful of that risk and take precautions to stay safe.
Hi Emily , I am a beginner with decarbing concentrate . I have 1 gram of budder/batter with thc level of 80.8 and cbd of 0.111%. Should I infuse this 1 gram in 1 cup of coconut oil or 2 ?
Hello Aniya! Thanks so much for reaching out with your question about decarbing concentrate—I’m so happy to help! Since you’re working with 1 gram of budder/batter with a THC level of 80.8%, you’ll want to consider the potency you’d like for your final product. Infusing it into 1 cup of coconut oil will create a stronger end result compared to using 2 cups, which would dilute the potency more. A 1-cup infusion is a great starting point if you’re looking for a more concentrated oil.
Here’s the math to help you figure out the THC content for your infusion:
If you’re using 1 gram of concentrate with 80.8% THC, that means your total THC content is 808 mg (since 1 gram = 1,000 mg, and 80.8% of 1,000 is 808 mg).
• For 1 cup of coconut oil: All 808 mg of THC will be infused into this single cup, resulting in 808 mg of THC per cup.
• For 2 cups of coconut oil: The same 808 mg of THC is distributed across 2 cups, so each cup would contain 404 mg of THC.
If this is your first time, take it slow and test the potency of a small amount before using more. Please don’t hesitate to reach out again if you need more tips or assistance! 😊
I forgot to break up my flower before decarbing. Have I ruined it or can I still make butter? Do I need to change anything to still make it potent?
No worries, Stephanie! You can still make butter. Breaking up the flower before decarbing helps with even heating, but it’s not essential. Just proceed as usual, and your butter should still be potent!
literally, my first time making an MCT infusion I did this too…..lol I sat and measured up my 7g of dry flower……measured out my 14 OZ of MCT Oil….dumped the 7g of “smalls” White CBG into my decarb machine and I was so excited, and totally forgot to grind hahaha….I think I got “lucky” cause the 7g of “small buds” I got were super small lol…..so my second batch I ground up the 7g and literally, the same effects. I add the oil to capsules though.
I just poured 1/2 cup of MCT oil over 18 grams of weed and I forgot to decarb it first, did I just ruin 1/2 oz, of weed? Can I use it for edibles that need to be cooked?
No worries, Larry — You haven’t ruined your cannabis! We recommended decarbing the oil by itself following regular decarb guidelines to ensure even and complete decarboxylation. If you use it in items to be cooked or baked, it’s unlikely the cannabis will get hot enough to full decarb. Hope this helps!
Feeling truly blessed, thank you! 💖
We’re so happy to help, Alfred!! Glad you’re enjoying our site!
I have tried this 4 times now and it just hasn’t worked. The first two times i tried infusing mct oil and butter for 40 minutes in the instant pot and the result didn’t have any affects. I recently decided to try it again but to just try decarbing a small amount and trying the weed before infusing it, but i still felt nothing. I tried it for 40 minutes and then again for 30 (different batch) and at the most i got a little tired. I did a quick release these past two times but i’m pretty sure I tried it with a natural release before. Any ideas what i’m doing wrong ?
Hi there! It sounds like you’re putting in a lot of effort, and I can understand how frustrating it must be not to see results. Let’s troubleshoot together!
Decarbing: Decarboxylation is critical for activating the THC or CBD in your material. Can you confirm the temperature and method you’re using to decarb? Generally, decarbing at 240°F for 40 minutes is best for THC and 90 minutes for CBD.
Ratio and potency: How much cannabis are you using, and what’s its potency (THC/CBD percentage)? A small amount of material might not give noticeable effects. Try using a slightly higher amount.
Infusion process: When infusing into MCT oil or butter, maintaining a consistent temperature is key. The Instant Pot on slow cook is a great tool, but ensure you’re actually hitting and maintaining the right temperature around 160–180°F, and infuse for 4 hours. Pressure cooking for 40 minutes for infusion isn’t long enough.
Consumption: How are you consuming the final product? If it’s an edible, remember that it can take 1–2 hours to feel the effects. Also, eating it on a fuller stomach could delay the onset.
Individual tolerance: Everyone’s body metabolizes THC differently. Have you had success with other edibles in the past? If not, it might be worth experimenting with dosage and maybe titrating up until you get to a dose you like.
Feel free to share more details about your process, and hopefully, we can pinpoint the issue!
totally why I went with the decarb machine route……I honestly got a cheap one from alliexpress and it hasn’t burned down the house yet LOL…..I honestly decarbed for 60 minutes…..then infuse for another hour no complaints of any smells or odors from the wife either.
I was kinda in your boat too….and I’d recommend trying it out with some more “economical” shake or trim….rather than precious 🌿….I personally used White CBG, since I got a whole OZ for a good deal….and Im now a huge fan of CBG cannabinoid