Quick Recommendations:
- THCA → Δ9-THC – bake at 240°F/116°C for 40 minutes
- CBDA → CBD – bake at 240°F/116°C for 90 minutes
- CBGA → CBG – bake at 220°F/105°C for 60 minutes
- Δ9-THC → CBN – bake at 240°F/116°C for 180 minutes
Before you can get to the fun part of cooking or baking with cannabis, you have to “activate” the good stuff, like THC and CBD. That’s all decarboxylation is! I’m here to walk you through everything I’ve learned about why we do it, how to do it in your own kitchen, and how you can get started today. Think of me as your experienced friend, here to show you the ropes. 👯
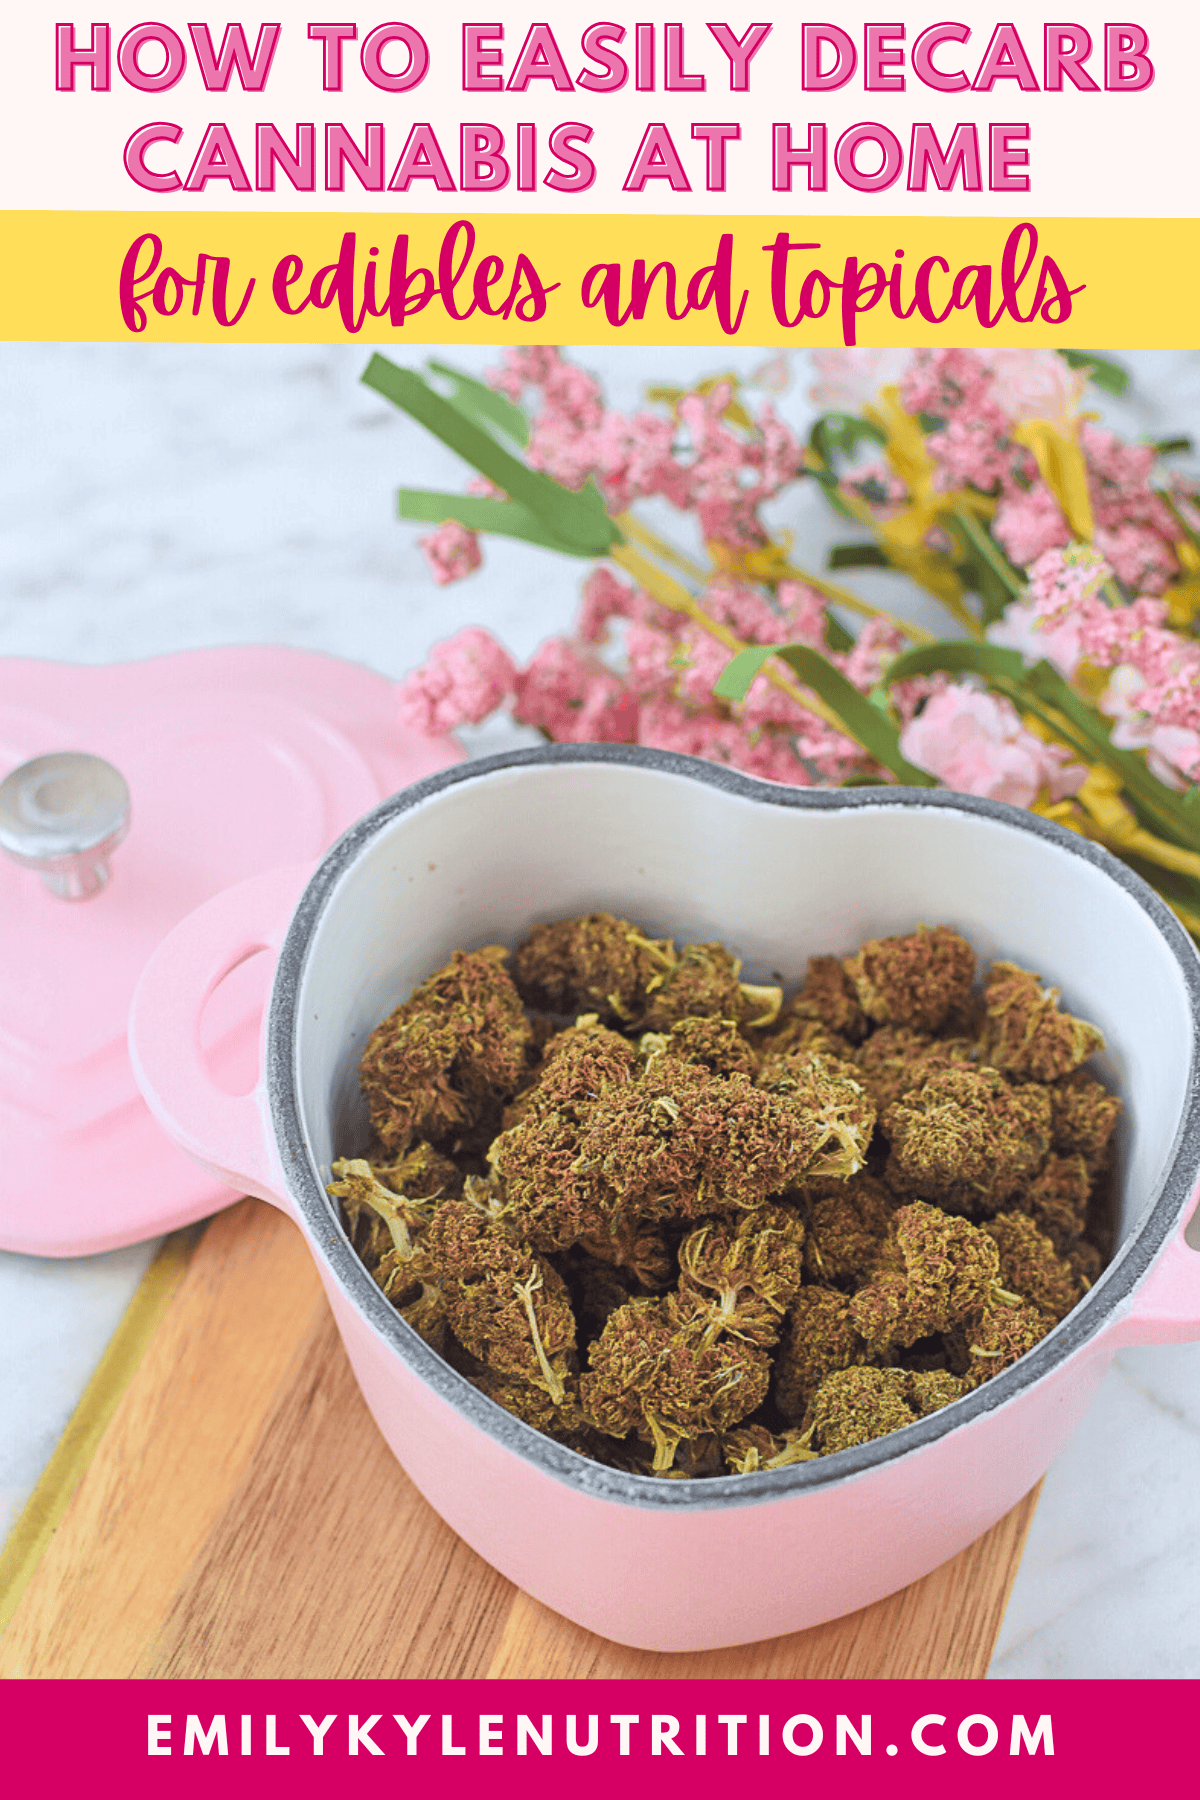
Table of Contents
- Quick Recommendations:
- Article Features
- Why You Will Love This Guide
- How to Decarb Cannabis Before Making Edibles or Topicals Recipe
- What You’ll Need
- Step-by-Step Instructions
- Why You Need to Decarb
- How to Decarb at Home
- Lab Tests
- What If I Don’t Decarb?
- It’s Not Going to Be Perfect
- Estimating The Potency
- How to Use Decarbed Cannabis
- Frequently Asked Questions
- More Articles You Will Love
Article Features
- Easy Guide: Step-by-step tips for home decarbing.
- Activate Cannabinoids: Decarb cannabis to unlock THC and CBD.
- Want to skip the hard work? Shop with me and have premium, high-quality cannabis products delivered directly to your door! Now shipping across the US.
Why You Will Love This Guide
Not long ago, a member of my Well With Cannabis Community asked me, “What exactly is decarboxylation, and why do we even need to do it?” It’s such a great question and one I had myself when I started this journey.
Decarboxylation is the essential first step you need to take before infusing cannabis into oil, butter, tinctures, edibles, topicals, and more.
Here’s a little secret: if you just ate a piece of raw cannabis, you wouldn’t feel the intoxicating effects of THC.
That’s because the plant doesn’t naturally contain a lot of THC. Instead, it has something called cannabinoid acids, like THCA.
These acids have their own benefits, but they won’t get you “high.” To transform THCA into the THC we know and love, we need to apply a little heat.
🪄 That’s the magic of decarboxylation.
You can easily do this at home by baking your dried cannabis in the oven or decarb machine at a low temperature.
In this guide, I’ll show you my simple oven method, break down the science in a way that makes sense, and share my personal tips so you can feel totally confident doing it yourself.
How to Decarb Cannabis Before Making Edibles or Topicals
Watch The Video
Equipment
What You Need
- 1 ounce cannabis *any amount is fine
Instructions
Oven Decarboxylation Instructions
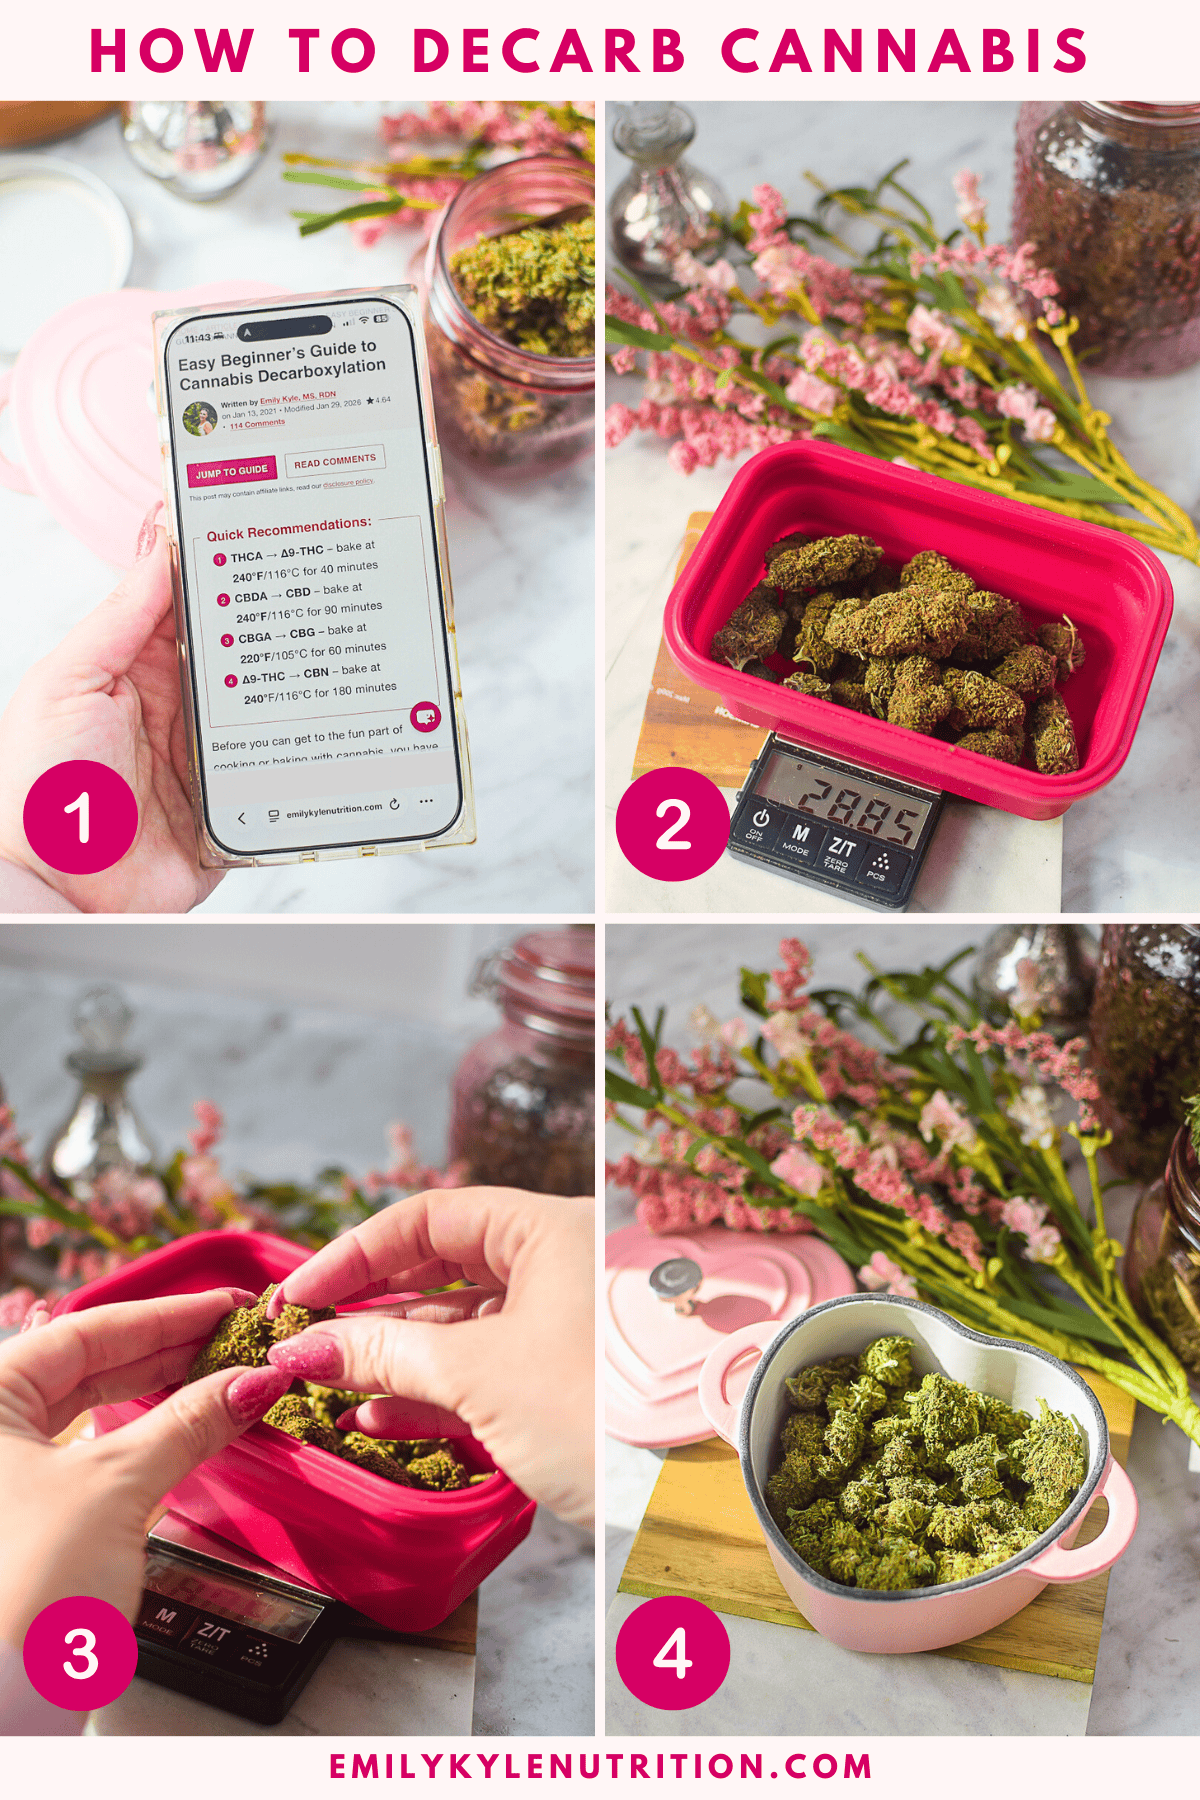
- Look at the chart below and preheat your oven to the right temperature. For most THC-dominant flower, you will want to set the oven to 240°F.
- If you have a digital scale, weigh your cannabis in grams or ounces. This step is optional, but helps with dosing later on if you plan to use my edible dosage calculator.
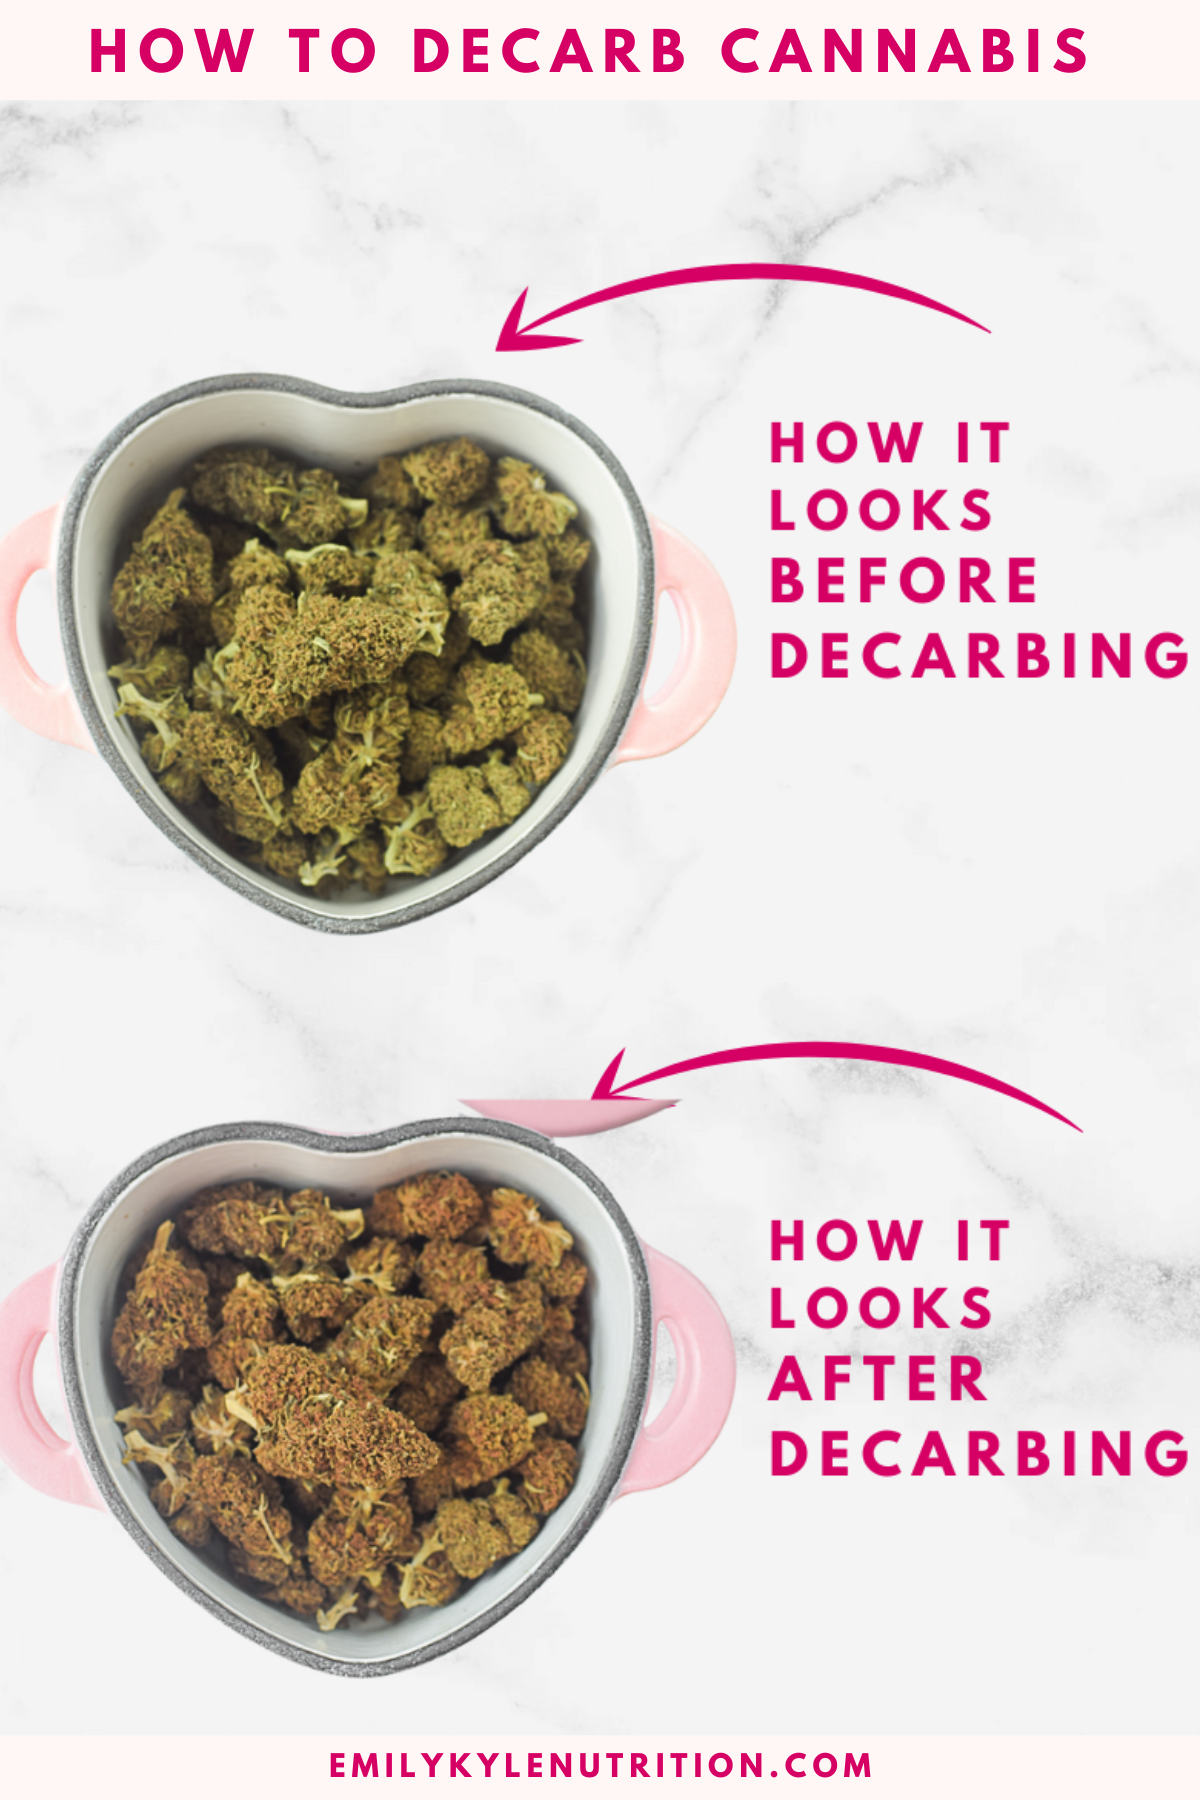
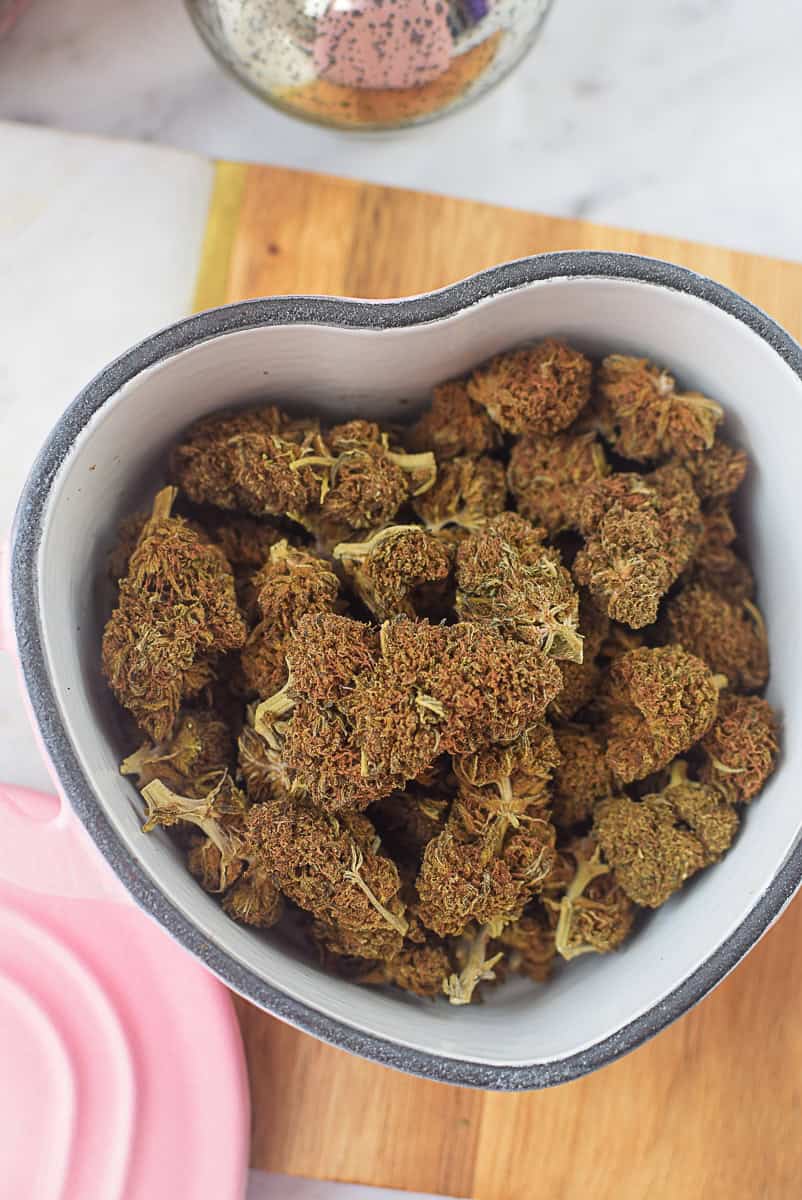
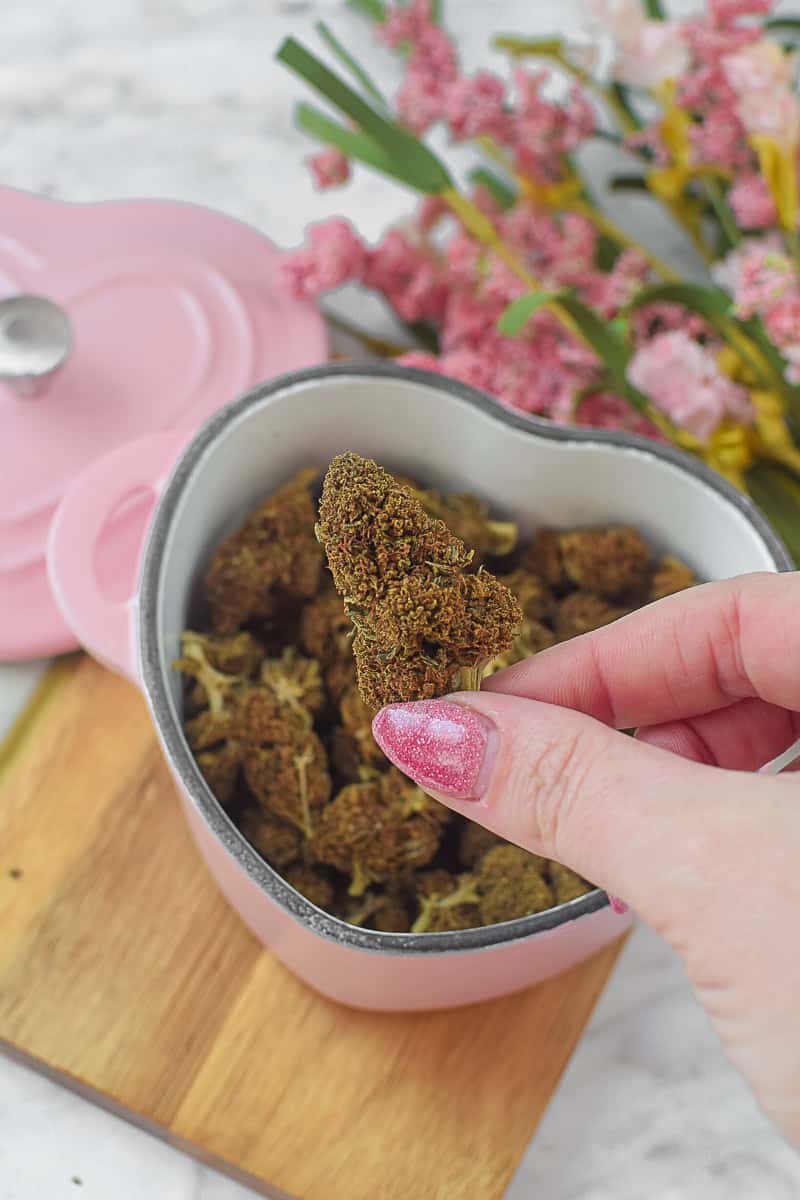
- Gently break up the cannabis buds with your fingers into small, popcorn-sized pieces. I pull out any obvious stems or seeds but I don't grind it. Grinding can make your final product taste a bit grassy.
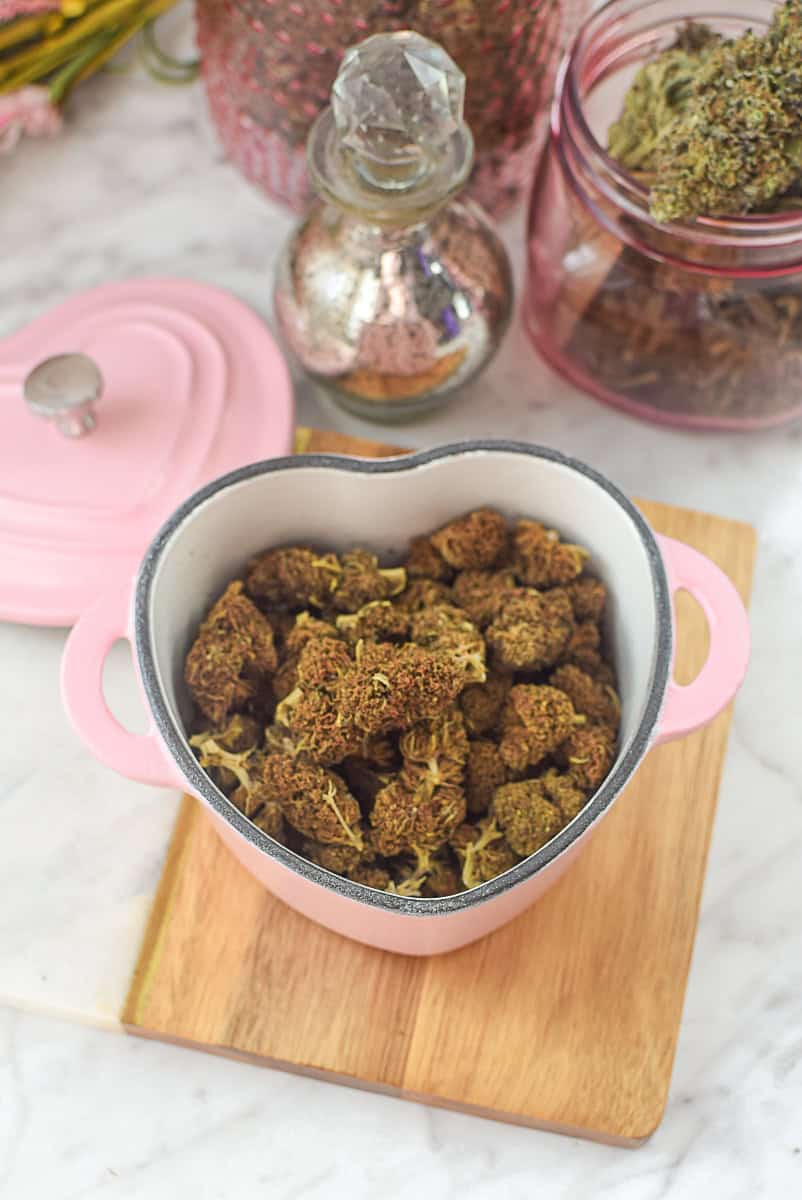
- Spread the flower in your oven-safe dish and put the lid on. If you don't have a lid, cover it tightly with foil. This helps contain the smell and preserves the flavorful terpenes.
- Place the dish in the oven and bake for the recommended time for your available cannabinoid. For THC, that's usually 40 minutes.
- Resist the urge to open the oven, lift the lid, or otherwise check on the material. Let it bake uninterrupted for the desired amount of time.
- When the timer goes off, carefully take the dish out of the oven. Here’s a key tip: let it cool down completely with the lid still on. This lets all those amazing aromas settle back into the flower.
- That's it! Your cannabis is now decarbed and ready to use.
- If you notice any moisture accumulated during the process, make sure to allow the cannabis flower to dry out completely before storing it. Moisture can lead to mold and compromise the quality of your decarbed cannabis, so lay it out on a clean, dry surface in a well-ventilated area until it feels dry to the touch.
Storage Instructions
- Once your cannabis is decarbed, cooled and dried, store it in an airtight container, like a mason jar, and keep it in a cool, dark place like a pantry. To keep it fresh, you can add a humidity control pack (like a Boveda pack).
- If you want to store it for a longer time, the freezer is a great option. It does a fantastic job of preserving the potency of the THC, CBD, and other cannabinoids.
Notes
Time & Temperature Recommendations:

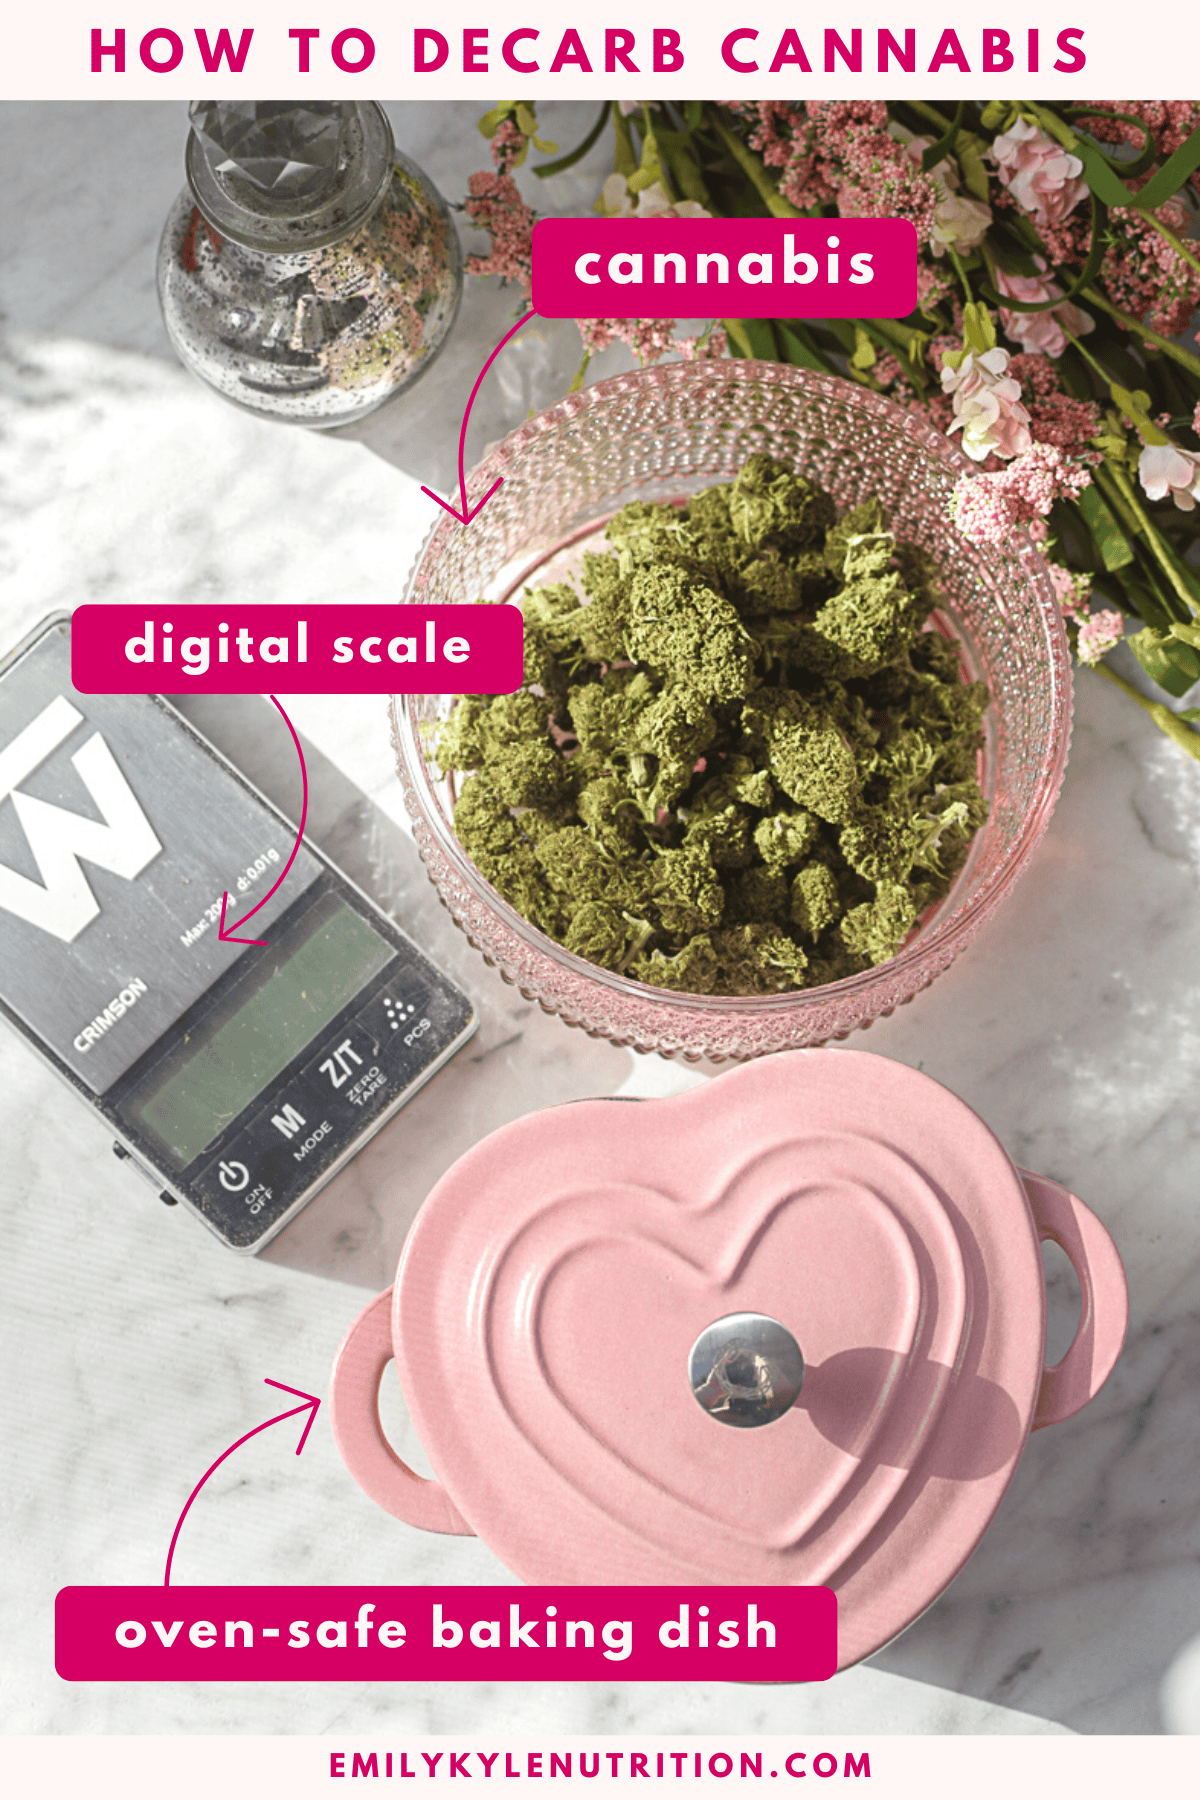
What You’ll Need
- Any Amount of Cannabis: This tutorial will work for any type of cannabis, including flowers, buds, trim, leaf, or shake. Check my these alternate instructions for how to decarb kief and decarb concentrates.
- Digital scale: Weighing your material is optional, but using a scale is helpful if you use my edible dosage calculator to guestimate the potency of your final product.
- Digital thermometer: Optional, but a thermometer can help you reach your ideal temperature for your specific oven.
Choose One:
- Oven-safe baking dish: Using an oven-safe baking dish is the best practice. From a glass pie pan covered with foil to an old Pyrex baking dish with a lid, you want to ensure you are using something specifically designed to be used in an oven. It is not recommended to place mason jars in the oven; see FAQ below for more details.
- Stasher Silicone Bags
Made from food-grade silicone, Stasher bags are an eco-friendly and reusable solution. These bags are perfect for sealing in the aroma during decarbing while also being easy to clean and durable. - Aluminum Foil Pouches
Creating a pouch with aluminum foil is a simple, effective, and budget-friendly method. Make a secure, airtight envelope using foil to wrap the cannabis, which helps contain the smell and ensures even heating. - Decarb Boxes or Trays
Specialized decarb boxes or trays, designed for cannabis enthusiasts, can also make the process straightforward. These tools are purpose-made for even heating and odor management.
📌 Remember: it does not matter how much you decarb at once. From a gram to an ounce, the process remains the same.
Decarb Times
- THCA → Δ9-THC – bake at 240°F/116°C for 40 minutes
- CBDA → CBD – bake at 240°F/116°C for 90 minutes
- CBGA → CBG – bake at 220°F/105°C for 60 minutes
- Δ9-THC → CBN – bake at 240°F/116°C for 180 minutes
Step-by-Step Instructions
- Use the General Decarb Recommendations above to determine what temperature to preheat the oven. Preheating the oven to 240° degrees Fahrenheit for THC-dominant flowers is commonly recommended.
- Using a digital scale, weigh the cannabis to your desired weight. This step is optional but helpful.
- Gently break up the cannabis buds into small pieces, and remove any seeds and stems as necessary. Do not grind.
- Add the flower to an oven-safe baking dish and put the lid on. You can cover the dish with tin foil if you don’t have a lid.

- Step 5 – Place the dish in the oven and bake for the time according to the chart, typically 40 minutes for THC-dominant flower.
- Step 6 – Carefully remove the dish to cool completely with the lid on.
- Step 7 – Your decarbed flower is now ready to use.
- Step 8 – Once your cannabis is decarbed, cooled and dried, store it in an airtight container, like a mason jar, and keep it in a cool, dark place like a pantry. To keep it fresh, you can add a humidity control pack (like a Boveda pack).
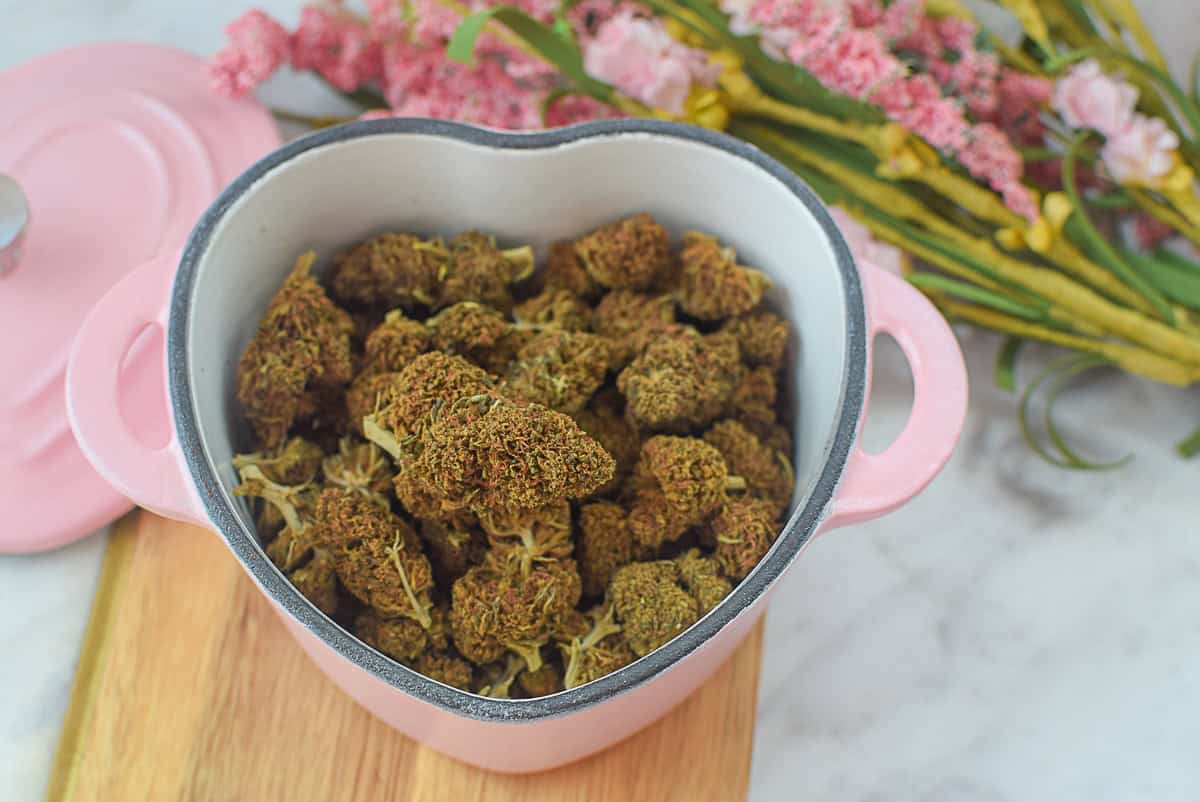
Why You Need to Decarb
When I first started making edibles, I was so confused.
“What is this? Why do I need to do it? And why didn’t I know this sooner?”
But the truth is, you’ve probably already done it without even realizing it!
If you’ve ever smoked cannabis, the flame from the lighter does the decarbing for you instantly. Same with a vape pen, the heat activates the compounds right before you inhale.
So, if you just eat raw cannabis, you won’t get that familiar “high.”
That’s because raw cannabis has THCA and CBDA, cannabinoid acids which are non-intoxicating.
Through decarboxylation, we gently heat it to remove a part of the molecule (a carboxyl group), which turns the THCA into the psychoactive Δ9-THC we’re looking for.1
This process also works to convert CBDA into CBD, though neither of those will get you high. While THCA and CBDA have their own unique wellness benefits, most of us decarb to get the full effects of active THC and CBD.
It’s really just a fun little kitchen experiment to get you to your desired result.
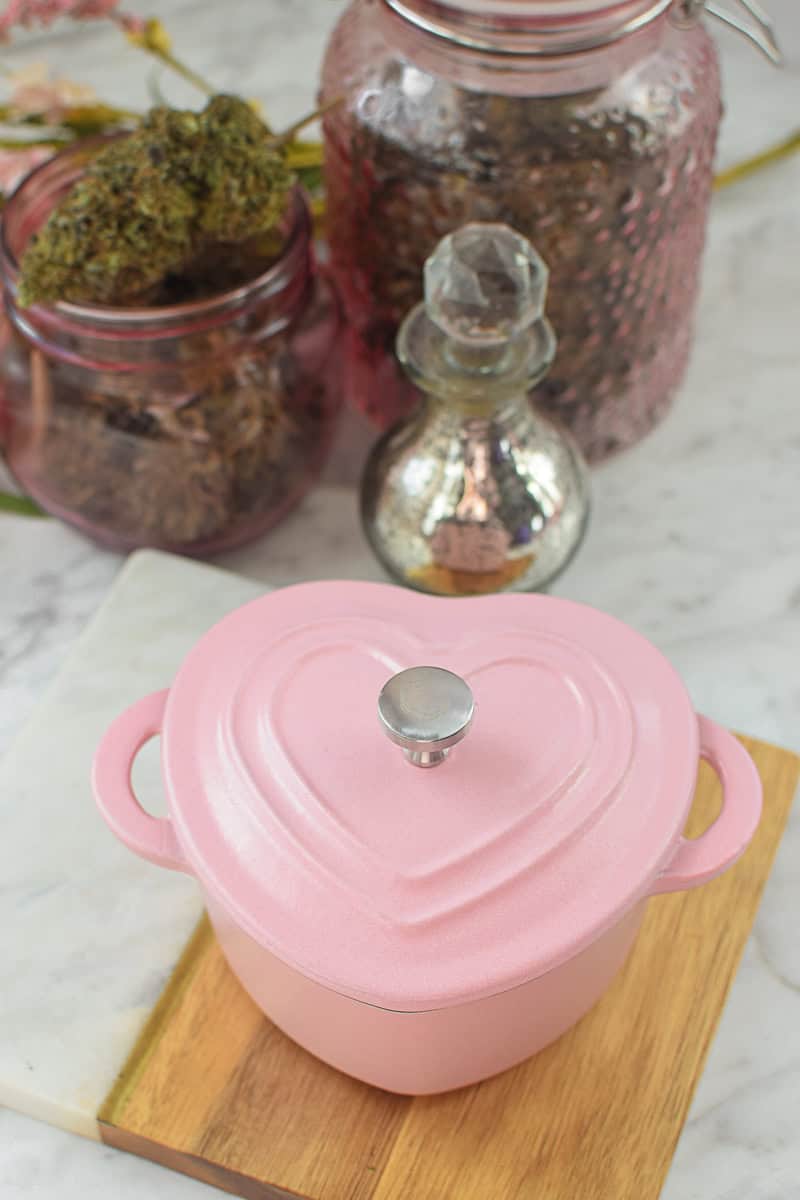
How to Decarb at Home
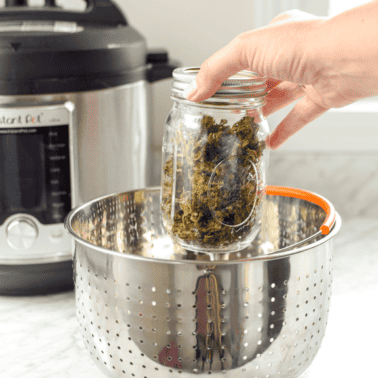
The easiest way to decarb at home is by using heat. Your oven or an Instant Pot is the perfect tool for the job.
The goal is to heat the cannabis at a low temperature for a specific amount of time. This activates the cannabinoids without destroying other beneficial compounds like terpenes, which give cannabis its unique aroma and flavor.
It gets a little tricky because each cannabinoid and terpene has its own ideal temperature.
THCA begins to decarboxylate at approximately 220°F after around 30-45 minutes of exposure, with full decarboxylation typically taking longer to occur2.
If you are working with CBD-dominant flower, keep in mind that CBDA requires more time to fully activate. I have a complete guide for decarbing CBD here.
Also, know that the type and strain of cannabis you are using will impact your final results.
This is why I recommend starting with the temperatures and times I listed above. They are a great, reliable starting point.
Experiment With Different Temperatures
Feel free to play around with different times and temperatures to see what works best for you. There are many paths to the same destination!
Remember, if you want to decarb at a higher temperature, you’ll need less time to achieve activation.
Just be careful with extreme heat, like from a broiler or microwave. High temperatures can destroy the very compounds you’re trying to activate.
While heat is needed to decarboxylate, extreme temperatures can destroy many important compounds that contribute to positive health outcomes3.
We want to be gentle to preserve all that goodness.
Lab Tests
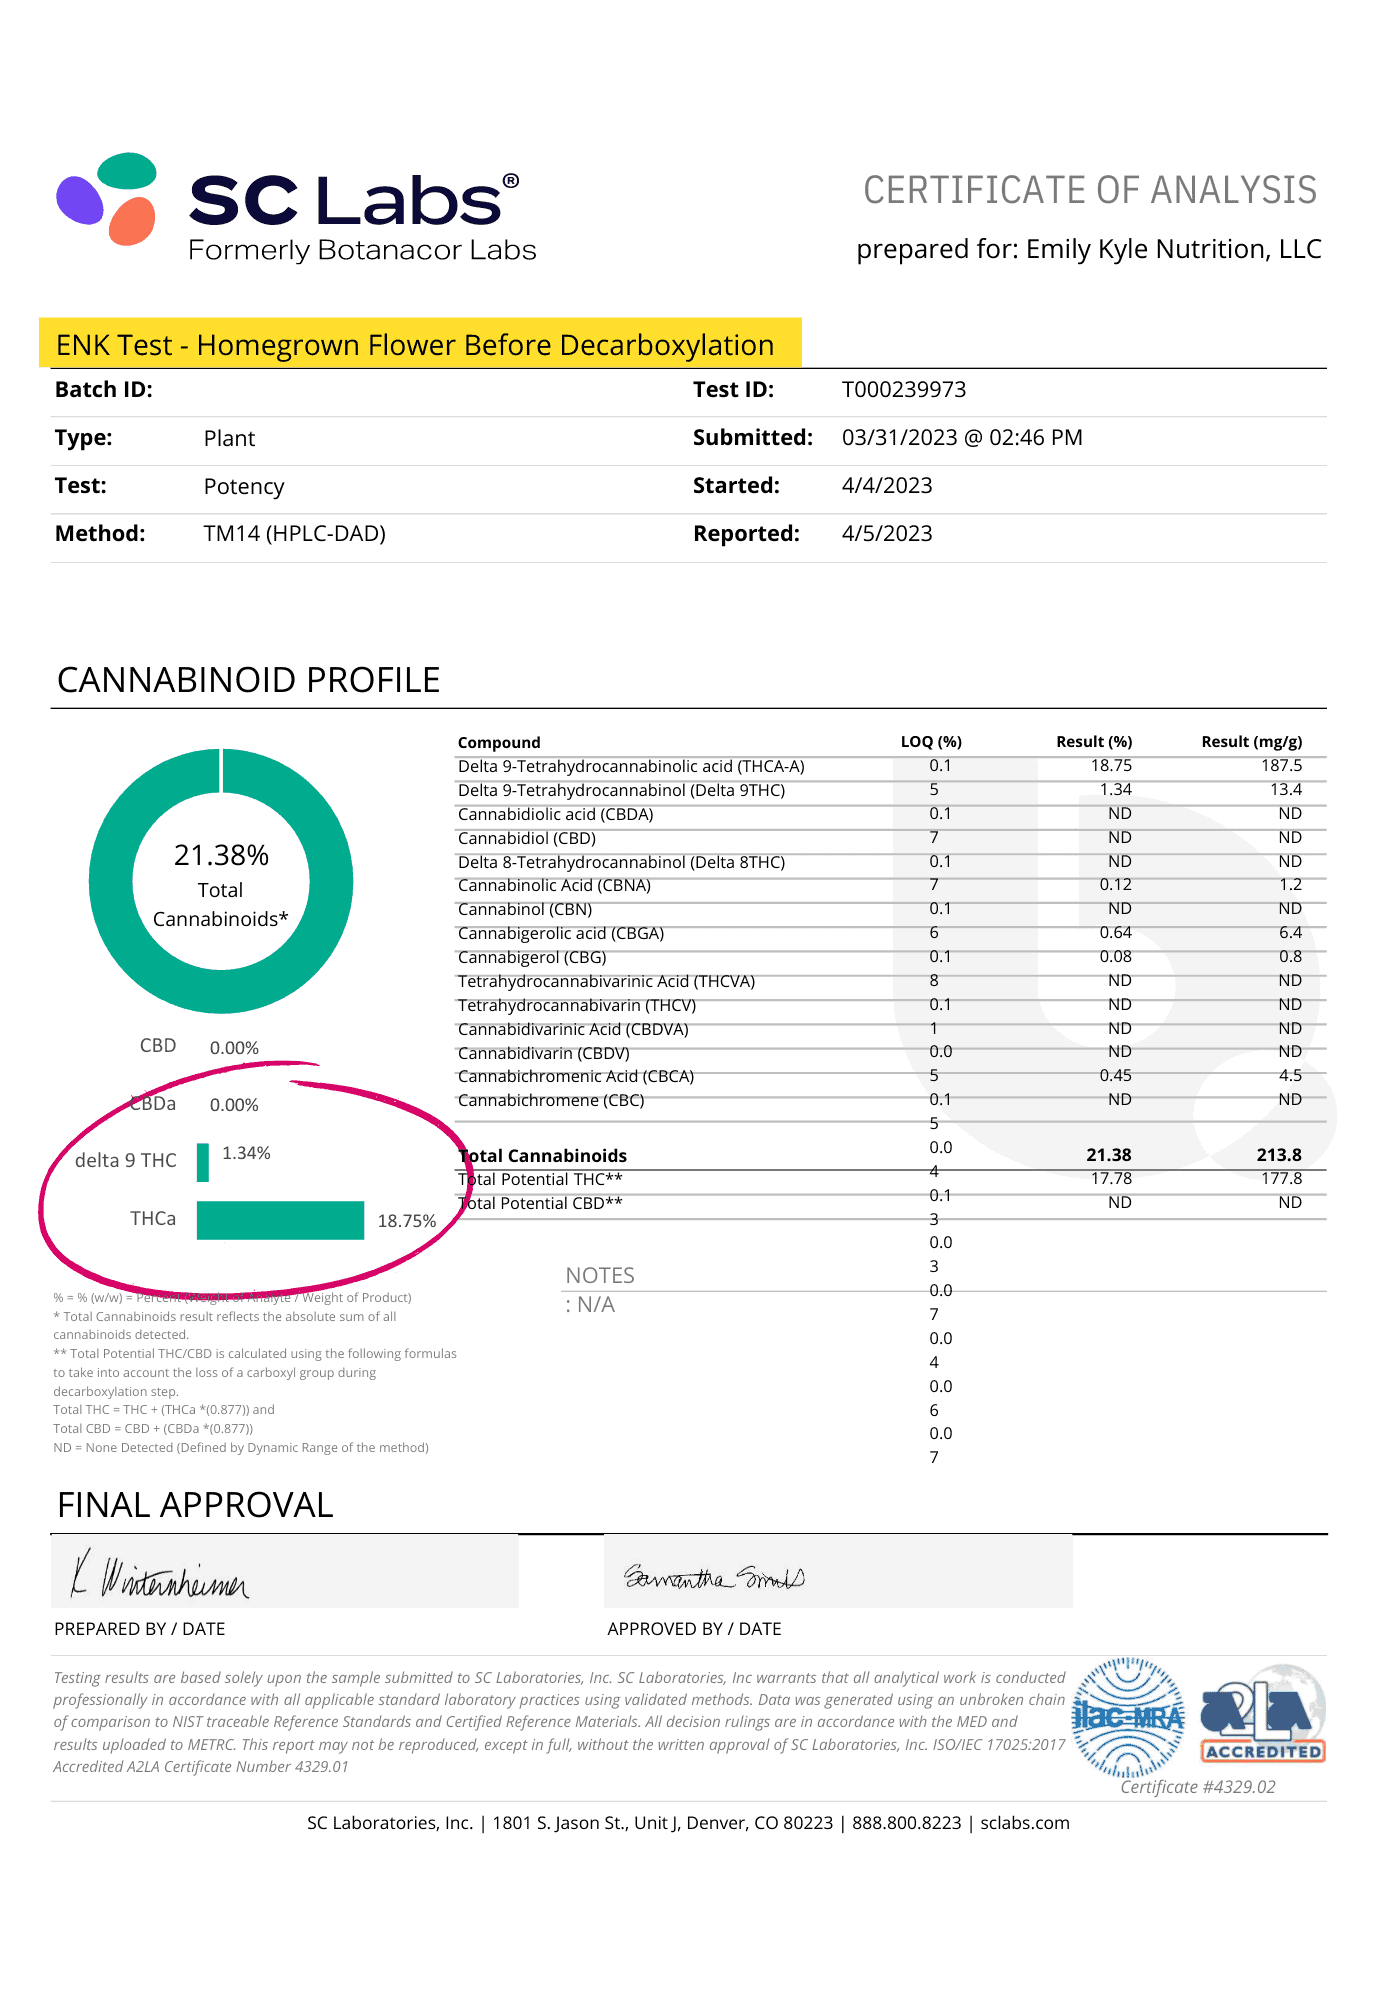
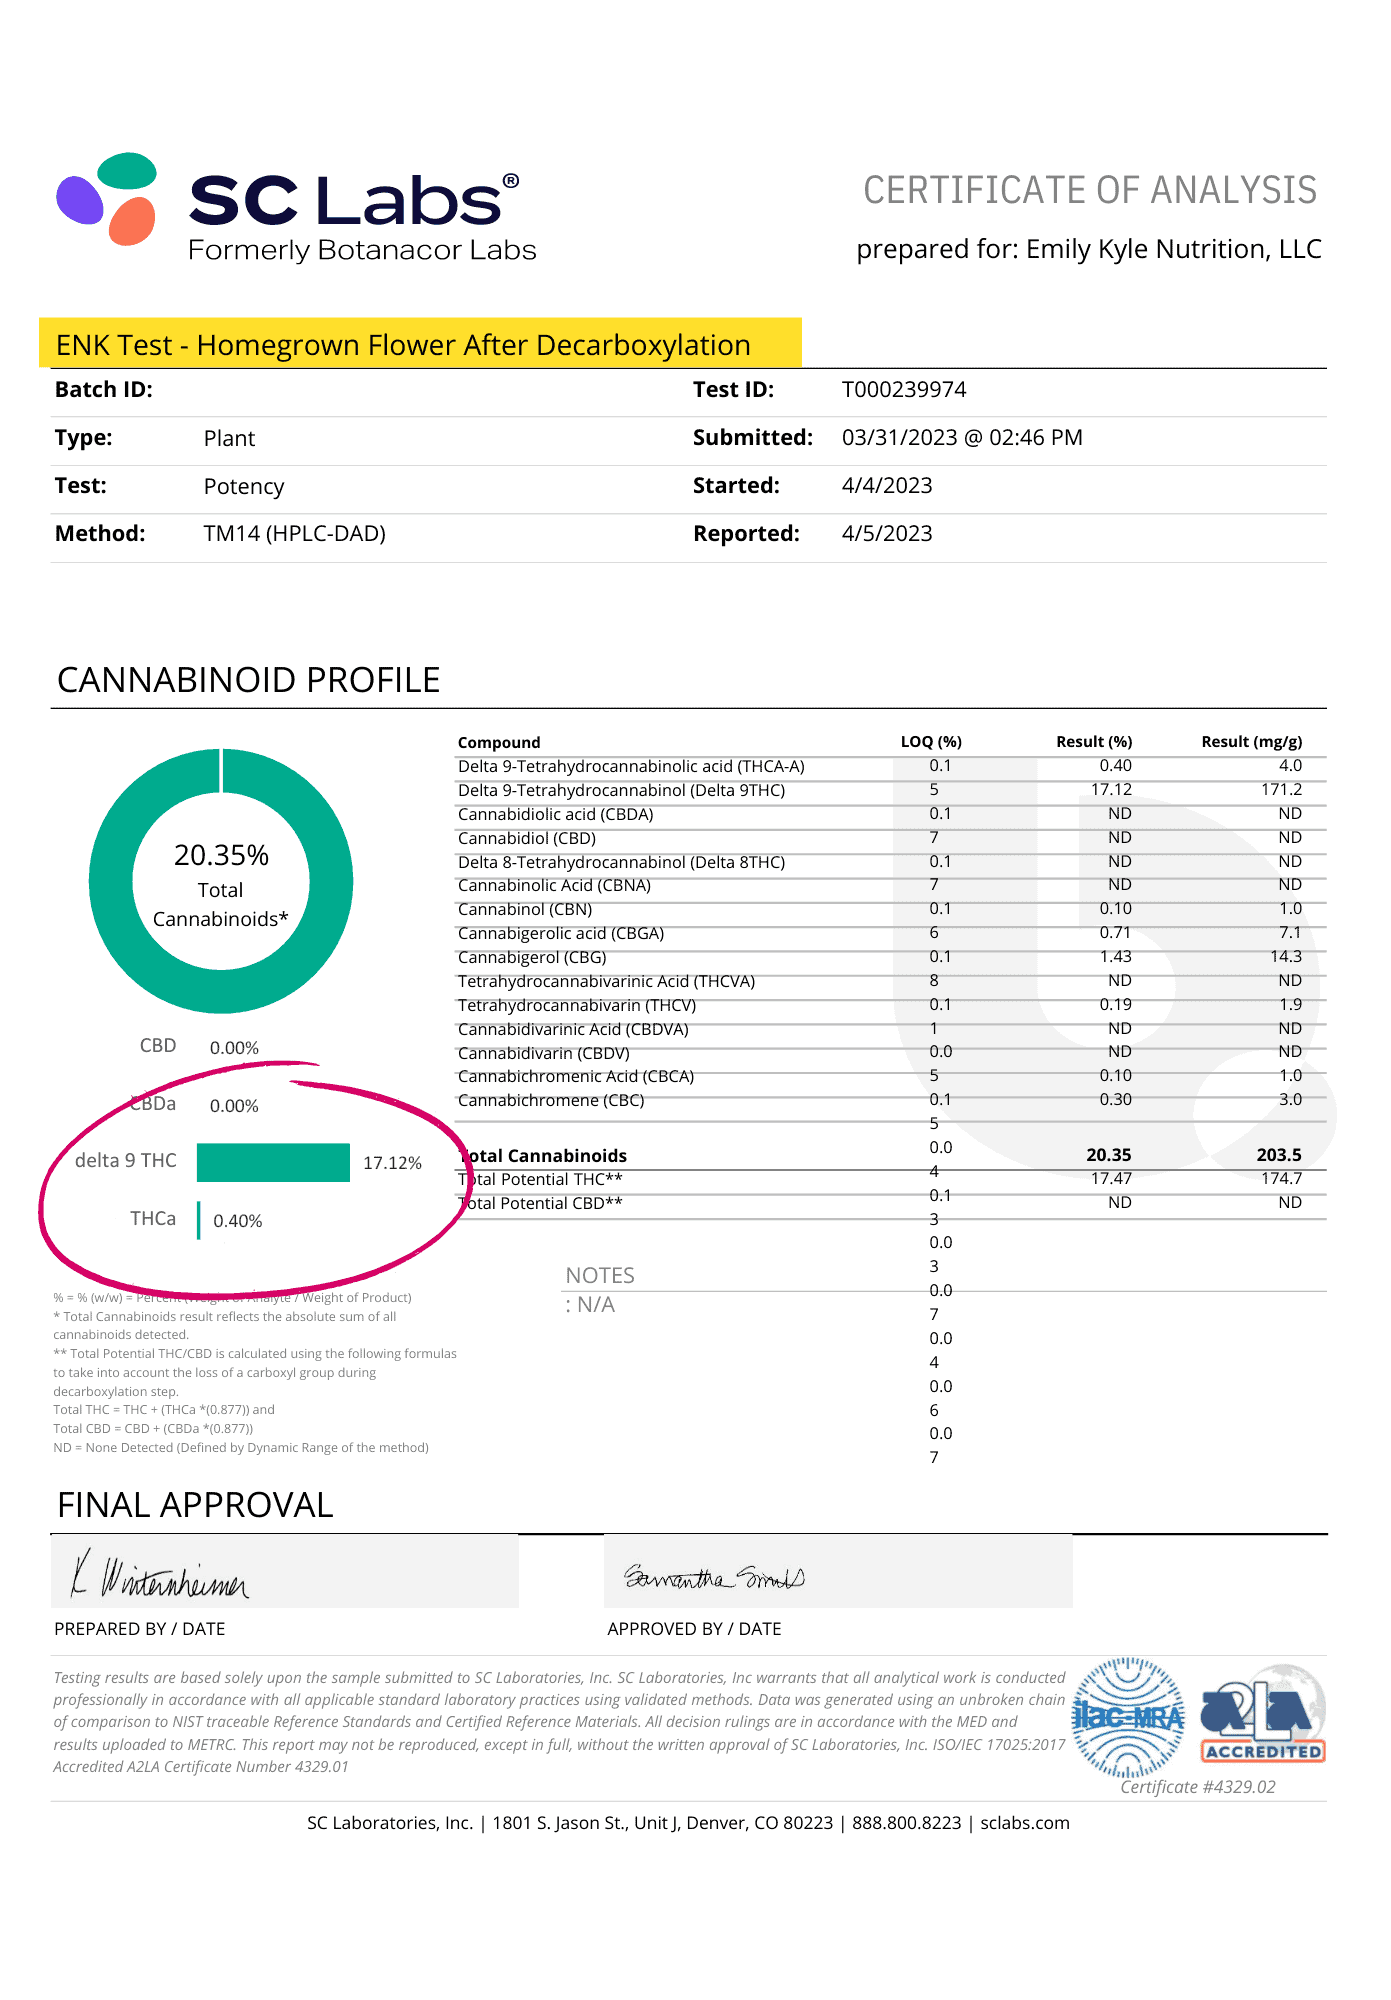
When I first wrote about this years ago, I didn’t have access to lab testing. I just went with the standard advice: bake at 240°F for 40 minutes. But now, I can run my own tests, and I was so excited to see the real-world data from my own kitchen.
I sent a sample of the same flower for testing before and after decarbing using my go-to method.
The “before” test showed the flower had 1.34% THC and 18.75% THCA. After baking it at 240°F for 40 minutes, the “after” test came back with 17.12% THC and only 0.40% THCA.
That’s a nearly perfect conversion!
💡It gave me so much peace of mind to know that the method I’ve been sharing for years is both effective and accurate.
Lab Tests Before Decarboxylation:
Lab Tests After Decarboxylation:
SAVE THIS GUIDE 💌
What If I Don’t Decarb?
I hear this all the time: “Back in the day, we didn’t do that decarb thing. We just left it in the crockpot for 24 hours, and it was plenty strong!”
And you know what? They’re absolutely right. I bet the butter was super strong, and green and grassy.
Decarboxylation happens on a time-and-temperature scale. Leaving cannabis in a low-heat crockpot (around 160°F) for a whole day will definitely cause decarb to happen, it’s just a much slower process.
So why do I recommend the quicker oven method first?
A few reasons. It ensures maximum activation of the cannabinoids and helps preserve those delicate terpenes.
But honestly, the biggest reason for me is taste. Long infusion times can pull a lot of chlorophyll (the green stuff in plants) into your butter or oil. Chlorophyll isn’t harmful, but it can give your edibles a strong, grassy flavor.
By decarbing first and then doing a shorter infusion (around 4 hours), you get a more potent and much better-tasting final product.
This is my favorite way to create all of my popular staple oils, including:
Cannabis Infusions & Extractions
Easy Crockpot Cannabutter 🧈 with Photos & Video
Cannabis Infusions & Extractions
Easy Cannabis Coconut Oil Recipe
All Things Cannabis Oil
How to Make Cannabis Olive Oil
All Things Cannabis Oil
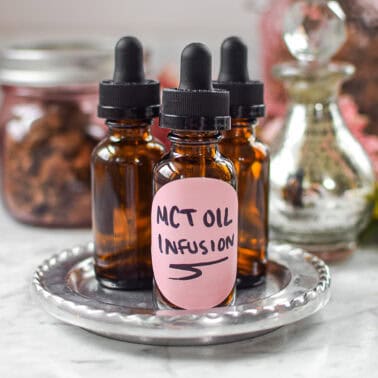
Easy Cannabis-Infused MCT Oil
Cannabis Infusions & Extractions
How to Make Full-Extract Cannabis Oil (FECO)
⭐ Remember, without decarboxylation, you will not experience the full range of active ingredients like THC and CBD.
It’s Not Going to Be Perfect
If you ask ten members of my Well With Cannabis Community how they decarboxylate cannabis, you will likely get ten different answers.
And that’s okay! It’s important to remember that we’re not working in a sterile lab. This is home cooking!
Every plant is different, and every kitchen setup is different. Your oven might run a little hotter or cooler than mine. Don’t let that discourage you!
While this sounds like one big science experiment going on in your kitchen, it really is as simple as putting cannabis in the oven and baking it.
Ultimately, we all arrive at the same goal, activated THC and CBD that can be used in homemade edibles, topicals, and more.
If you want to be as precise as possible, here are a few things I’ve learned to keep in mind.
Temperature Control
Ovens can have temperature swings. I really recommend getting an oven-safe thermometer to see what’s actually happening in there.
Also, try not to open the oven door while it’s baking. Every time you peek, the temperature drops and can throw off your timing.
Different Equipment
You don’t have to use an oven! I’ve seen people use an Instant Pot, decarb machine, an air fryer, sous vide, and even a pressure cooker.
I’ve even seen a guy use a toaster oven outside in the garage because his wife didn’t want him to decarb inside.
Basically, anything that can hold a steady temperature around 240°F will work.
If you’re concerned about the smell, using an Instant Pot or a dedicated decarb machine can help keep the aroma contained.
Different methods will have different temperature controls, so I recommend you use a thermometer as needed throughout the process.
Small variables in the different types of cooking equipment may impact your final product, but it is a great idea to experiment with different options to find what works best for you.
Estimating The Potency
One of the only downsides to making edibles at home is that it’s hard to know the exact potency without lab testing. This can make dosing tricky.
This is a disadvantage because it is hard to accurately dose correctly, and then it becomes difficult to assess and track how each option makes you feel.
Unfortunately, without lab testing, it is nearly impossible to accurately assess the final product’s total cannabinoid concentration, like total mg of THC or mg of CBD.
However, you can get a pretty good estimate. I created an edibles dosage calculator that helps you do the math.
It even accounts for the small potency loss that happens during decarboxylation (about 13%). So if you start with 100mg of THCA, you’ll end up with about 87mg of THC.
Thankfully, my calculator does all the math for you, and all you need to do is check the box.
How to Use Decarbed Cannabis
Once the decarbing process is over, the world is your oyster!
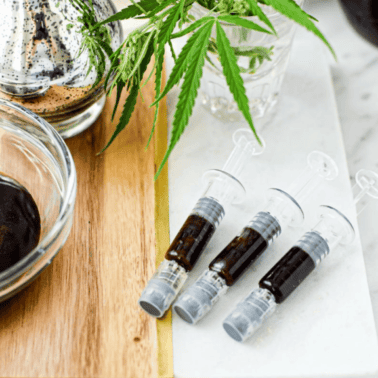
You can use it to make butter, oils, tinctures, topicals, and a wide range of cannabis products – you dream it, you can make it.
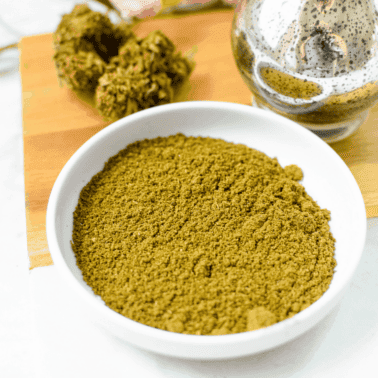
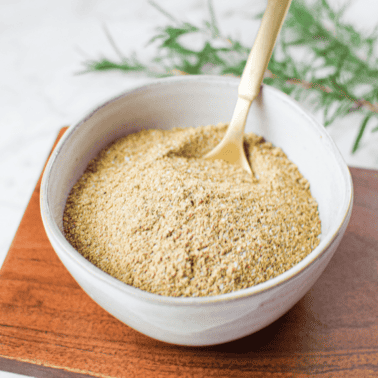
Or, you don’t have to do anything at all; you can grind the weed into a fine powder and enjoy the decarbed weed as-is, similar to how other dried herbs are used.
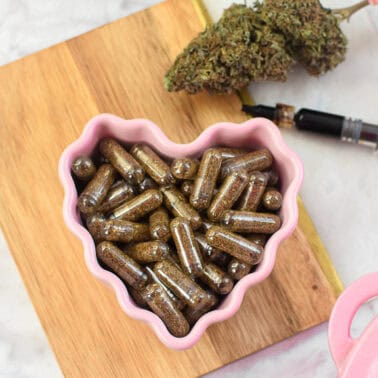
This powder can be sprinkled onto food, added to your favorite recipe like my cannabis ranch dressing, or put into capsules for easy consumption.
Members of my Well With Cannabis Community make their own tea, honey, or seasoning blends with their decarboxylated cannabis flower.
Others will move forward to use the decarbed cannabis flower to make a cannabis-infused oil or cannabis-infused butter with a simple infusion process.
What to Do with Decarbed Cannabis
Articles & How-To Guides
How To Use Just Decarbed Cannabis in Edibles
Cannabis Infusions & Extractions
How to Make Cannabis Capsules: Filling and Dosing Guide
Cannabis Sides & Snack Recipes
Cannabis Firecrackers » The Easiest Edible Ever
Gluten-Free
Easy Savory CBD Seasoning & Rub
Frequently Asked Questions
No worries, I am here to help you! If you haven’t already, check out my guide to help you on your cannabis journey. And be sure to grab your free copy of my printable terms & abbreviations chart.
While it is very common and popular to decarb cannabis in a mason jar, Ball canning jars are not recommended to be used in the oven. A lid sealed too tight could cause a jar to crack, break, or explode. For this reason, we recommend baking the cannabis in an oven-safe baking dish with a lid.
If you don’t have a dish safe in the oven, you can use a baking sheet or tray covered with aluminum foil or parchment paper. Just know that this will not hold in the smell as well as a covered option.
This is a matter of personal preference. Grinding will remove trichomes, leaving them in the grinder and not on your material. Grinding will also expose more surface area, allowing more chlorophyll to be absorbed into the final product. This is why I recommend skipping the grinding process and breaking up large buds by hand into smaller, popcorn-sized pieces instead.
Yes, decarbed cannabis can be stored for quite a long time. It is recommended to store the decarbed cannabis in an airtight container, like a mason jar, in a cool, dark space. The freezer works well to help preserve the potency of THC and CBD.
Yes – the decarboxylation process can cause your house to smell like weed. This is because, when we bake cannabis, we activate and release certain terpenes, which give cannabis its distinct smell. While some enjoy the wonderful aroma, others are concerned about the smell affecting a loved one, a neighbor, or someone else in the home. That is why we recommend baking the cannabis flowers in a sealed container, like an oven-safe baking dish with a lid. You can contain the smell even further by decarbing in an Instant Pot. The sealed lid will hold in many terpenes, which is great for your final product and helps significantly reduce odor.
Yes, you can absolutely just eat the cannabis as-is after the decarb process. Some prefer grinding it into a fine powder, like other herbs like oregano. If you will consume this year, it is a good idea to be extra cautious. Depending on your material, this method can be very potent, with even just a few grams able to pack a potent THC punch.
Each human body has an endocannabinoid system with cannabinoid receptors that interact with the cannabis we consume.

Take your edibles to the next level…
My Edibles Made Easy Online Cooking Course will teach you how to easily make cannabis edibles and topical recipes at home. This step-by-step video course will teach you how to infuse, extract, and create edibles with many different product types – all from the comfort of your own home.
More Articles You Will Love
Articles & How-To Guides
How To Decarb In An Instant Pot » Low Smell Method
Articles & How-To Guides
How to Decarb Kief & Make Edibles
Articles & How-To Guides
How To Use Just Decarbed Cannabis in Edibles
Articles & How-To Guides
How to Decarb & Make Edibles with Cannabis Concentrates




If I bake Brownies, I never decarb!
My Cookies are potent anyway 😋
Guess the baking is decarbing!?
Yes, if you mix raw cannabis or cannabutter directly into your batter and bake at the right temperature, the heat from baking will decarb the cannabinoids during the cooking time. For even more potent results, many recommend decarbing the cannabis beforehand to ensure full activation before it hits the oven!
Loved how you broke things down. The tips are actionable and clear.
I am so glad to hear this was helpful, thank you for telling me!
Hello, Thanks for all the well explained info. I’m using your directions for the first time and am confused over how long to leave my pot in the oven as it is 10.6% THC and 12.6% CBD, so almost identical. So, do I following the timing for the THC (40 minutes) or for the CBD (90 minutes)? That’s quite the range and I don’t want to get it wrong.
Thanks in advance for your reply.
Hey Kat, great question—and you’re right, the timing is different depending on which cannabinoid you want fully activated. If your goal is to fully activate both CBD and THC in a 1:1-type flower, follow the CBD decarb: 240°F (116°C) for 90 minutes. This duration is generally fine for THC and won’t push it all the way to CBN at that time frame.If you only did 40 minutes, you’d activate THC well, but you’d leave a significant portion of CBDA not fully converted to CBD. If you want tighter control, another option is to decarb two separate batches, one for each time and then blend the two together. But, for a single mixed flower like yours, 90 minutes at 240°F is the way to go.
Hi, Emily, I’m very happy that you’ve educated me on how to prepare the flowers for decarbing, but I want to make sure about a couple of things. Would you say that “popcorn-sized” pieces would be grape-sized or smaller?
Another thing – I put two quart mason jars, about half full (3/4 oz each) into my oven, digitally set at 240, for 40 minutes. After 20 minutes, I shook and rotated them, then returned them to the oven.
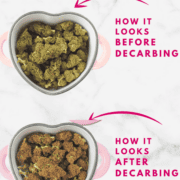
Judging by the color as compared to your illustrations, the oven was not hitting 240. I’m waiting delivery on a thermometer to help me determine, as nearly as possible, what the actual temperature was for that 40 minutes and finish it accordingly. Should it be that golden-brown when done in a jar as opposed to spread out on a baking sheet?
Thanks – love the info and the presentation.
Hello Chris, I’m so happy that you’re finding the information helpful, thanks for your kind words! To answer your question, when I say “popcorn-sized,” I mean pieces that are smaller than a grape, typically around the size of an actual piece of popcorn. This allows for even heating and consistent decarbing.
Your process with the mason jars sounds great! Shaking and rotating them halfway through is a smart step to ensure even heat distribution. The color shift you’ve described can happen when jars are used, as they can sometimes trap more moisture or affect heat transfer compared to an open baking sheet. While spread-out flowers on a tray tend to turn golden-brown when done, the jar method might result in slightly less even coloring. Once your thermometer arrives, it’ll definitely help you fine-tune the process to match your target temperature better. Thank you again for your kind words about the info and presentation, it means a lot! Keep the questions coming, and I’m happy to guide you further.
Thanks for the website and info!!! Much appreciated!!!
You state to decarb to go with 240°F for 40 minutes for THC and 90 minutes for CBD. If I wanted a good blend of both…relaxation, less anxiety, but with a bit of a buzz, would going 240°F for 65 minutes get me in the ballpark??? I’ve smoked for decades but getting older I find it doesn’t take nearly as much to get high so I figured to lean to the CBD side. Thanks for your help! Swamp
Hello Swamp, thank you so much for your question and kind words! I’m so happy to hear that the information has been helpful to you so far. When it comes to creating a blend for relaxation, less anxiety, and a light buzz, it’s really important to first check if the flower you’re using already contains both CBDA and THCA. They both need to be present to achieve that balance you’re looking for. If you’re not sure about the flower’s content, it might be better to grab a THC flower and a CBD flower, decarb them separately at their respective times (240°F for 40 minutes for THC and 240°F for 90 minutes for CBD), and then combine them at the end. Decarbing for 65 minutes isn’t quite ideal—it might over-convert THC into CBN and leave some CBDA not fully converted into CBD. Taking the separate decarb approach gives you the most control over the final product and helps you get the desired effects. I hope this clears things up, and feel free to reach out if you have more questions!
Thanks for the reply! The problem I have is that I’m in a anti-cannabis environment and have to be rather low profile with things. The plants are from mutt seeds that were saved from a bag of cannabis procured several years ago. From looking at the leaves I believe it has a good dose of indica dna in it. So, mixing different types is not possible for me. I’m getting some age on me and this will probably be my last grow…maybe not. 🙂 With clarification that you’ve given me I’m thinking that I might try decarb an amount of cannabis for a certain time, then removing half of it, and continuing on for a longer time with the remainder. Would that be worth trying?
Also, I’ll be decarbing in an old mobile home with a non-working oven. I picked up a small digital toaster oven the other day at a thrift shop. After looking it up on the Internet it appears to actually be a rather good one with a noted digital temperature control so I think it will produce good, constant temperatures. The problem with it is that the temperature settings are only in 25F-degree increments…thus, I have a choice of 225, 250, 275, etc.,. In regards to temperature, I’ve seen conflicting temperature suggestions/recommendations to decarb at…some at lower temperatures and some at higher temperatures. Which would be better in my situation? I’m thinking 225F or 250F, but keep bouncing around with it. Thanks for the help! Swamp
Thank you so much for your reply Swamp, I completely understand why you’d want to keep things low-profile. It really sounds like you’ve put a lot of thought into your setup and plans, so happy to hear that! Plus, using seeds with a story behind them is such a cool and personal touch to your grow. Your idea of splitting the decarbed cannabis into two portions and extending the time for one half is super creative and definitely worth exploring. It’s a great way to test and compare the effects of different decarb levels based on what you’re looking to achieve. Speaking of the toaster oven, it’s awesome that it has a digital control—totally makes things easier to manage, even with those 25-degree increments. If you’re thinking about keeping more terpenes intact, going with a lower temp like 225F might be the way to go since higher temperatures can cause some of those delicate compounds to fade. On the other hand, if efficiency is your goal or you need faster results, 250F could be a better option. Either way works, it just depends on which aspect is more important for your project. If you’re able, experimenting with small batches at both settings could be super useful to find what works best for you. It sounds like you’re already on the right track, and I’m cheering you on! Don’t hesitate to reach out if you have any other questions—I’m happy to help.
Hi Emily your recipe is great used it several times but I always decarb in a mason jar I’m worried now cause you don’t recommend it thanks your a good teacher.
Thank you so much for your kind words, Ralph – I’m so happy to hear that you’ve enjoyed the recipe! 😊 Personally, I do still decarb in a mason jar occasionally, but I always like to remind others that there is a small risk of the jar shattering, especially if it has a tight-fitting lid. If you continue to decarb this way, just be mindful of that risk and take precautions to stay safe.
Hi Emily , I am a beginner with decarbing concentrate . I have 1 gram of budder/batter with thc level of 80.8 and cbd of 0.111%. Should I infuse this 1 gram in 1 cup of coconut oil or 2 ?
Hello Aniya! Thanks so much for reaching out with your question about decarbing concentrate—I’m so happy to help! Since you’re working with 1 gram of budder/batter with a THC level of 80.8%, you’ll want to consider the potency you’d like for your final product. Infusing it into 1 cup of coconut oil will create a stronger end result compared to using 2 cups, which would dilute the potency more. A 1-cup infusion is a great starting point if you’re looking for a more concentrated oil.
Here’s the math to help you figure out the THC content for your infusion:
If you’re using 1 gram of concentrate with 80.8% THC, that means your total THC content is 808 mg (since 1 gram = 1,000 mg, and 80.8% of 1,000 is 808 mg).
• For 1 cup of coconut oil: All 808 mg of THC will be infused into this single cup, resulting in 808 mg of THC per cup.
• For 2 cups of coconut oil: The same 808 mg of THC is distributed across 2 cups, so each cup would contain 404 mg of THC.
If this is your first time, take it slow and test the potency of a small amount before using more. Please don’t hesitate to reach out again if you need more tips or assistance! 😊
I forgot to break up my flower before decarbing. Have I ruined it or can I still make butter? Do I need to change anything to still make it potent?
No worries, Stephanie! You can still make butter. Breaking up the flower before decarbing helps with even heating, but it’s not essential. Just proceed as usual, and your butter should still be potent!
literally, my first time making an MCT infusion I did this too…..lol I sat and measured up my 7g of dry flower……measured out my 14 OZ of MCT Oil….dumped the 7g of “smalls” White CBG into my decarb machine and I was so excited, and totally forgot to grind hahaha….I think I got “lucky” cause the 7g of “small buds” I got were super small lol…..so my second batch I ground up the 7g and literally, the same effects. I add the oil to capsules though.
I just poured 1/2 cup of MCT oil over 18 grams of weed and I forgot to decarb it first, did I just ruin 1/2 oz, of weed? Can I use it for edibles that need to be cooked?
No worries, Larry — You haven’t ruined your cannabis! We recommended decarbing the oil by itself following regular decarb guidelines to ensure even and complete decarboxylation. If you use it in items to be cooked or baked, it’s unlikely the cannabis will get hot enough to full decarb. Hope this helps!
Feeling truly blessed, thank you! 💖
We’re so happy to help, Alfred!! Glad you’re enjoying our site!
I have tried this 4 times now and it just hasn’t worked. The first two times i tried infusing mct oil and butter for 40 minutes in the instant pot and the result didn’t have any affects. I recently decided to try it again but to just try decarbing a small amount and trying the weed before infusing it, but i still felt nothing. I tried it for 40 minutes and then again for 30 (different batch) and at the most i got a little tired. I did a quick release these past two times but i’m pretty sure I tried it with a natural release before. Any ideas what i’m doing wrong ?
Hi there! It sounds like you’re putting in a lot of effort, and I can understand how frustrating it must be not to see results. Let’s troubleshoot together!
Decarbing: Decarboxylation is critical for activating the THC or CBD in your material. Can you confirm the temperature and method you’re using to decarb? Generally, decarbing at 240°F for 40 minutes is best for THC and 90 minutes for CBD.
Ratio and potency: How much cannabis are you using, and what’s its potency (THC/CBD percentage)? A small amount of material might not give noticeable effects. Try using a slightly higher amount.
Infusion process: When infusing into MCT oil or butter, maintaining a consistent temperature is key. The Instant Pot on slow cook is a great tool, but ensure you’re actually hitting and maintaining the right temperature around 160–180°F, and infuse for 4 hours. Pressure cooking for 40 minutes for infusion isn’t long enough.
Consumption: How are you consuming the final product? If it’s an edible, remember that it can take 1–2 hours to feel the effects. Also, eating it on a fuller stomach could delay the onset.
Individual tolerance: Everyone’s body metabolizes THC differently. Have you had success with other edibles in the past? If not, it might be worth experimenting with dosage and maybe titrating up until you get to a dose you like.
Feel free to share more details about your process, and hopefully, we can pinpoint the issue!
totally why I went with the decarb machine route……I honestly got a cheap one from alliexpress and it hasn’t burned down the house yet LOL…..I honestly decarbed for 60 minutes…..then infuse for another hour no complaints of any smells or odors from the wife either.
I was kinda in your boat too….and I’d recommend trying it out with some more “economical” shake or trim….rather than precious 🌿….I personally used White CBG, since I got a whole OZ for a good deal….and Im now a huge fan of CBG cannabinoid
Is it better to decarbonate in the oven or in the instant pot?
Hello Ben, both options work well, so it really is just a matter of personal preference and what you have availalbe 😀
Hi I know you recommend not grinding the weed first but my dispensary sells it pre ground and very fine.
Should I adapt the time/temperature?
Hi Percy. If your cannabis is pre-ground and very fine, it might decarb faster. I’d recommend keeping a close eye and reducing the cooking time, if needed, to avoid overcooking. Experiment with small adjustments to find what works best!
Wow amazing information I’ve just picked up an 1oz of cannabis. And sent the wife for the items needed to carry out the decarb process.
Update to follow thank you xxx
Glad you found the information helpful, Lee! Good luck with the decarb process! We’re always here if you have any questions.
Hello! I decarbed in the oven, but on a cookie sheet with no lid or foil to cover, before reading your recommendations. What does the lid do for the process?
Thank you!
Hello Kim! Using a lid or foil helps to retain the terpenes and prevent the loss of volatile compounds during the decarbing process. It can also help in maintaining a more consistent temperature. However, if you didn’t use one this time, you should still have effective results. Feel free to try it next time to see if you notice any difference. Thanks for reaching out!
In getting a lot of cbg-a keif what can I make with that can I make a wax or concentrate out of it if so pls lead me in the right steps I’d greatly appreciate it or anything really easy to make. Thanks Chason
Hello Chason, yes, you can use it to make full-extract cannabis oil, which is a concentrate easy enough to make at home. Here’s the recipe, I hope this helps!
Thank you… gaining knowledge
You’re welcome, Roger! I’m glad to hear you’re gaining valuable knowledge. If you have any questions or need further insights, feel free to ask. Happy learning!
Can you use freshly harvested flower to decarb or is a drying process required?
Hi William. To decarb freshly harvested flower effectively, a drying process is required. Fresh flower contains too much moisture, which can hinder the decarboxylation process. Drying the flower first helps ensure that you activate the cannabinoids properly for optimal results.
High 😁
All I care about is THC. So for a basic rule of thumb? Without any Bliss butter. Is it 240 for 40 minutes? Then how much weed to how much butter?
Thank you ♥️
High Mike! For decarbing THC, yes, 240º for 40 minutes. We generally recommend a 2:1 ratio to start: 2 cups of butter/oil and 1 ounce of oil. If you’re looking for something more potent, you can do 1:1 with 1 ounce of flower to 1 cup of butter/oil. Here is a printable chart to help you even further: https://emilykylenutrition.com/cannabis-flower-to-oil-ratio-guide/ – Happy infusing!
I’m using the InstaPot and it consistently works well per your directions. I have your leaf and oil chart handy and at this point, I have it memorized. CBD alone and THC alone works.
I want to make a combination high CBD with THC. One product I have has about 16% CBDA and a small % of THC. Is there a way to make the combo together (it doesn’t sound it).
Your website is great, easy to use, and has the most information out there (for me).
Hi Carl. I’m thrilled to hear that you’re finding success with your InstaPot and our guides! For creating a high CBD to THC ratio like 16:1, you’ll want to combine 16 parts of a CBD dominant product to 1 part of a THC product. For example, for every 16 grams of CBD, you would need to find a THC product with similar percentage and use one gram of that to achieve a 16:1 ratio. The key is to adjust the ratios based on the specific percentages of CBD and THC in the products you’re using to get the desired effect. You may not find matching strengths of CBD and THC. It may take a bit of trial and error to get the results you desire, but you’ll be thankful in the end! Thanks for your kind words about our website, and keep experimenting safely!
Hi
In your decarbing section, the THC to CBN 240° for 180 minutes…
Does this mean leave the cannabis bud in for 180 minutes and it will convert to CBN?
Also, I’m familiar with THC and CBD, but what exactly is CBN?
THANKS!
Hi there Ken, thanks for reaching out with your questions! 😊 Yes, you’re correct. When you decarb cannabis at 240° for around 180 minutes, it helps convert THC into CBN. CBN, or cannabinol, is another compound found in cannabis, much like THC and CBD. It’s known for its potential sedative effects, which can be helpful for individuals having trouble sleeping. I’d recommend reading this article to fully understand how CBN might fit into your wellness routine. It’s always exciting to learn about the various compounds in cannabis and how they can be used! I hope this helps. Don’t hesitate to reach out if you have any more questions!
You beautiful, beautiful soul! Thank you for all of this 🥹🙏🏼💕
Hello, Your kind words truly warmed my heart! 🥰 It’s messages like yours that make all the work worthwhile. Thank you for your heartfelt appreciation. Remember, this space is here for you. If you have any questions or need more information, don’t hesitate to reach out. Let’s continue this journey together!
I haven’t used it yet so I don’t know but it sounds perfect. My problem is I have cannabis tops in coconut oil i didn’t decarb juist heated the oil and put the tops in. Can I reverse the process and try again or is this out of the question? If I don’t hear back I will just try to get the well oiled cannabis dried out, somehow. And proceed with your recipe.. Thank you Emily.
Hi Joey. We typically recommend infusing for twice as long if it hasn’t been strained yet. If it’s already strained and ready to go, there is varying information out there, but I typically suggest 300°F for an infusion that contains THC-dominant cannabis. After 90 minutes, you should have almost a full conversion. The temperature and time are increased compared to the regular decarb process to account for the oil not heating as quickly as the buds alone. This shouldn’t burn your oil either, but it’s important to keep a close eye on it. I hope this helps!
Hi Emily,
I notice you say that each cannabinoid decarbs at a different temp, but your guide shows the same temperature for every cannabinoid. This is quite confusing.
Thanks,
Skillit
Hi Skillit. We recommend 240º for decarboxylation, but different lengths of time depending on the primary cannabinoid. THC-40 Minutes. CBG-60 Minutes. CBD-90 Minutes. CBN-180 Minutes. This process may seem a bit perplexing at first but don’t worry, it will all become clear in due time. Trust me, we’ve been there too! Happy Decarboxylating! 🙂
I followed your recipe for baking my CBG in a covered baking dish for 60 minutes, but the buds never turned light brown there’s still green. I noticed your instructions for a covered dish are different than the other ones online that say to use a cookie sheet. I’m wondering what the benefits are to cooking it in a covered baking dish as opposed to a baking sheet with no cover?
Hi Gina. Thank you so much for trying out our recipe and reaching out with your question. I’m sorry to hear that the buds didn’t turn light brown as expected. Let me explain the benefits of using a covered baking dish.
Decarbing your CBG in a covered baking dish helps create a more controlled environment inside the dish, which allows for better heat retention and even distribution, which can result in more consistent and thorough decarb. The cover helps trap moisture, leading to a slower and gentler cooking process and helps preserve the flavors and aromas of the buds.
On the other hand, using a baking sheet without a cover typically allows for faster and more direct heat exposure. This method can result in quicker decarboxylation but may also risk the buds becoming overly dried or burnt.
It’s worth mentioning that different recipes and methods found online may offer variations based on personal preferences or specific desired outcomes. It’s always good to experiment and find what works best for you.
I appreciate all how tos,…, and use your way to assists my health, you’re a great inspiration and helpful. Thank you.
Hi Marisol. We’re thrilled to hear that you’re finding the resources on our blog beneficial to your health. Your kind words are much appreciated, and it’s encouraging to know the content is making a positive impact. Feel free to reach out if you have any questions or suggestions!
I want to activate the THC with sous vide bag in water, I can only go up to 90C due to the safety of the bag. If I do 50min at 90C would that still decarb my flower?
Hi Jay. Great question! The sous vide method is an excellent way to decarboxylate cannabis due to its precise temperature control
We recommend decarboxylation at 115°C (240°F) for 40 minutes. At 90°C, the process will be slower, so we recommend decarbing for at least 60 minutes to make up the difference. Just keep in mind that the results might vary, and it’s possible that not all of the THCA will be converted. You can experiment with a small sample to see how the process works for you.
I hope this helps, and happy experimenting!
Hi Emily. I purchased a sativa strain that is 1 to 1 CBd and thc. When decarbing I’m sure thc starts to degrade after 40 minutes, but I’m looking to activate CBd levels also. It doesn’t start until 75 to 80 minutes at 240 degrees. What’s happening with the thc levels at this point. My understanding is that the best benefits of CBd for pain is a combination of both thc and cbd together. A little confused on the decarb timing for this reason. Any suggestions would help. Thanks
Hi Dinger. This is a great question! You’ll want to decarb for 90 minutes at 240º to activate the CBD, which isn’t too long for THC. THC needs double that time to convert to CBN so there shouldn’t be any issues. I hope this helps!
Hello, I am using the trim from a very potent plant. It’s basically everything but the bud. My question is this: once I have done my first batch of infused oil I realize it’s not going to be as strong as the bud had been used however,’xcan I reuse that first batches oil on the second batch to make it stronger?
Hi Tonie. Yes, you can re-infuse the oil a second time. Happy Infusing! ?
Hi,
I know it’s not recommended but I already have an Oz of ground weed. Is the DeCarb process the same.
Thanks
Tonie
Hi Tonie. I would follow the same process but watch closely to ensure your flower doesn’t burn. You may want to take it out sooner.
Is it possible to use a Ninja Foodie air fryer for the decarboxylation process and if so, what setting would be the best to use? I used my oven (gas) and could not maintain the correct temperature.
Hi Debbie. Is your Foodi a multi-cooker with a bake setting? If so, follow the decarb guidelines of 240ºF for 40 minutes. Keep an eye on it while it decarbs. Do you have a thermometer you can use to monitor the actual temperature? Ninja Foodi devices are usually reliable, but some smaller devices can fluctuate in consistency quite a bit. Let us know how it works out for you!
I grew a lot of weed. Mostly to make into oil. Ive mixed up my jars of bud and decarbed bud. If i happen to decarb bud that has already been dercarbed, will it be useless?
Hi Gregory. The bud won’t be useless at all, but rather give a more sleepy effect when consumed. THC converts to CBN with heat, so the extra decarb time (on the already decarbed bud) will convert the THC into CBN.
I’m new to making my own edibles. When using a tincture or concentrate purchased from a dispensary for making edibles, isn’t it ready to go into the mix? Is there a decarb process to activate these or just mix in and go?
Hi Justin. Not all concentrates need to be decarbed before use, some have already been decarbed during the production process. FECO, RSO, Distillate & CO2 Oil do NOT need to be decarbed. The following DO need to be decarbed: Shatter, Wax, Badder/Budder, Hash/Bubble Hash, Crumble, Rosin and Live Resin. Here’s Emily’s guide that goes into further detail: https://emilykylenutrition.com/make-edibles-with-cannabis-concentrates/
I hope this helps!
I followed the process with sealed mason jar in my instant pot. Pretty easy. My question is when I removed jars (lid still on) there was a little condensation inside jar at the top. Is this normal? I was going to store for awhile and I don’t want to grow mold.
This was harvested and dried last September.
Hi DDD. The condensation inside the jar is from the remaining moisture that was in the flower. You should definitely air out the jars and make sure all moisture has dried to avoid any mold issues in the future.
Your side is the only one I use when I need to make butter or oils. I have not tried any tincture recipes that you have offered up, but I’m willing to try those soon! ✌️?
You’re a lifesaver when it comes to recipes and concoctions LOL God bless you and thanks again ?
Hi Sharon! Thank you so much for your kind words. You put a big smile on Emily’s face! She works hard to continuously improve the cannabis education she offers and it’s always rewarding to receive such wonderful feedback. Thank you!
hey is there any difference as to decarb-ing in a sealed container as to an open baking sheet?
Hello Ian. You may notice less smell when baking in a sealed container vs. an open baking sheet. Others believe using a sealed container is a good way to preserve the terpenes. I hope this helps!
My weed is already grounded as l buy it this way..Will this affect decarboxlating .Do l still bake at 240 for 40min?
Hi Maggie! Still bake at 240°, but you probably won’t need the full 40 minutes. I’d let it go for a minimum of 20 minutes and then watch closely so it doesn’t burn. The closer to 40 minutes the better, but you don’t want to burn your flower. Hope this helps!
Hi Emily. Here I go again with my questions.
I ground the buds to make FECO and soaked them in grain alcohol, and made 4 washes with it. Now I have left 3 ounces of plant in a jar and I feel that maybe I may be losing an opportunity to throw it away.
Do you think it is still good to use in other ways?
Could I decarboxylate it even after the washes, considering it has some alcohol left in it?
Or is it already lost? 🙁
Thank you!
Hi Viviam. Chances are, there is some good stuff stuck in the leftover plant material, making it worth saving and enjoying. Members from our Well With Cannabis Community have put the dried-out material in tea bags, capsules, and more. I would not decarb it though because you risk any trace of alcohol being left behind.
What happens if u decarb in the butter in the oven
Hey Peggy, I don’t have lab tests to know for sure, but I think you should be alright.
First time is my excuse: I ground up my trim before decarbing. How do I decarb it now??
Hello Brenda! No worries 🙂 You can still decarb it while it is ground. Simply place the ground material in a mason jar or oven-safe baking dish and proceed as normal.
Hi Emily,
Here’s a question that’s hard to get a definitive answer to: will decorbed herb last longer than un-decarbed? Also, what is the effect of using decarbed herb for vaping? Is doing so irrelevant since the vaping process should adequately decarb?
I so appreciate your thorough and quick replies for questions that you get from the community!
Bill
Hello Bill! I don’t have a definitive answer either; I think that would require some long-term experimentation with lab testing to know for sure. You will have to experiment with how vaping decarbed herb makes you feel, but yes, the vaping process should adequately decarb. I don’t think it’s irrelevant to experiment, though and see if you prefer one option over the other 😀
I accidentally decarbed at 240 for 60min instead of 40 min.Did I turn it into CBD or will I be ok?
Hey Peggy! I think you’re just fine. THC can not turn into CBD through decarboxylation, but THC can eventually degrade into CBN (usually needs 180 minutes), so if anything, you may notice a more “sleepy” end product.
Hey Emily!
So I have about 2oz of hydro shake. A good 1/3 of it is powder. I’m nervous to burn it. What do you recommend?
Hey Dally! I would just watch it closely for the last 10 minutes of the cooking process. If it begins looking too toasty, take it out of the oven and you should be good to go ☺️
Hi Emily. Thanks for the recipe. Will this work for me if the weed I bought is all pre-ground?
Hello Leah, you are most welcome, and yes, everything should be just the same with pre-ground flower 😀
Hello, I’m totally new working with cannabis.
I’m ready to decarboxylate my flowers however, I don’t know how many buds I can put into a pint mason jar. an ounce? fill the jar 1/2 full? full?
I’m assuming the less cannabis in each jar it heats evenly? Thanks
Hey Mindy! Welcome to the world of cannabis edibles 🙂 I generally like to keep the jar about halfway full, feel free to use extra jars if you need to.
I have a question can I use the weed and residue left in my vape to make edibles and tincture?
Yes, I think so, Dee! I don’t think it would need to be decarbed either, it should just be ready to go 🙂
Hi Emily,
Just wondering, if you can decarb the flower with the butter at the same time to create the infused butter, this being done in a crockpot or instant pot. Will the potency of the THC or CBD still be the same? If this can be done, what would the temperature have to be and time for the whole process be please?
I would assume that this method would reduce the smell of the terpenes considerably 🙂 if it can be done?
Thank you for your amazing insights and teachings….Much appreciated!
Regards
Hey Jessie! I don’t think the crockpot gets hot enough, but you can decarb in the Instant Pot as that gets to 240°F. Here’s my complete guide for decarbing in the IP, I hope this helps!
Yo. What’s your recommendation with making infused brownies? I can decarboxylate and grind into powder. My question is, does putting the prepared product into a mix and cooking again, make a difference? Any advice on how to adjust? Brownies cook at 350° for 15-20 minutes. Already decarboxylated product in the batter, cooks a little bit more. You’re right about the strain you start with. I’ve had 500mg slices hammer me. Then the same stuff at 625mg stopped my heart. Blood pressure dropped to the dead zone and I actually shit myself. Was scary so I’m trying to make sense of that. Recently a batch was a 2 hrs come on, mild at first. Hours 3,4 and 5 were progressively stronger until it was banging hard. Slept like a baby. Thanks for your time and consideration.
Daniel Loeffler
Hey Daniel. That’s a crazy story; I’m sorry to hear what happened to you. 500-625mg of THC is crazy high for a single person in one sitting! I typically use oil in my recipe when making brownies, but you can definitely use the decarbed flower. I don’t think the 20 minutes in the oven will make a big difference in the outcome, I would bake as normal. Maybe just use less decarbed flowers for a more mild experience?
Hi Emily!
Your (fabulous) website and others websites have suggested decarbing cannabis by putting it in a mason jar and putting it in an oven. When I searched for “oven-safe mason jar” some websites emphatically point out that there’s no such thing. They claim that mason jars are made of annealed versus tempered glass and that the former can explode into shards when baked. Is this concern irrelevant because decarbing occurs at a lower temperature (e.g., 240-290 degrees) for this to happen? Maybe I’m unnecessarily nervous here but I’d still like to read what others have experienced in baking cannabis in a mason jar.
Hey Bill! I think you have a valid concern, it’s always a possibility the glass could break, but I think its more due to temperature shock (going from hot to cold or vice versa, too fast) than anything else. To avoid this, I just place my jar in the oven before preheating and leave it in there until it has completely cooled. Of course, you don’t need to use a mason jar, you can use any type of oven-safe dish you prefer, or even silicone bakeware. I hope this helps!
Hey Emily,
I followed your instructions and compared the color of your decarbed buds vs mine. I didn’t take a picture of mine but it looked darker green and not as golden as yours. Could it be possible that I either burned them or did I not leave them in the oven long enough? And I also noticed when I removed the mason jar out of the oven, I left it sealed to cool off on the counter and when it was finally cooled enough to handle I noticed condensation inside the jar. Is that normal?
Hey Kimmi! Thanks so much for giving this tutorial a try. I truly don’t worry too much about the color – there are a lot of factors that can impact the final color that are irrelevant to the process. I trust the 40 minute time frame, and I am sure yours is just fine! Yes, condensation is normal and won’t harm or affect your final product. Just make sure to transfer everything to a clean, dry jar for storage to leave the moisture behind 🙂
Hi Emily, I was wondering in your experience if decarbing by putting the cannabis in a mason jar in the oven would stop from smelling up the whole house since the mason jar lid acts kind of like a seal? Thank you!
Hey Luke! The mason jar definitely helps, but it doesn’t contain the odor 100%.
I’m not sure if this is the best place to post this question, but figured my question starts one step before decarb (selecting cannabis strain), it’s the most logical (to me anyway) 🙂 I have seen mixed thoughts on the using different strains of cannabis for edibles. Is it true that this will only make the THC portion available vs. smoking where each strain has its own character including effects of indica vs. sativa
Hey Ed! I’ve heard this question asked before, and it seems to be unique for each person. I’ve heard people say they can definitely notice different effects (ex. Indica vs. Sativa) when consuming edibles, while others say it all hits them the same. Feel free to let us know what your experience was like after you’ve given your edibles a try!
hi – would you clarify the use of a mason jar in the context of what’s described as “… making sure the flower is in an even layer (you do not want clumps or mounds)”. For me, that’s more easily understood for using a glass baking dish, but not the jar.
Hey Elle! Great question. When I use a mason jar, I try to use the biggest one I have and then turn it over onto its side when it’s in the oven so the plant matter is spread out as much as possible. I hope this helps 🙂
I am sure this is a silly question but, are you able to decarb THC dominant flower to bring out the CBD components? Thank you in advance for any advice.
No silly questions here, Heather. No, you cannot decarb THC flower to get CBD. There needs to be CBDA already present in the starting material to convert to CBD. You can start with a CBD-dominant flower to get the CBD you are looking for 🙂
How long do I decarb flower that’s 1:1 ration (CBD to THC)? I’m looking to make a 1:1 tincture.
Hey Unkle JR – That is a great question. I do not have lab tests to know what the best answer it. I personally would decarb for CBD (240°F for 90 minutes) in this case. You will achieve the CBD, and the THC conversion. You run the risk of slightly overdecarbing the THC, but in any case, that will bring you to more CBN. Keep us posted in what you end up doing!
Hi Emily,
I was in South Africa last month and I purchased some weed there that I didn’t want to bring back on the plane as-is, so I had my husband bake it into some brownies. I totally forgot about the decarboxylating process because it had been years since I tried it and we were in a bit of a rush. So I cut the flower up into small pieces with kitchen knife and it was dumped into the batter. I figured that the brownies would be pretty much regular brownies after I realized I skipped that important step. However, upon returning to NY I had a couple friends try the brownies and they actually said the high was better than those chocolate Punch Bars that we usually have around. So… what’s up with that? Is it possible that the heat in the baking process helped release some stuff? It was so easy to do it that way and also they said the taste is great (I agree). What do you say about it?
Yael, it’s definitely possible that the heat from the baking process helped with the decarboxylation process 🙂