Are you ready to make your own cannabutter at home with the equipment you already have in your kitchen? Let me share everything you need to know about how to make cannabutter in a crockpot or slow cooker. This guide will help you get started with everything from ingredients to step-by-step instructions so you can feel confident and ready to make your own cannabutter at home.
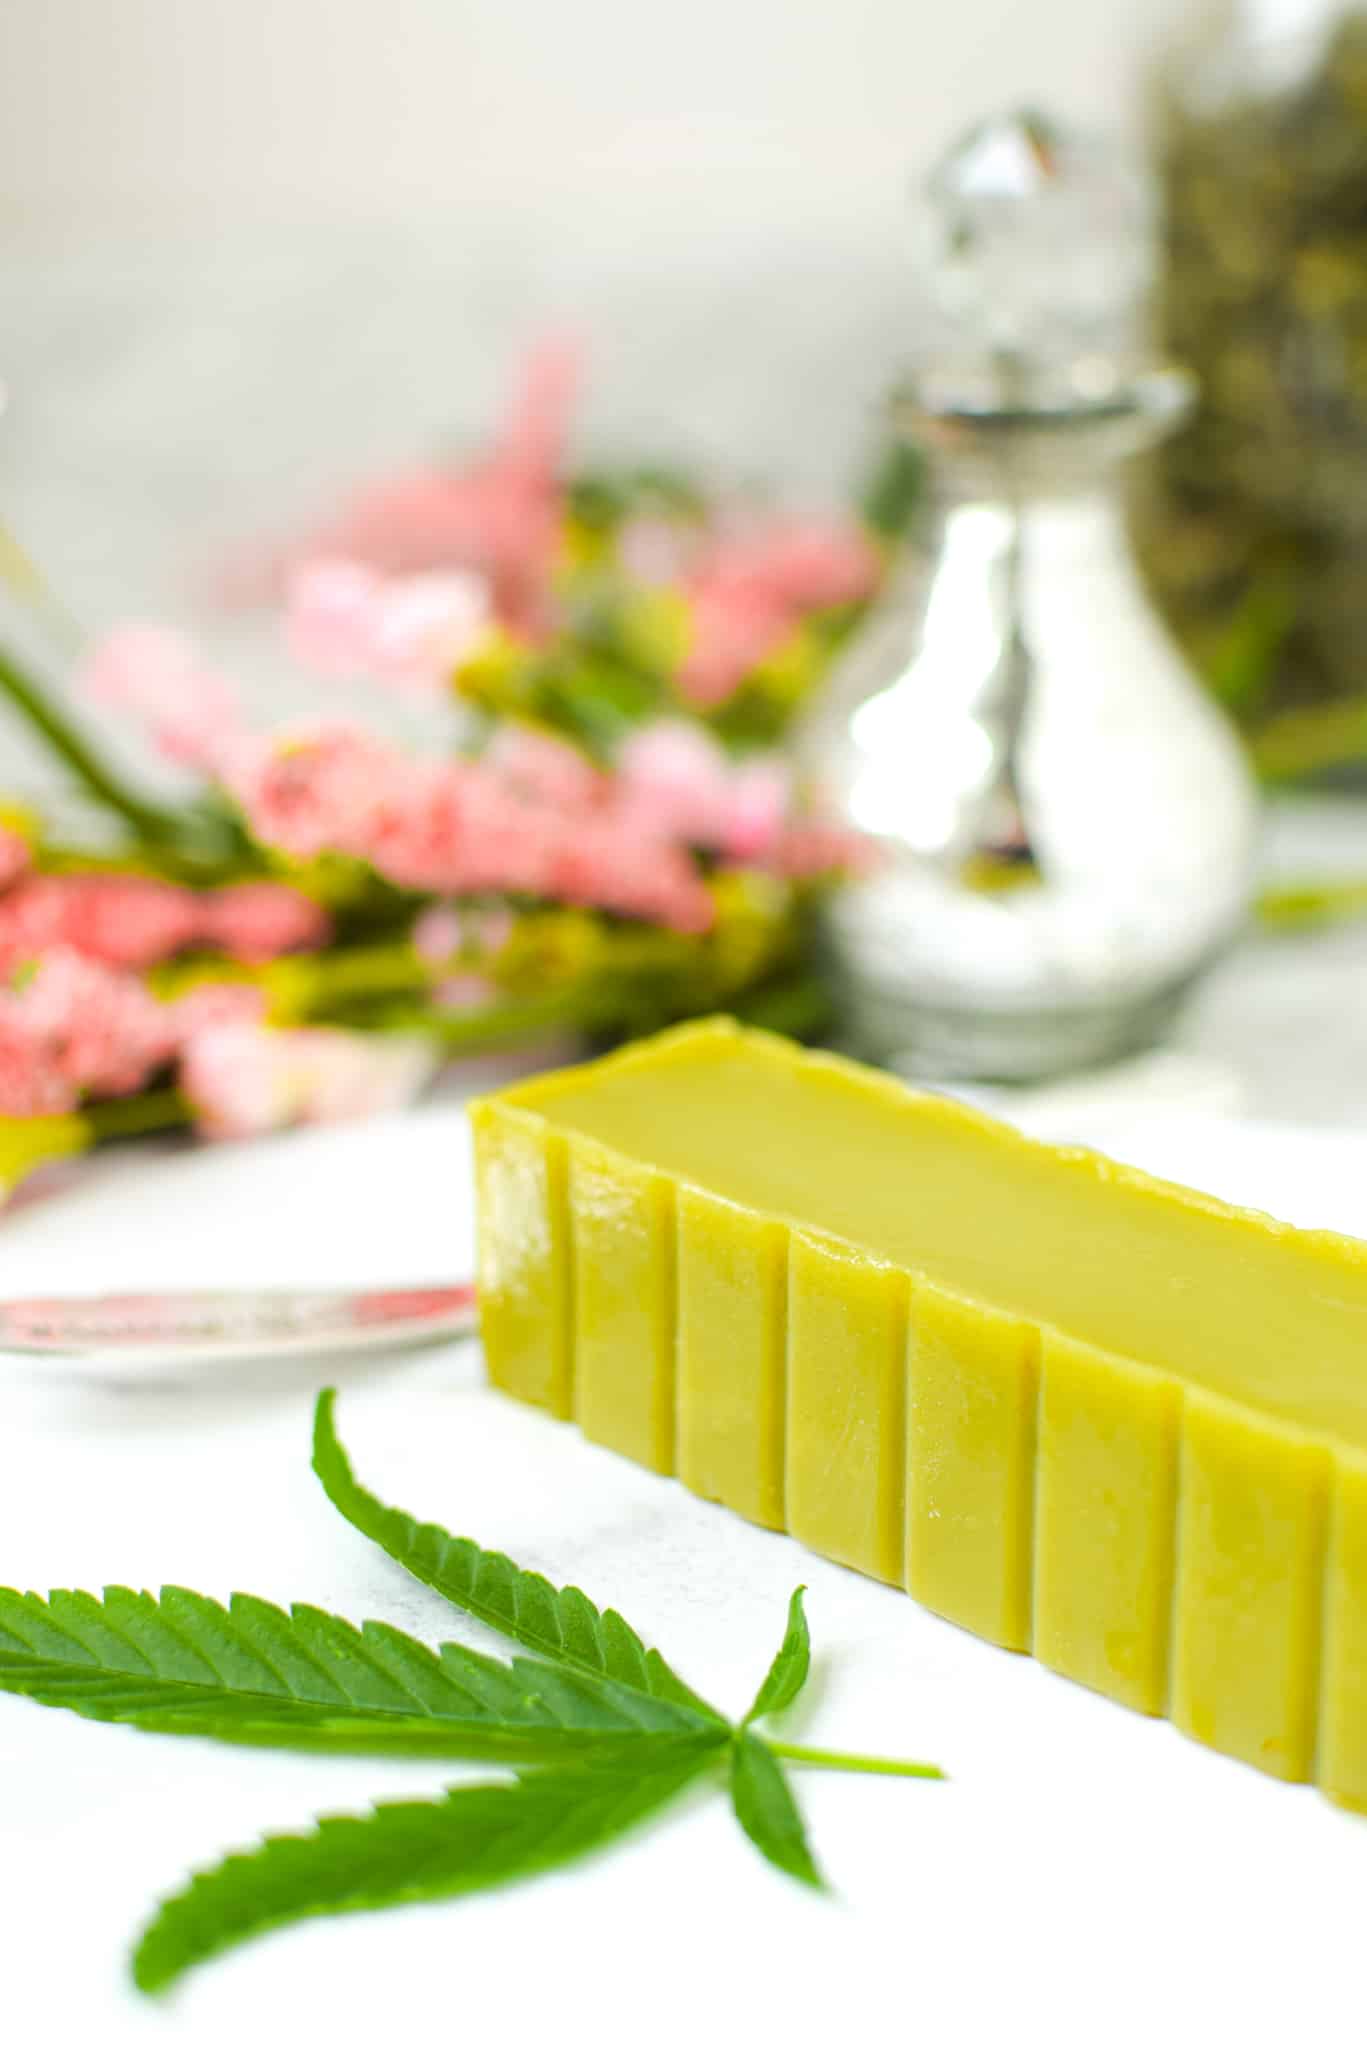
Table of Contents
- Recipe Features
- Why You Will Love This Guide
- Easy Crockpot Cannabutter » Video + Photos Recipe
- What You’ll Need
- The Step-By-Step Process
- Equipment Options
- Ingredient Options
- How Much To Use
- Storage Instructions
- How To Make Cannabutter Taste Better
- What is Cannabutter?
- Notes & Expert Tips
- Frequently Asked Questions
- Recipes To Make With Cannabutter
Recipe Features
- Discover how easy it is to make cannabutter at home
- Learn the basics: ingredients, equipment, and cooking methods
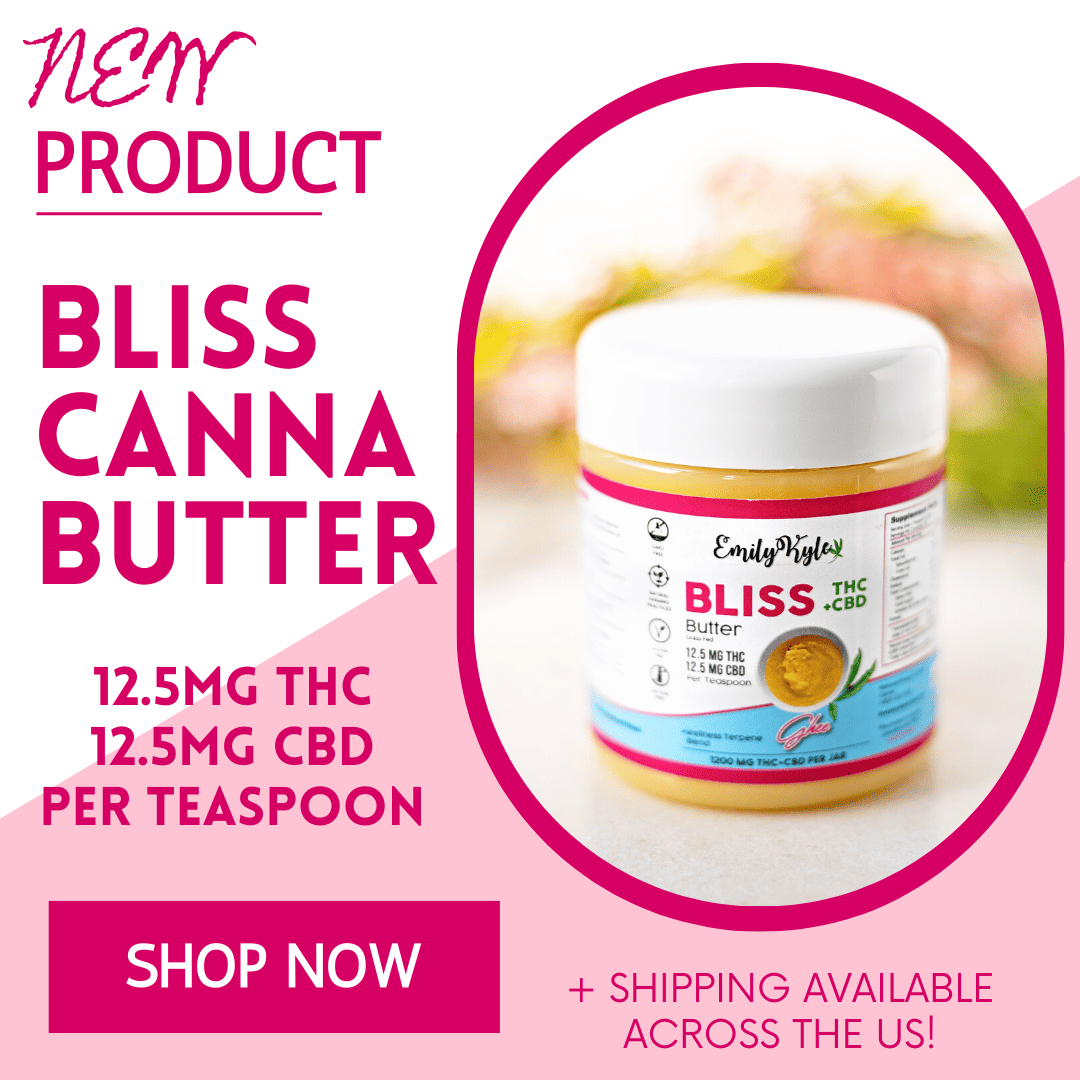
- Want to skip the work? Have my Bliss Cannabutter delivered straight to your door – now shipping across the United States!
Why You Will Love This Guide
Crockpot cannabis butter, called cannabutter, is one of the most tried and true cannabis-infused recipes.
It remains the most popular recipe in my Well With Cannabis Community, and it’s the perfect recipe to follow if it’s your first time making edibles.
Below you will find my step-by-step instructions to make cannabis butter at home with a crockpot or slow cooker, storage instructions, notes, expert tips, and thoroughly answered FAQs.
Prefer to watch this instead? Click on the video below!
Easy Crockpot Cannabutter » Video + Photos
Equipment
- Dishtowel
- Strainer or coffee filter
- Silicone Butter Mold optional
Ingredients
- 7 grams cannabis flower
- 1 stick butter or ghee
Instructions
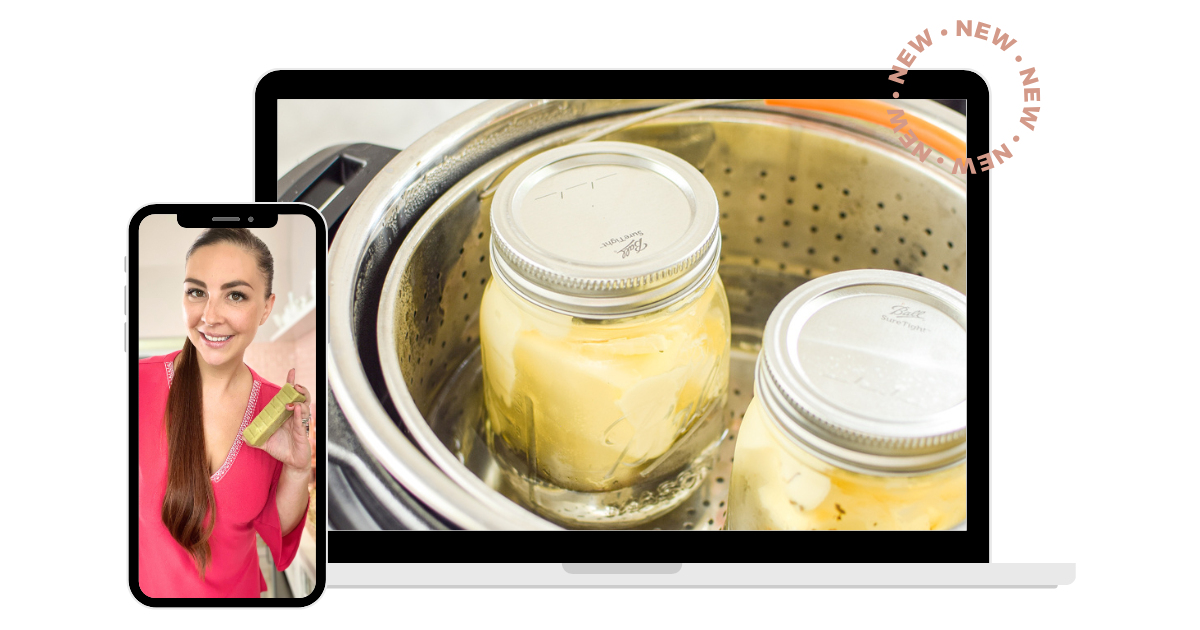
- Lay a clean dish towel down on the bottom of your crockpot to create a buffer between your mason jars and the crockpot. This will help to prevent the jars from moving or cracking during the cooking process.
- Fill your crockpot at least halfway with hot water. You want enough water to cover the sides of the mason jars you will be using. However, be careful not to add too much water, as it may overflow when you add the jars.
- Place a thermometer in the water and set the crockpot to high heat. When a temperature of around 180°F is reached, turn it down to low heat. Note: any temperature range of 160-200°F will work. You may need to adjust to medium heat, depending on your crockpot.
- While the water bath is heating up, measure your desired amount of cannabis flower. Use the flower-to-oil ratio guide if you need help deciding how much to use. Record how much flower you used, in grams, so you can calculate your final potency at the end.
- Gently break apart the cannabis buds by hand into popcorn-sized pieces and place them into a mason jar. Do not grind. Gently put the lid on the mason jar and place the jar in the oven for decarboxylation.
- After decarboxylation, remove the jar from the oven. When it is cool enough to handle, open the lid and place your butter or oil of choice inside. You may need more than one jar if you are making a big batch. If you are using more than one jar, evenly divide the ingredients between the jars for more consistent dosing.
- Wipe the rim of the jars with a clean towel, and add the lid. Tighten the metal ring to finger-tip tightness. It should be tight, but not too tight.
- Carefully place the jar into the water bath, put the crockpot lid on, and leave it alone to cook for 4 hours. You want to maintain a temperature of around 160-200°F the entire time. If you don't have a lid, aluminum foil will work.
- After the 4-hour cooking time, carefully remove the jars from the water bath and allow them to cool enough to handle. You are now done with the crockpot step and can discard the water bath.
- Prepare a straining area with new, clean mason jars and a strainer, paper filter, cheesecloth or French Press. Pour the contents of the mason jar through the strainer to separate the plant-matter from the infused butter.
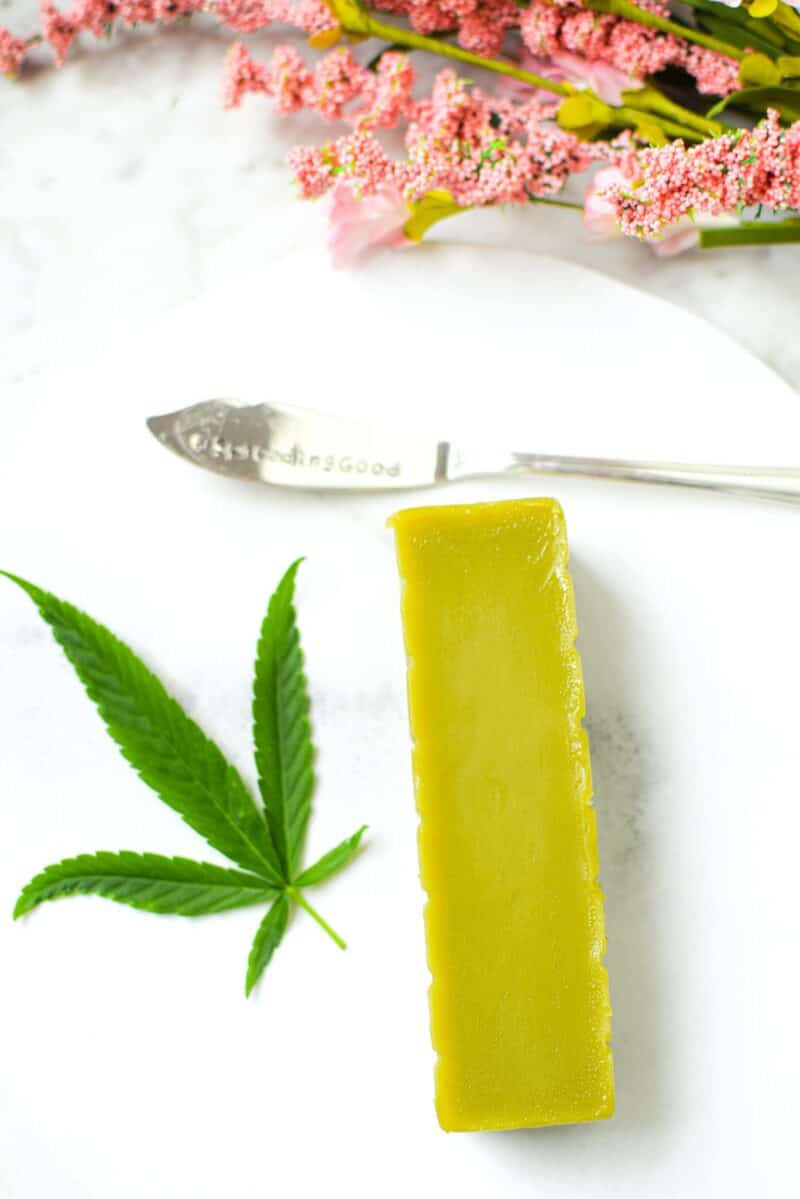
- Add the strained butter to a container you want to cool it in. A flexible container works well. You can also use butter molds. Place the container in the refrigerator and allow it to cool completely, it may take several hours.
- While cooling, the infused butter will harden and solidify, leaving a bit of liquid underneath. When completely cool, remove the solid block of butter and drain the liquid, it doesn't contain anything worth saving. Your cannabis butter is now ready to enjoy!
- Store your finished product in an airtight container in the refrigerator according to the expiration date on the butter you used. You can store it for a long time in the freezer. If you keep it in the freezer, wrap the cannabutter in individually sized portions to ensure easy and convenient dosing.
Video
Notes
- Don’t forget to save the leftover plant material, also called the pulp, to use in other recipes.
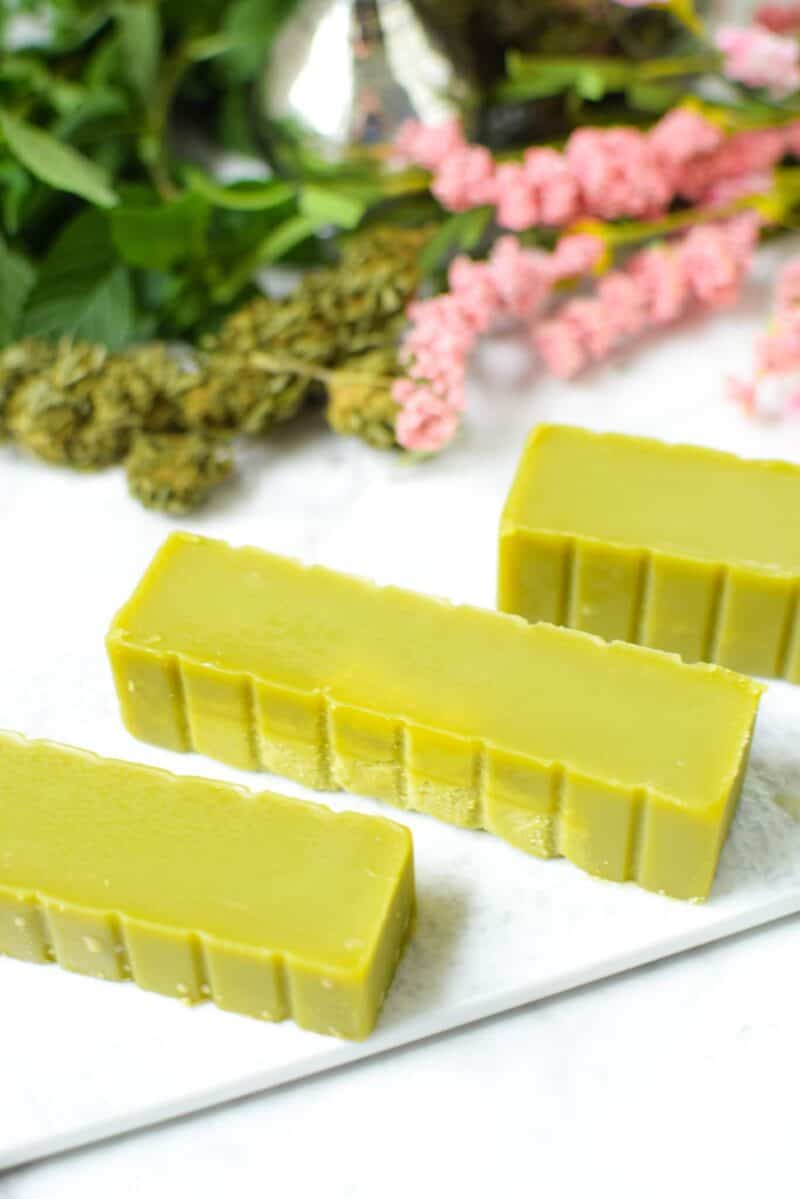
- Pro Tip: If you’re using butter molds, place the molds on a baking sheet to prevent them from spilling. Then use a spoon to get the pure, infused butter into the first two sticks of the mold. The third stick will contain the remaining infused butter and milk solids. You will then only need to remove the milk solids from one stick. The fourth stick will remain empty due to the loss of water volume during the cooking process.
- If you store the butter in the fridge or freezer, never use the microwave to soften or thaw the butter, as it could ruin the final product with too much heat. Use my guide to get your cannabutter to room temperature safely.
Nutrition
What You’ll Need
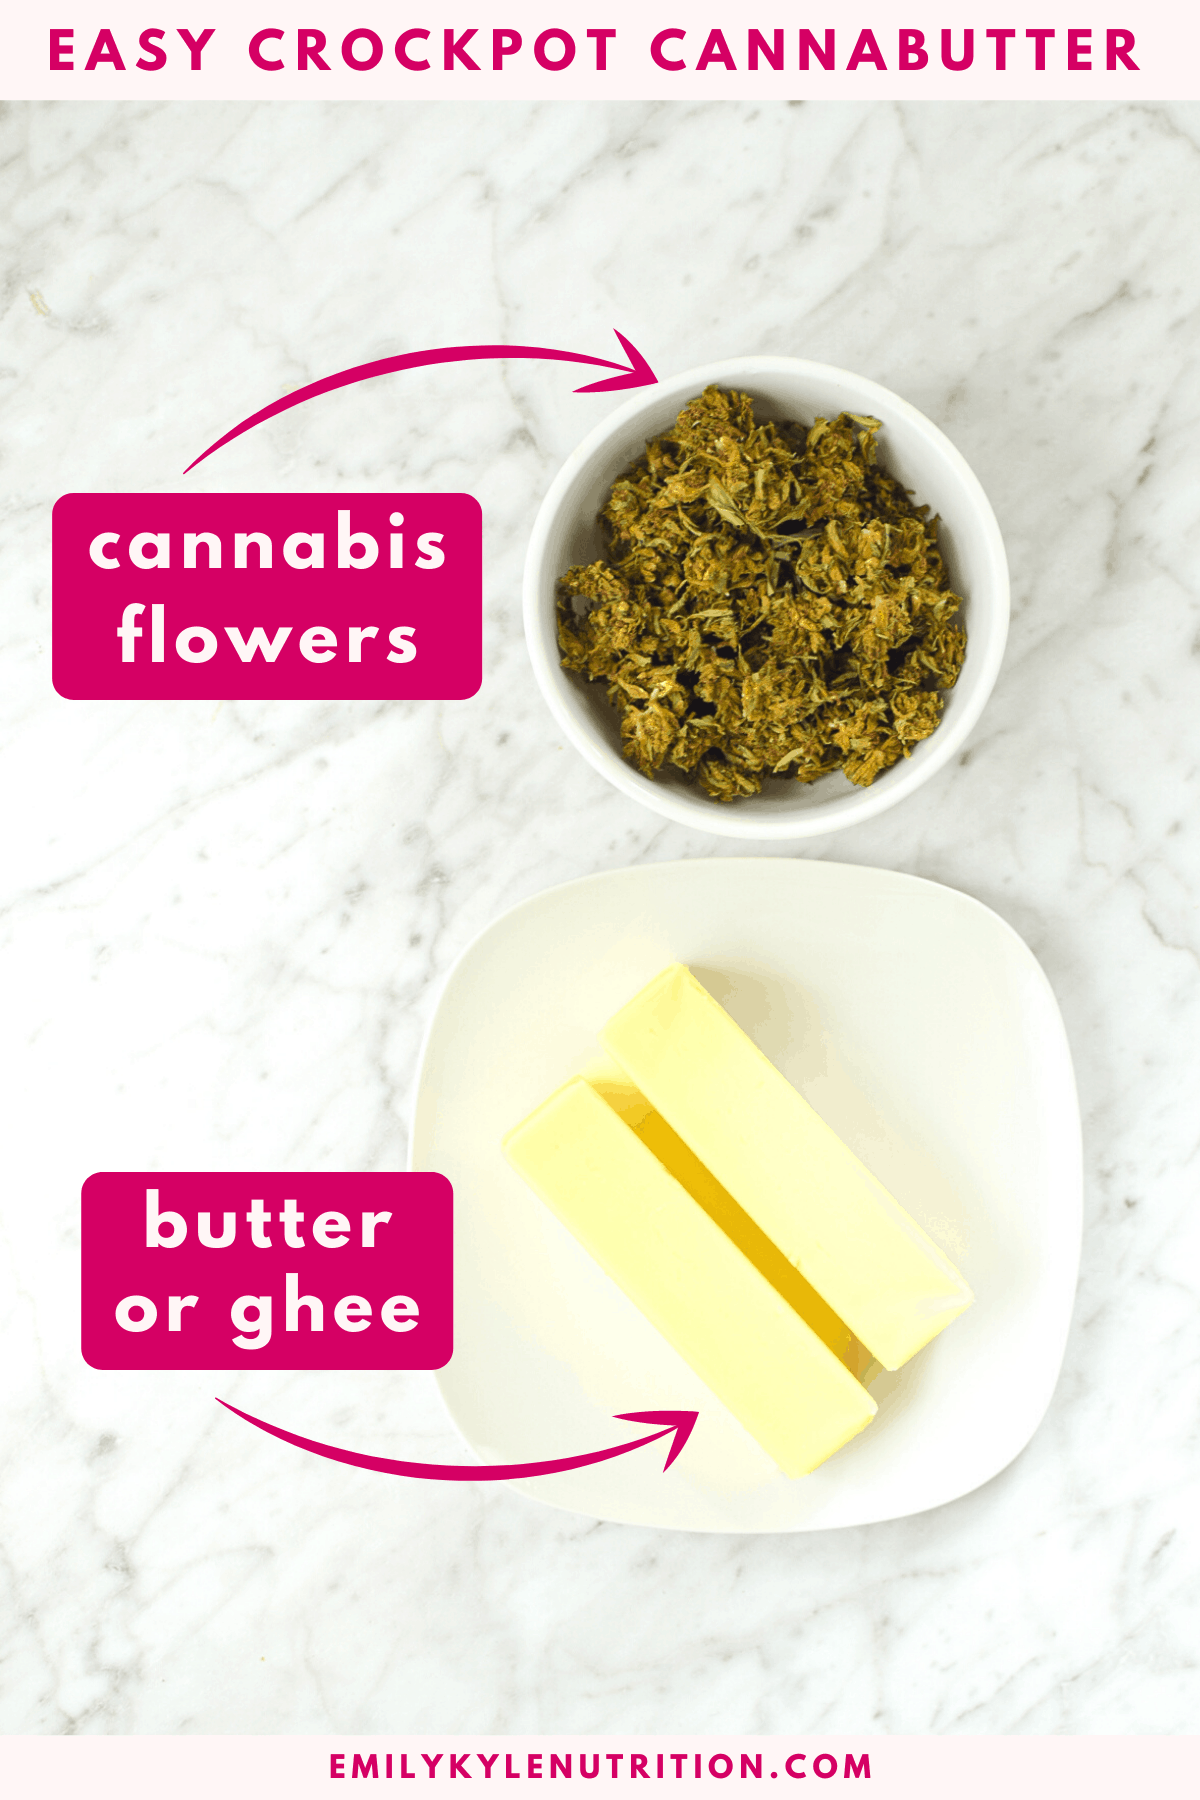
- Cannabis: The first step is to select your preference of THC, CBD, or CBG dominant flower, trim, shake, etc. You can purchase flowers from my online shop here. Then select your desired amount to use. Small batches can be made with as little as 3.5 grams; large batches can be made with up to 1 ounce of cannabis or more. Use the flower-to-oil ratio guide if you need help deciding how much to use. You do not need to grind the cannabis; break the buds into small pieces.
- Butter: The next step is to choose a type of butter: unsalted butter, clarified butter, or ghee. You can also use this infusion process to make cannabis oil with olive oil, coconut oil, MCT oil, vegetable oil, or any other carrier oil you desire.
The Step-By-Step Process
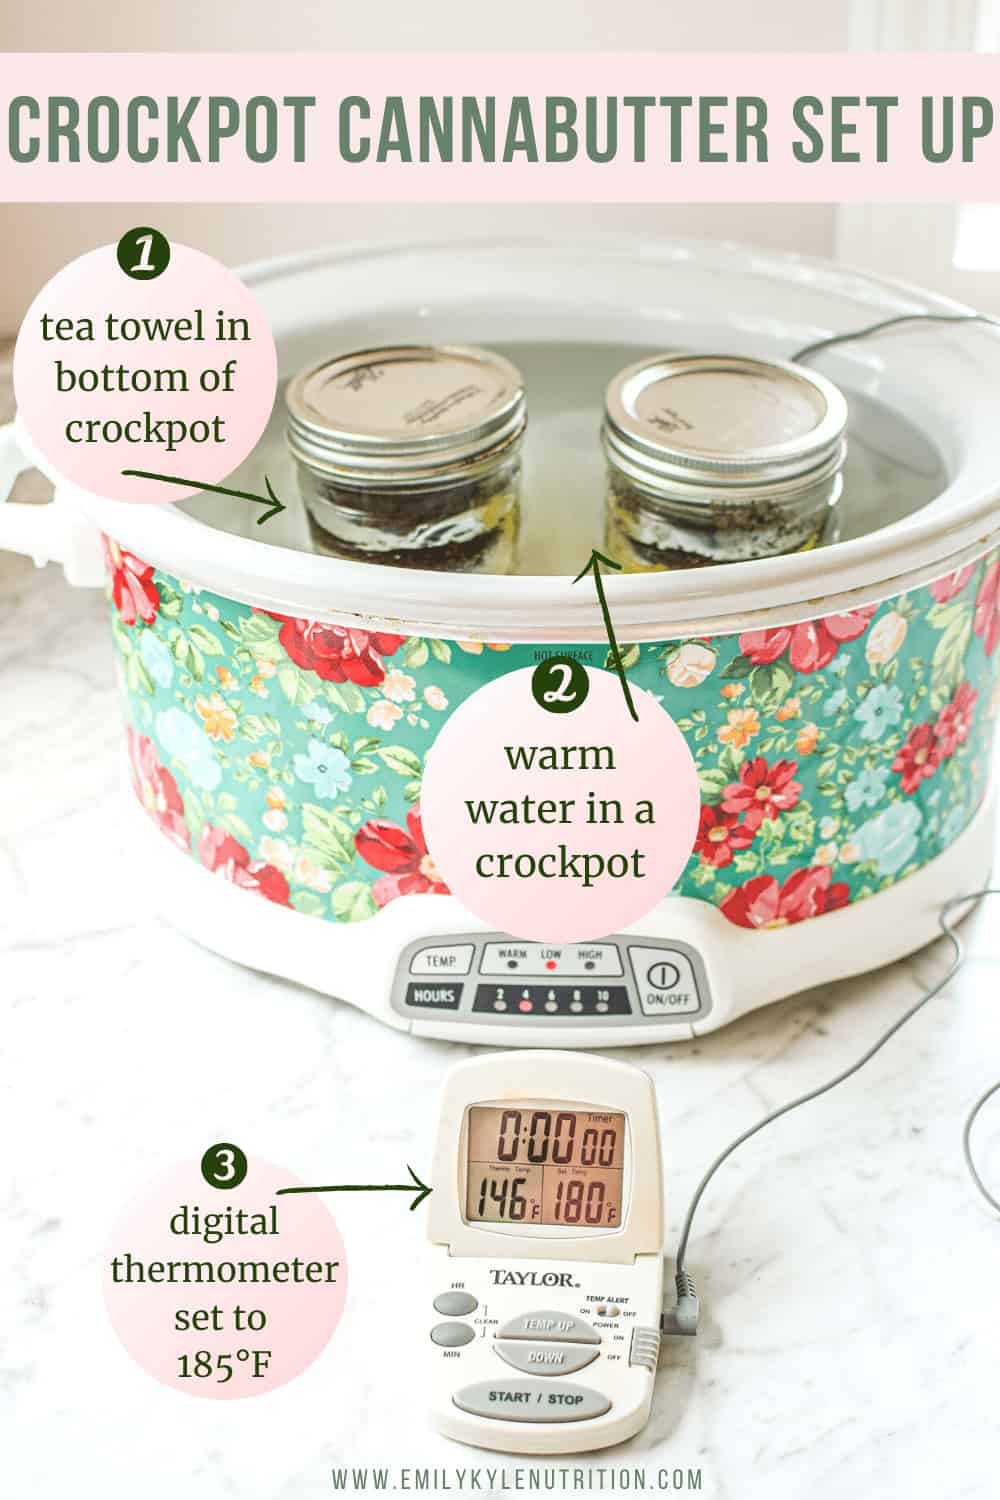
Step 1: Lay a clean dish towel down on the bottom of your crockpot. This will help to prevent the mason jars from moving or cracking during the process.
Step 2: Fill your crockpot at least halfway with hot water. You want enough water to cover the sides of the jars you plan on using. However, be careful not to add too much water, as it may overflow when you add the jars.
Step 3: Place a thermometer in the water and set the crockpot to high heat. When a temperature of around 180°F is reached, turn it down to low heat. Note: any low temperature between around 160-200°F will work. You may need to adjust to medium heat, depending on your crockpot.
Step 4: While the water bath is heating up, measure your desired amount of cannabis flower. Use the flower-to-oil ratio guide if you need help deciding how much to use.
Record how much flower you used, in grams, so you can calculate your final potency with the edible dosage calculator.
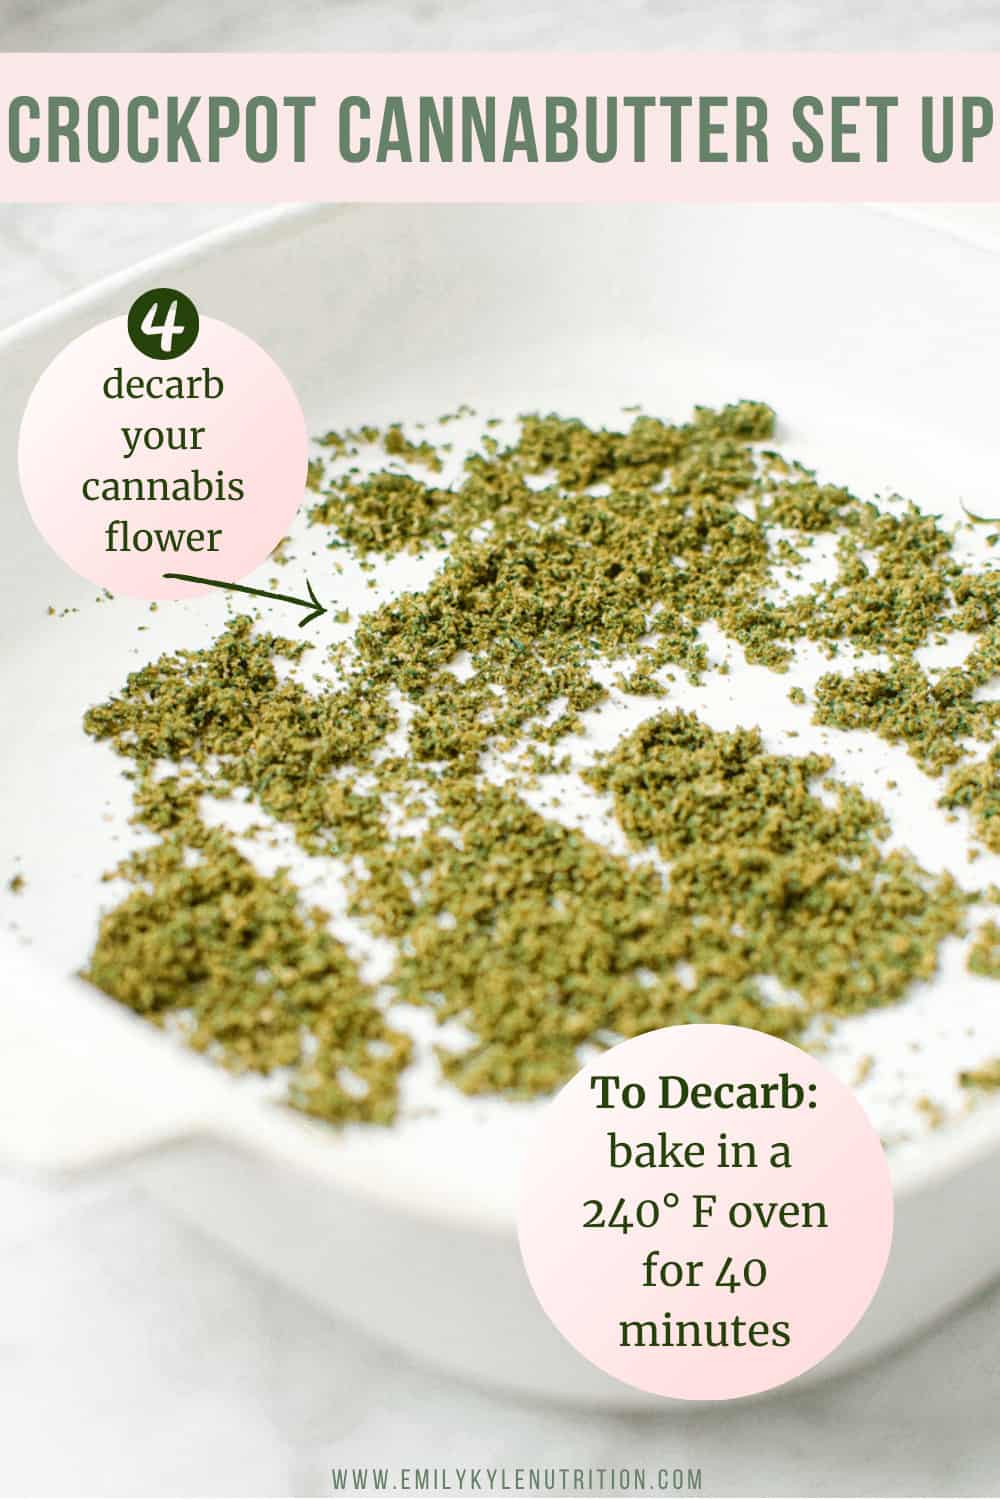
Step 5: Gently break apart the cannabis buds by hand into popcorn-sized pieces and place them into a mason jar. Do not grind.
Gently put the lid on the mason jar and place the jar in the oven for decarboxylation. The decarboxylation process is simple and can easily be done in an oven or Instant Pot.
Bake at the time and temperature needed for each specific cannabinoid; see below.
Decarb Times
- THCA → Δ9-THC – bake at 240°F/116°C for 40 minutes
- CBDA → CBD – bake at 240°F/116°C for 90 minutes
- CBGA → CBG – bake at 220°F/105°C for 60 minutes
- Δ9-THC → CBN – bake at 240°F/116°C for 180 minutes
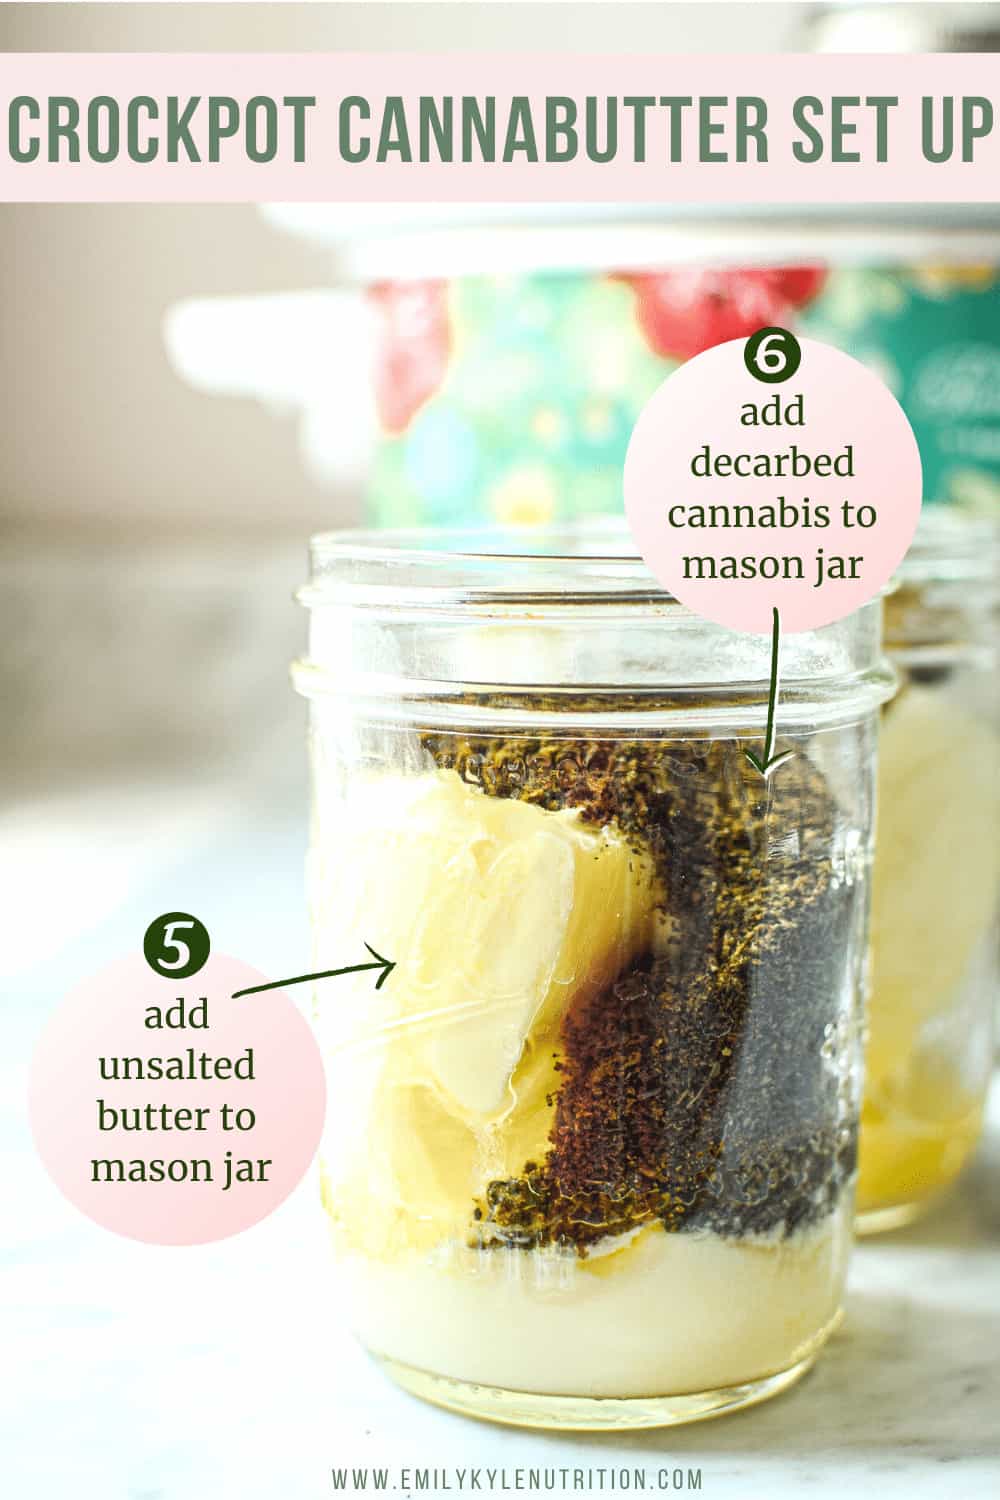
Step 6: After decarboxylation, place your butter of choice into a mason jar or another jar with a tight sealing lid.
You may need more than one jar to make a big batch.
Step 7: Add your decarbed cannabis to the jar.
If using more than one jar, evenly divide the ingredients between the jars for more consistent dosing.
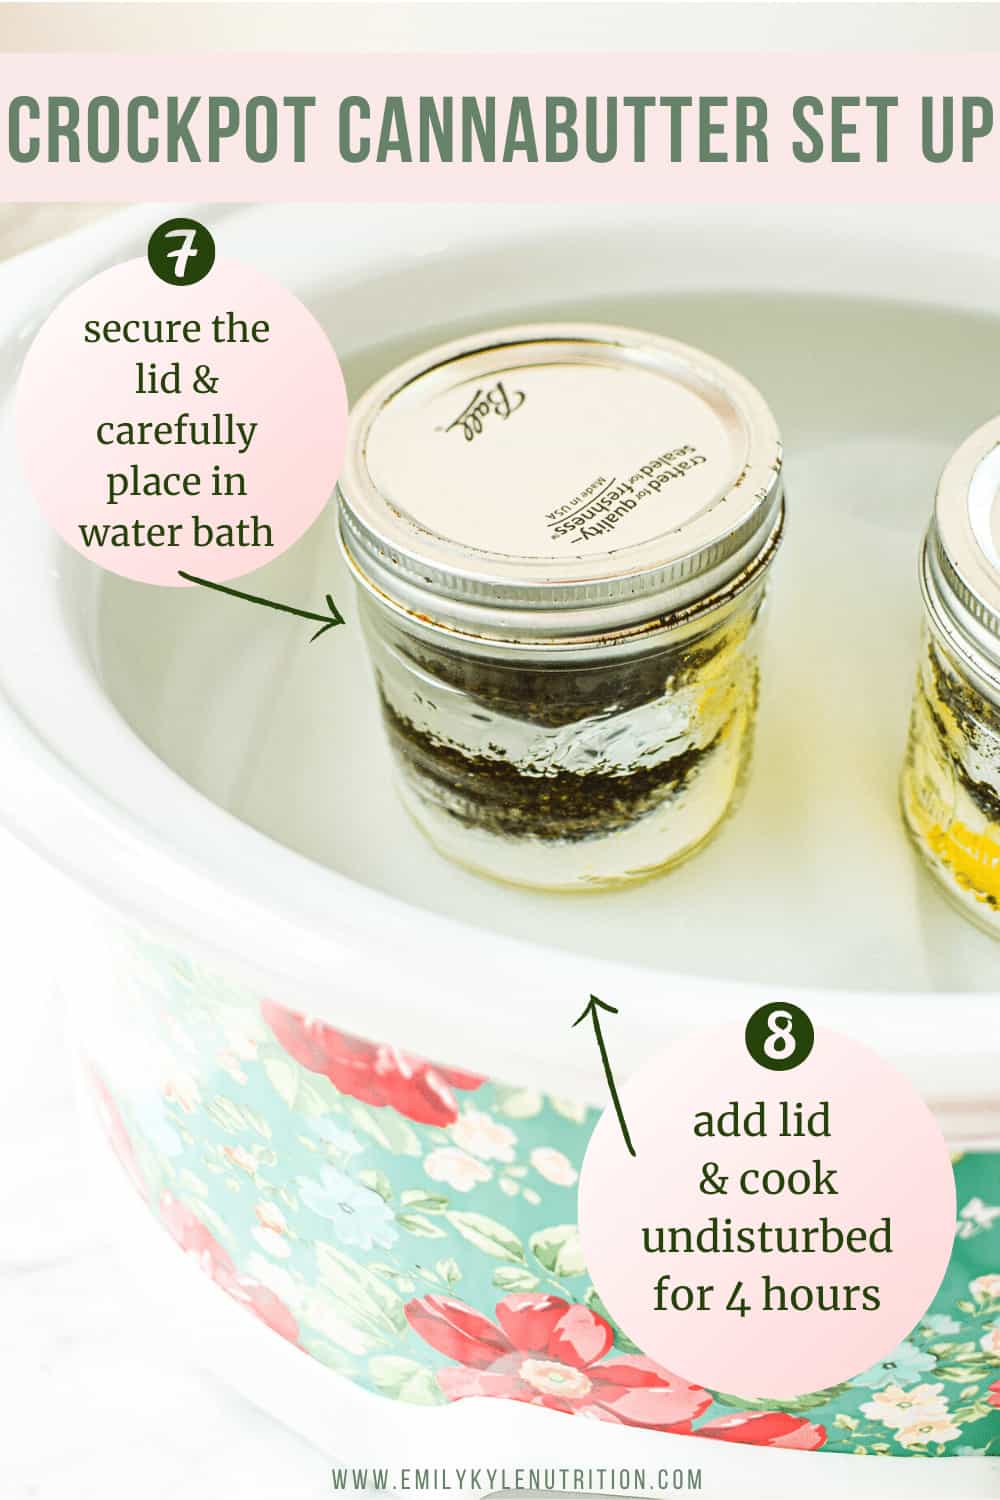
Step 8: Wipe the rim of the jars with a clean towel, and add the lid.
Tighten the metal ring to finger-tip tightness. It should be tight, but not too tight.
Step 9: Carefully place the jars into the water bath, put the crockpot lid on, and leave it alone to cook for 4 hours.
If you don’t have a lid, aluminum foil will work.
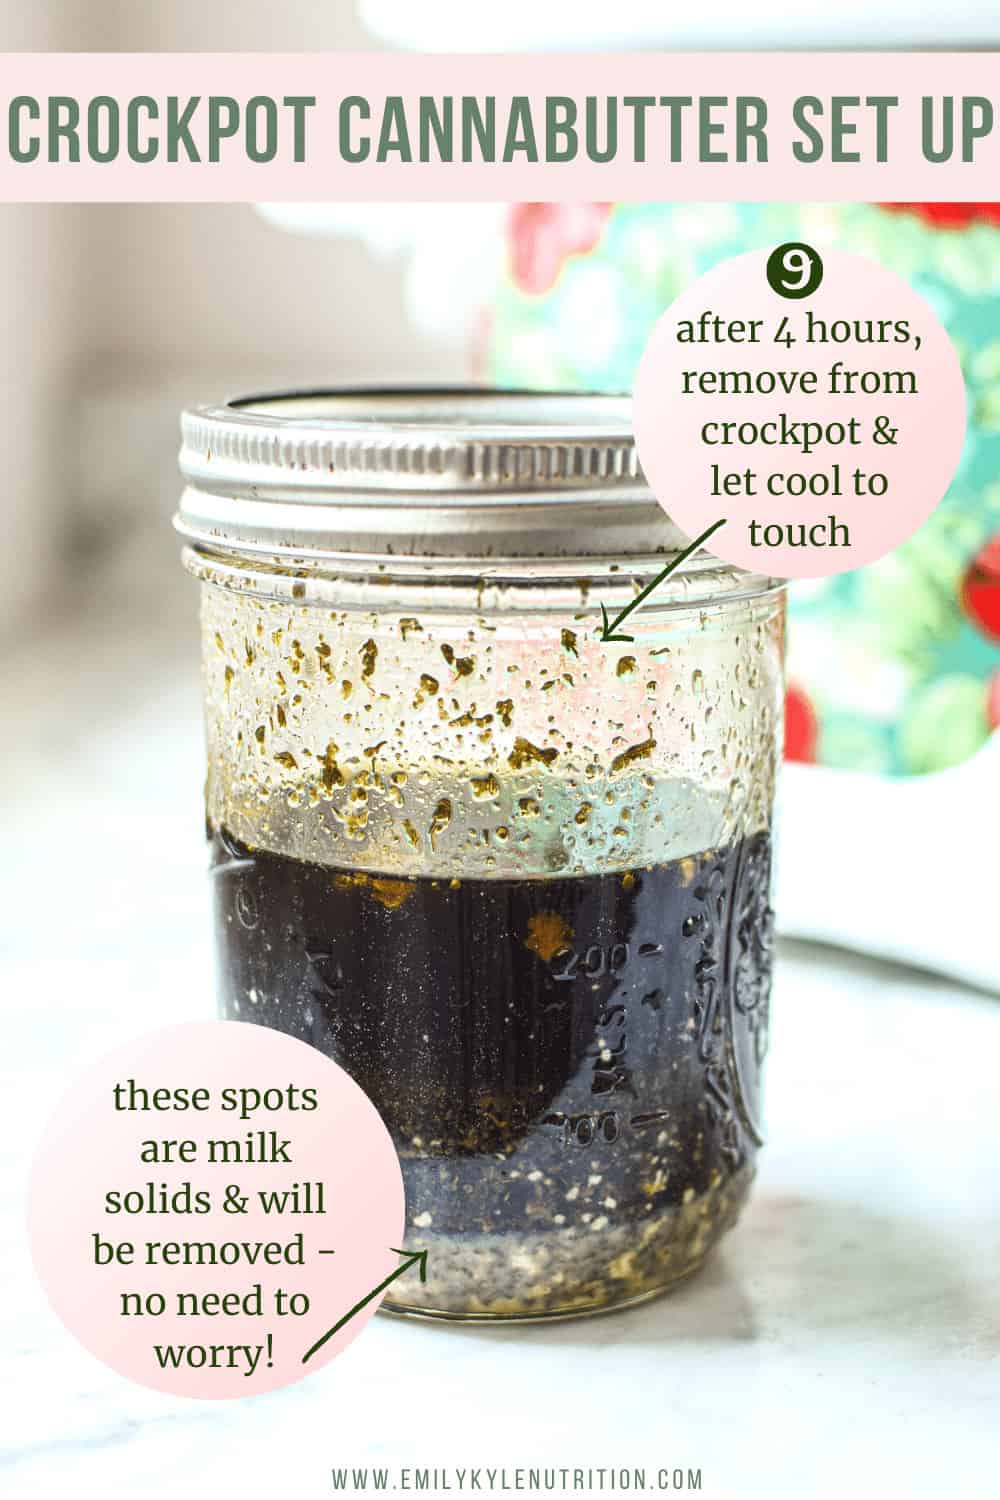
Step 9: After the 4-hour cooking time, carefully remove the jars from the water bath and allow them to cool enough to handle.
You are now done with the crockpot step and can discard the water bath.
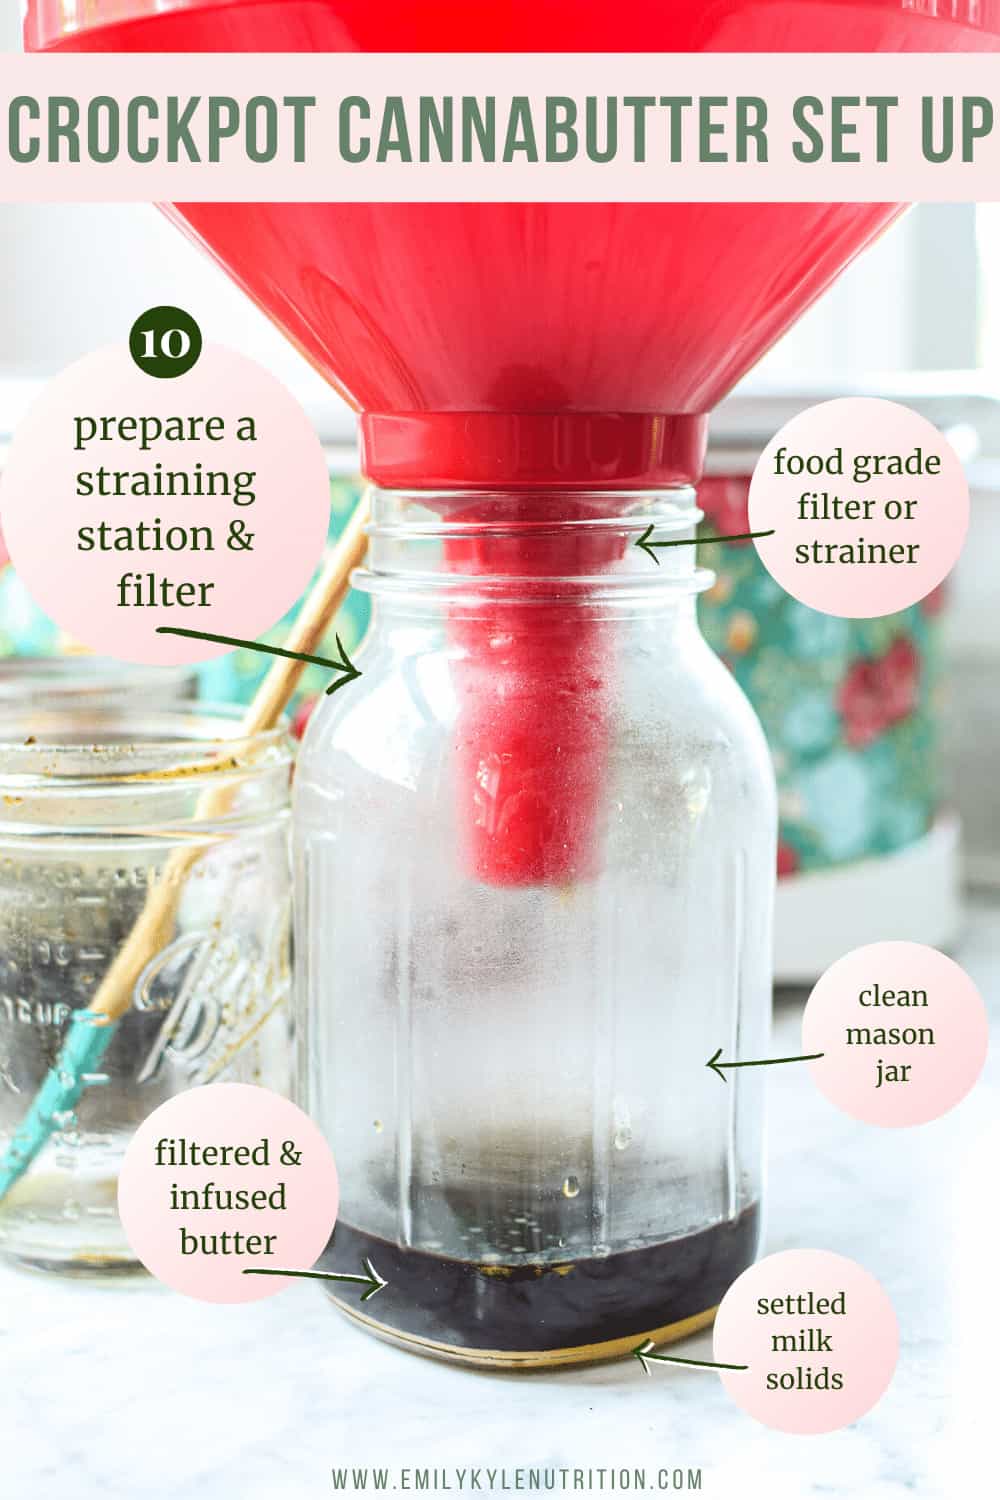
Step 10: While the butter is cooking, prepare a straining area.
You can use a coffee filter with a funnel, a fine-mesh strainer, cheesecloth, or a French press. I do not recommend using anything not food-safe, like pantyhose.
Pour the melted cannabutter through the strainer to separate the plant matter from the infused butter.
Don’t forget to save the leftover plant material, also called the pulp, to use in other recipes.
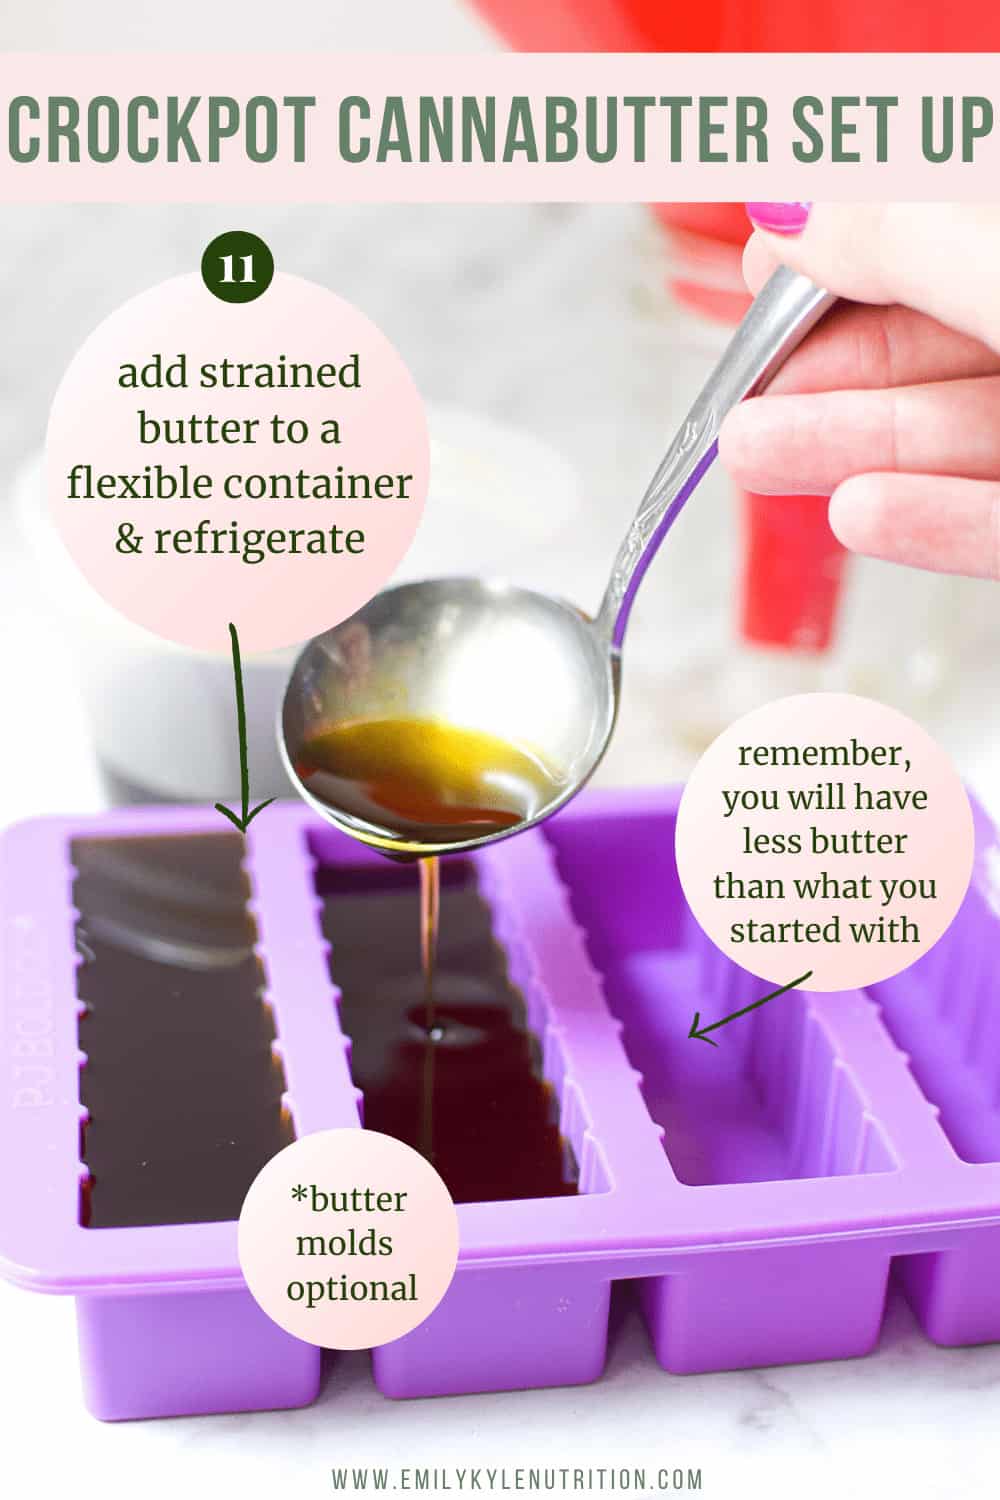
Step 11: Add the strained butter to a container you would like to cool it in. A flexible container works well. You can also use butter molds.
Place the container in the refrigerator and allow it to cool completely; overnight is ideal.
Pro Tip: If you’re using butter molds, place them on a baking sheet to prevent them from spilling.
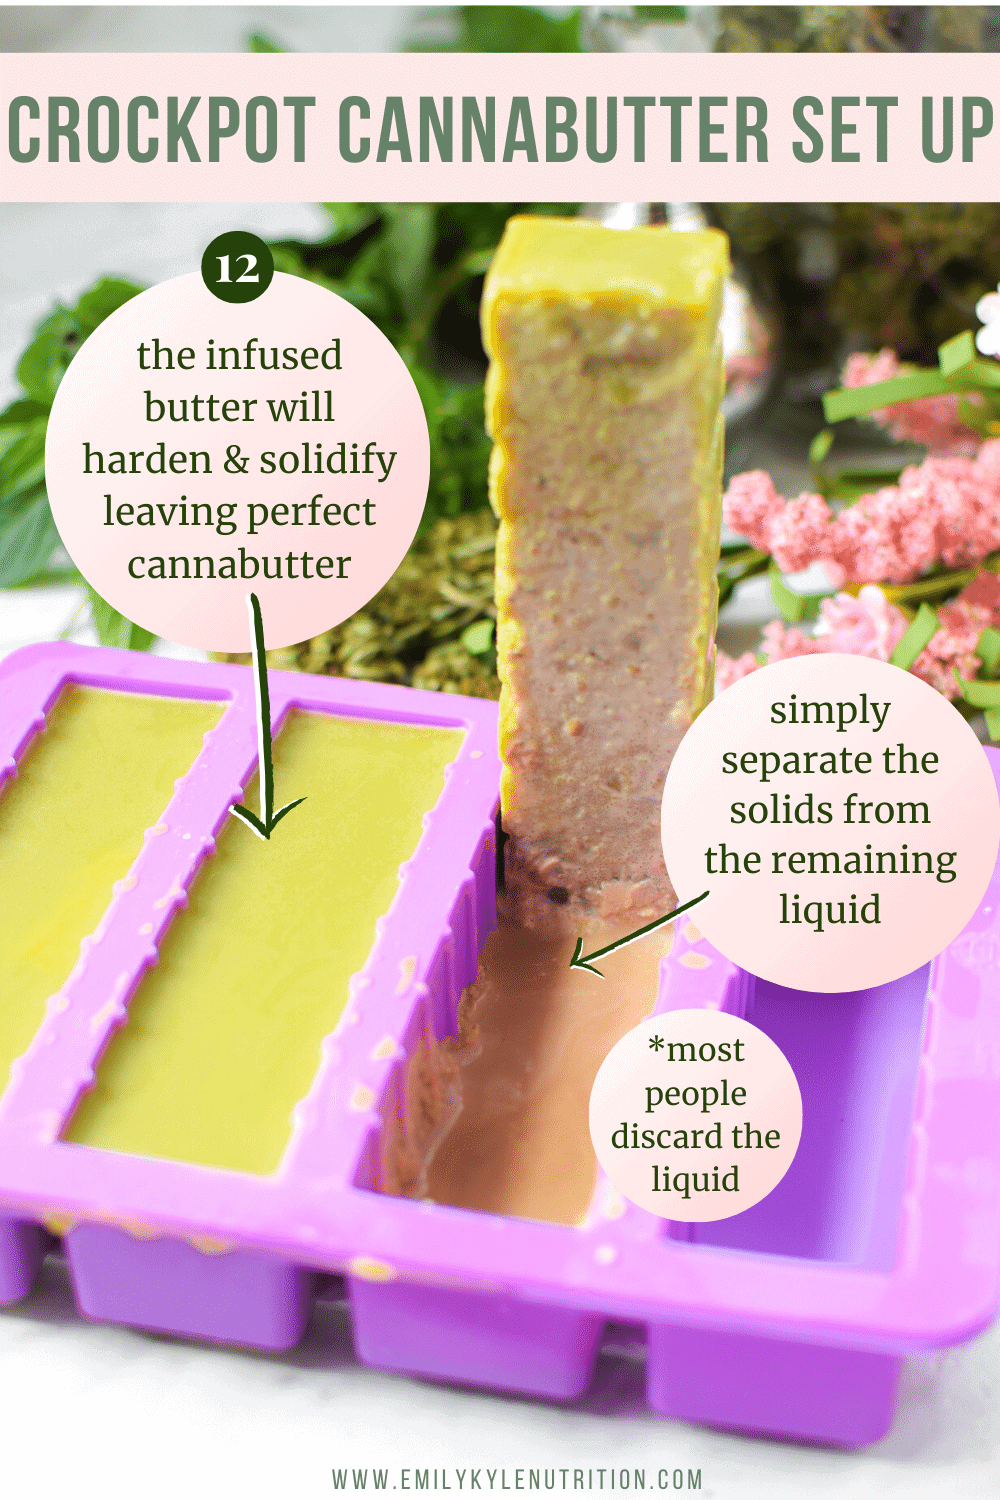
Step 12: While cooling, the infused butter will harden and solidify, leaving a bit of liquid underneath.
When completely cool, remove the solid block of butter and drain the liquid; it doesn’t contain anything worth saving.
Your cannabis butter is now ready to enjoy 😁
Equipment Options
With so many cannabutter recipes, I know picking the right infusion process can feel overwhelming.
I want you to rest easy knowing they all follow the same basic process.
First, it’s time for decarbing, which you can do in an oven or Instant Pot.
This step activates the CBD and THC, and once this is complete, then you can start the water bath process.
My personal favorite way to make the water bath? The crockpot because it is an easy set-it-and-forget-it option! Find the printable recipe below.
Don’t have a crockpot? No worries, you can always use:
Remember, there is no one best way, just a way that works for you!
Other than that, you do not need anything fancy to make cannabutter at home, but having some of these items before starting will be helpful.
- Dishtowels
- Mason Jars
- Digital Thermometer
- Digital Scale
- Strainer or coffee filter
- Silicone Butter Mold
Ingredient Options
Two ingredients are necessary to make cannabutter: cannabis and butter.
However, you have many different options to choose from when picking which type of butter and what kind of cannabis you want to use.
Here, we will explore all the options you can choose from and the next steps.
SAVE THIS GUIDE 💌
Types of Butter
When making DIY cannabutter, you will quickly realize that the type of butter you use will impact your final product.
If you use regular butter, like salted butter or unsalted butter, you will encounter some water and milk solid separation at the end.
While nothing is wrong with it, regular butter requires an extra step of letting the mixture cool and draining off the liquid at the end.
To save time and energy and to get better quality cannabis butter, I recommend using ghee or clarified butter instead.
You can also follow this method to infuse any type of cannabis oil you desire, such as:
- Coconut oil
- MCT oil
- CBD oil
- Vegetable oil
- Any other cooking oil
Types of Cannabis
The great thing about making your own weed butter is that there are so many different forms of cannabis you can use, from flowers to concentrates.
The type of product you choose will most impact the potency and taste of your final recipe.
In a general sense, below are the common cannabis infusion options, ranging from most potent to least potent:
- Concentrates
- Kief
- Flower
- Trim
- Fan leaves
- Stems or stalks or roots
How Much To Use
One of the most important questions is: How much cannabis should I use?
How much cannabis and how much butter you use will have the greatest impact on the final potency.
For example, if you infused seven grams of decarbed cannabis into two sticks of butter, your final product will be twice as potent as if you infused the same amount into four sticks (or a pound) of butter.
Thankfully, I have created a printable flower-to-oil ratio guide to help you decide how much to use.
In this chart, you will find a range of options to start with, from a ⅛th to a full ounce of cannabis.
There is also a doubled-up option for those who have a high tolerance.
The first step is to select how much cannabis and how many sticks of butter you want to use.
Be sure to record the amount of cannabis you use if you want to calculate the final dose.
From there, you can use my edible dosage calculator to input the values and get a rough guesstimate of the potency and how much THC is in your cannabutter.
How To Make More Potent Cannabutter
- Choose a higher-quality flower that contains more % THC, CBD, etc
- Add decarbed kief or cannabis concentrates like distillate or FECO
- Make kief cannabutter
- Use more flowers (increase from 1 ounce to 2 ounces or more).
- Use less butter (decrease from 1 pound of butter to 1/2 pound).
- Have you already made your cannabutter? Learn how to fix weak cannabutter here
Storage Instructions
After making cannabutter, you will want to store your finished product in an airtight container in the refrigerator according to the expiration date on the butter you used.
You can store it for a long time in the freezer. If you keep it in the freezer, wrap the cannabutter in individually sized portions to ensure easy and convenient dosing.
Learn more about how to store edibles here.
If you store the butter in the fridge or freezer, never use the microwave to soften or thaw it, as the unpredictable high heat could ruin the potency of the final product.
Use my guide to get your cannabutter to room temperature safely.
How To Make Cannabutter Taste Better
Some people find themselves overwhelmed by the taste of the cannabis in the butter.
If you want to reduce the taste of cannabis, you must work to reduce the amount of chlorophyll in the end product.
Here are a few different options to try:
- Opt for dried cannabis when possible. Fresh or raw cannabis contains much more chlorophyll than dried.
- Select cannabis buds or cannabis flowers over other parts of the plant. Fan leaves, trim leaves, sugar leaves, or shake will all contain more chlorophyll.
- Do not grind the cannabis before adding it to a recipe. Ground cannabis, especially in a fine powder, will release more chlorophyll.
- Decide how much weed you really need to add—more product = more taste.
- Try a different extraction process. The QWET method is excellent when making tinctures.
- Opt for other cannabis products like concentrates which have little to no taste.
- Be careful when straining, as crushing the plant matter may release more chlorophyll into the finished product. If you’re using a fine mesh strainer or cheesecloth, be sure not to squeeze or crush the plant material during the process.
- Watch your infusion times. Super-long infusions, over 8-24 hours long, will result in more green infusions. Four hours is enough time for infusion.
- Try “washing” your cannabutter. This method combines the weed butter and a few cups of water or more over the stove. Bring to a full boil, reduce the heat to low, and keep on a low simmer at a low temperature for 2-3 hours. This method is said to be a good way to remove more chlorophyll and green taste.
What is Cannabutter?
Cannabutter is a cannabis-infused butter for making your favorite edible products like cookies, brownies, and cakes.
You can easily make cannabutter at home by mixing decarbed cannabis with butter over heat to extract the plant’s powerful properties.
During the infusion process, the plant’s cannabinoids are released into the high-fat content of the butter.
When cannabinoids are extracted with fat, they are more easily absorbed and thus more bioavailable in our bodies1.
While it takes some time and effort to create cannabutter, the result is worth it if you want to save money and have control over your cannabis-infused edibles.
Switching from smoking to edibles is another positive benefit for those looking to improve their overall health and wellness.
Notes & Expert Tips
- You don’t need perfection in a home kitchen. Many variables can affect your final outcome; finding the best method for you is a learning process.
- If you’re nervous about making a cannabutter recipe for the first time, know that you can always make a small amount to test your process before committing to a full batch.
- If you’ve never cooked with cannabis, consider starting with CBD flower to make CBD butter. Experimenting with a more affordable option means less heartache if an accidental mistake is made along the way.
- Be mindful of how much cannabis you add. Before starting, use my edibles dosage calculator and dosing guide to determine how much you should use.
- If this process is overwhelming and too much for you, you can purchase cannabutter and have it delivered directly to your door (no medical card required!)
Frequently Asked Questions
This will depend on the type and strain of cannabis flower you start with, but many people anecdotally report that cannabis butter can help with pain and improve sleep.
If you’re new to cannabis edibles, I recommend checking out this safe dosing guide before starting your edible cannabis journey. You don’t want to consume too much THC and accidentally have a bad experience.
If you do not clarify your butter first, you will notice white particles on your cooked butter the next day. They are milk solids. These solids will be removed when you strain and discard the excess water.
You should expect a volume loss of 15-25%. This occurs due to the milk solids’ removal and the excess water’s evaporation. Volume loss is important to remember, especially if you try to make a small batch to use in a particular recipe.
Place a heavy heat and water-safe item on the jar’s top to weigh it down; a clean rock works well. Also, an occasional mishap can result in a broken or cracked jar – it happens to the best of us without rhyme or reason. To help prevent this, use a mason jar specifically meant for canning or cooking. Do not use leftover glass jars from other products. Also, use a brand-new lid so you know the seal is good and the contents inside will stay dry.
No. Color doesn’t have any correlation with potency. A very green butter is simply cannabis butter with a lot of chlorophyll, the green pigment that has also been extracted from the plant. You will have a deeper green color if you use trim or fresh buds.
Use coconut oil in place of butter.
At this time, for the most accurate results, we recommend lab testing. If you know the potency of the marijuana flower you are starting with, you can use the edible dosage calculator to get a guestimate.
Absolutely! If you’re looking for an easy solution, skip the local dispensary and try my Bliss Cannabutter made with high-quality ingredients. It delivers exceptional flavor with 12.5 mg of THC per serving. Plus, it’s delivered straight to your door – no fuss, no mess!
Recipes To Make With Cannabutter
Now that you have your cannabutter made, it’s time to try some delicious recipes. Check out my full selection of amazing cannabutter recipes here.
In the mood for something sweet? I have a sweet cannabutter recipe guide, too!
Cannabis Dessert Recipes
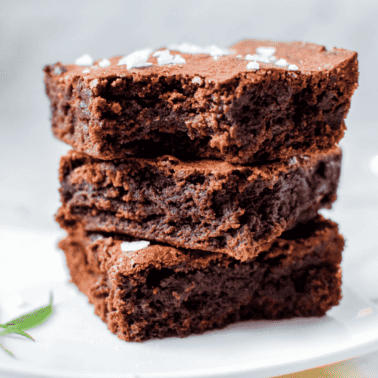
How to Make Weed Brownies with Cannabutter or Oil

Cannabis Dessert Recipes
Easy Cannabis Chocolate Chip Cookies
Cannabis Dessert Recipes
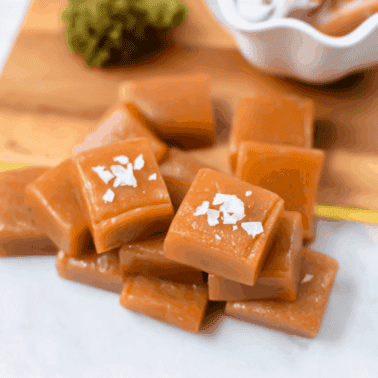
Chewy Homemade Cannabis Caramels
Cannabis Dessert Recipes
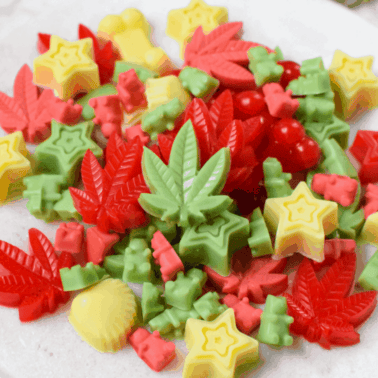
Cannabis Gummies Made with Oil or Butter
Cannabis Dessert Recipes
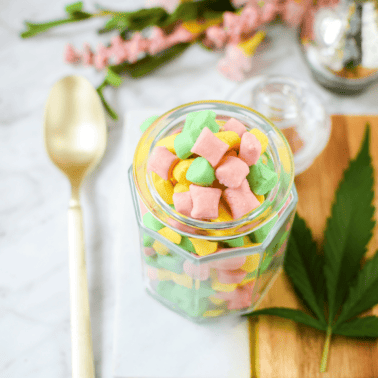
Sweet, Creamy Cannabis Buttermints
Cannabis Sides & Snack Recipes
Sweet & Savory Cannabutter Board


Could I already wrap the decarbed buds in cheesecloth and stick in mason jar so I don’t have to strain it?
Yes Christian, you can absolutely wrap your decarbed buds in cheesecloth before adding them to the mason jar! This method works well to avoid the need for straining later. Just make sure the cheesecloth is secured tightly so no plant material escapes during the infusion process. It’s a great way to save time and keep things mess-free!
What do you do with leftover pulp from making butter
Hey Teresa! I have many ideas outlined here in this guide 😀
This canna utter is absolutely fabulous and good for someone like me who is unable to smoke as I have emphysema
Thank you for sharing your experience, Debra! I’m so glad to hear that the cannabutter is working well for you. It’s a great alternative for those who prefer not to smoke or can’t due to health reasons like emphysema. Wishing you the best on your wellness journey. 🌿
How long and at what temperature do you put the weed in the oven to decarb? Have you ever had issues with the mason jar breaking or exploding from being in the oven?
Hi Midori. To decarb your THC-dominant cannabis, the recommended time and temperature are 240°F for 40 minutes. For more detailed information, check out this guide: https://emilykylenutrition.com/cannabis-decarboxylation/.
While decarbing in a mason jar is a popular method, it’s important to note that Ball canning jars are not designed for oven use. If the lid is sealed too tightly, the jar could crack, break, or even explode. Instead, we recommend using an oven-safe baking dish with a lid for a safer alternative. Hope this helps!
Can you explain why you don’t grind the flower before decarbing? I’ve always done that.
Great question, Katelyn! Grinding the flower before decarbing is a common practice, but it’s not necessary. In fact, leaving the flower in larger pieces preserves more cannabinoids and terpenes during the decarbing process. Grinding causes you to lose terpenes and cannabinoids and then increases surface area during decarb which can lead to more evaporation of these valuable compounds. For more detailed info, check out this article: https://emilykylenutrition.com/should-you-grind-cannabis/. Hope this helps!
I love using your guides. They have been very helpful on my cannabis wellness journey
Hi Lisa. We’re thrilled to hear that our guides have been helpful on your cannabis wellness journey. If you have any questions or need further assistance, feel free to reach out. Happy exploring!
I like your article but you seem so young trying to teach an old hippie about cannabis. But I really like what you are doing to teach and train people how to use cannabis. Peace oh I started growing weed in 1975.
Thank you for your feedback, Michael! It’s great to hear from someone with so much experience. We’re glad you like the article! Peace and happy growing!
Can you use infused oil instead of butter in your recipes and if so how much do you need
Hi Brandi. You can absolutely use infused oil as a substitute for butter in most recipes! Generally, you can use a 1:1 substitution ratio. For information on how much flower to use, I recommend checking out our Flower-to-Oil Ratio Guide here: Cannabis Flower-to-Oil Ratio Guide & Printable Chart. Happy cooking!
To clarify, i heat water to desired temp, switch to slow cooker and leave for 4 hours? Do i need to keep an eye on temp throughout?
Hi James. The beauty of using a slow cooker is that it maintains a consistent low heat, which is ideal for infusing the butter with cannabis. Therefore, once you’ve set the slow cooker to low heat, it’s not necessary to keep a constant eye on the temperature.
However, it is always a good idea to check in occasionally to ensure everything is going smoothly. If you notice the mixture is bubbling too vigorously, you may need to adjust the heat setting or add a little more water.
I use a citrus squeezer on the pulp. works wonders.
Hi Dave. That is an excellent tip. Thank you for sharing with our readers!
Hey thanks for the great work
Question, can i get a more potent butter by leaving it in water bath for more than 4 hours? Say 6 ?
Hi Mehrbod. When it comes to the infusion time of cannabutter, it’s a common misconception that a longer duration will yield a more potent result. In reality, extending the process beyond the recommended 4 hours doesn’t significantly increase the cannabinoid content, but rather extracts more plant matter and chlorophyll into your butter. This leads to a stronger, grassy flavor that many find undesirable. It’s a bit like steeping tea leaves for too long; after a certain point, you’re not extracting more of the good stuff, but rather introducing elements that take away from the overall taste and enjoyment.
So, while it’s tempting to think “more is better,” in this case, sticking to the recommended infusion time will give you a cannabutter that strikes a balance between potency and palatability. Remember, our goal is not just to create an effective product, but one that’s enjoyable to use in your favorite recipes!
Hi. Brilliant using the mason jars throughout the entire process!
“Gently put the lid on the mason jar and place the jar in the oven for decarboxylation.”
How long in the oven and at what temperature? Is it still 240 degrees for 40 minutes?
Thanks!
-Bill
Hi Bill. Yes, you still want to decarb at 240º for 40 minutes. One mason jar makes the process so smooth!
I’m using all of our leftover stems with that being said, am I supposed to leave them while if I can’t grind them? Or can those grind?
Hi Samantha. I would break the stems down a bit by hand, but I wouldn’t worry about grinding them. Stems are woody and fibrous and will cause more damage to your grinder than actually grinding them.
How do I make this recipe with fan and sugar leaves? Do I still need to decarb? First time, but I don’t want all of this to go to waste!!! Trying to make your banana bread recipe, but I need to make the cannabutter first 🤦🏻♀️
Hi Ali. Here is Emily’s guide on using trim for edibles: How To Use Trim & Sugar Leaves To Make Edibles. You will definitely want to decarb, but you can follow any of our cannabutter recipes and use trim in place of flower. I hope this helps!
Should I use salted or unsalted butter which one is better
Hi Jakcob. You can use either salted or unsalted butter, but each will give you a slightly different end result. Salted butter can help mask some of the cannabis flavor. Whereas unsalted butter has a neutral base, allowing the cannabis flavor to stand out more. In general, unsalted butter is preferred so you can control the amount of salt in your recipes. But ultimately, the choice between salted and unsalted butter depends on your personal preference and how you plan to use your cannabutter. I hope this helps! Happy cooking!
This butter is a 10/10.
Hi Rebecca. Thank you so much for the stellar rating! We’re thrilled to hear that you enjoy the cannabutter. It’s always wonderful to hear positive feedback from our readers.
Hi! I’m just wondering what the smell is like during infusion with this method. We’ve got neighbours and we rent – I just want to be as respectful as possible as far as the smell goes!
Hi Alexandra. Making cannabutter can produce a noticeable smell, similar to the scent of cannabis itself. The intensity of the smell depends on several factors, including the strain of cannabis used (some strains have a stronger scent than others), the amount of cannabis, and the specific method of infusion. For instance, using a slow cooker or a stovetop method can produce a stronger smell as compared to using an infusion device specifically designed to contain odors.
The Instant Pot works well for eliminating odors during decarboxylation(How To Decarb In An Instant Pot » No Smell Method) and reducing odor during infusion (Instant Pot Cannabutter or Oil » Easy Guide).
There’s a few different options to try. Happy Infusing!
So, I’m a little fuzzy on the decarb portion. It just says to let it get up to 180, then decrease temp, but does not say to what, or for how long. I know to do 240 for 40 in the oven, but I wanna try a different decarbing method.
Hi Sammi. Decarbing is not done in the crockpot, only infusion. Here is a different method than the oven for decarboxylation. How To Decarb In An Instant Pot » No Smell Method
Can i skip the oven part and extend the crock pot time? Thanks!
Hi June. We definitely recommend decarbing (240º for 40 minutes) the cannabis prior to running the infusion. Some members will run in the crockpot for 8 hours and claim the effects are the same as if they decarbed first. I hope this helps!
My flowers didn’t turn golden when I decarbed. The flowers turned a deeper green. Should I have spread them out on a cookie sheet?
Hi Nicki. Did you decarb at 240°F for 40 minutes? Did the flower become fragrant and dry to touch? The color isn’t always the best indicator. Spreading out on a cookie sheet would allow for even air flow, but shouldn’t make much of a difference overall.
Hi I have some shake that I’ve had in my freezer for several years, not sure how strong or if it will be any good now or how much to use for make the butter. I like eatables for pain not to get high. Any advice on an easy no brainer way for an 80 year old.??
Hi Billie! Your cannabis has most likely converted to CBN, which isn’t a bad thing! CBN is great for sleep! Emily has an excellent chart to follow for ratios when making butter. Check it out here: https://emilykylenutrition.com/cannabis-flower-to-oil-ratio-guide/
My butter is not solidifying. I used a cup of butter and 7g of flower. What did I do wrong?
Hello Heather. No worries, this is normal. It can take several hours to solidify at room temperature or in the refrigerator. Some water separation is also normal, and this can be drained and discarded. You didn’t do anything wrong 😀
I throw raw clippings without buds in my instapot with a stick of butter 1/4 cup water, 1/4 cup olive oil and set for 8 hrs low before I go to bed. By morning, I simply pull pulp out and use in smoothies. Then add brownie mix with a couple eggs in bowl,(only stir until it’s all wet) stick in greesed pan in oven for 350 for 25 minutes. Lick all instruments clean and voila feeling good all day and delicious brownies to share without spending my life on it or wasting trim. Everyone gets super good body highs from my git er done batch.
This sounds lovely, Jennifer! Thanks for sharing your process with us 🙂
Hi, what would happen if I used salted butter instead of unsalted? It’s all I have at home to keep me from going to the store
Hey Michelle, go right ahead and use salted, that is totally OK 🙂 Salted vs. unsalted is just a personal preference.
So I followed the instructions but I didn’t get any separate layers after I refrigerated it. I know the butter layer was supposed to be on top with some liquid under but I had one solid layer. Is that bad?
Hey Marissa! That is okay 🙂 It doesn’t mean you did anything wrong. How did everything turn out for you?
Hi I’m in the middle of making this but.I don’t have big jars is there anyway I can just put the butter and flower in the crockpot and then a jar?
Hello Rayne. Yes, you are more than welcome to do it that way if you prefer, just skip the water bath. Or any sized mason jar will do so 🙂
Hello, love this recipe, if I was to use shake instead of nuggs would I still use 7grams or would the recommended grams change?
Thank you
Anthony, I’m so happy you love the recipe! 💚 If you’re using shake instead of nugs, you can still use 7 grams, but the potency is may be higher. However, feel free to adjust slightly based on your preferences. I hope this helps!
Awesome! Thank you so much for the response 💚
You’re welcome!
Hey, love the recipes. What happens if my crockpot doesn’t keep the same heat temperature. It keeps dropping temperature even on high mode
Thanks so much, Jenny! You don’t need a crockpot specifically, especially if its not holding temperature. You just want anything that will hold a consistent 160-180°F temperature. You can use an Instant Pot or even the stovoe to create a water bath 🙂
I did crockpot method
The water is boiling is that ok
Hello Cathy. Boiling is OK, but I would reduce the heat a little bit, if possible 🙂 Good luck!
Hi there.
When it is ‘set to forget’, you say to leave it.. and then others say to burp every hour.
My question is, to burp or not to burp? And why?
Thank you ?
Liesha
Hello Liesha, I’ve never heard of burping cannabutter; I don’t do it personally, but if you like the method, go for it 😀
Hi Emily – Love your site and appreciate all the good info! The other night, I was using my decarb machine (similar to a Levo) and the power went out, so I have no idea how far the decab process progressed. Now I don’t know what to do. I’m afraid that if I just start over, the flowers will cook too long and the THC will be ruined. On the other hand, if I assume it was nearly finished – and it wasn’t – then my pretty flowers will be wasted. Any suggestions?
Hello Jody! Thank you so much for the kind words. I am sorry to hear the power went out. I personally would just start over, it’s unlikely that an extra 10-20 minutes of decarbing will ‘ruin’ the THC. If anything, some of the THC will convert into CBN and make for a more sleepy end product. If you think it was nearly finished, you could just experiment with a small batch, see how it makes you feel, and then re-decarb if needed 🙂 I hope this helps!
would it possible to also list the Celsius equivalent? Outside of america (you know, most of the world), we don’t use Fahrenheit, and so i messed up a batch decarb’ing it at 240C instead, because i only read the number and not the units (yes i swear i wasn’t high yet), but i bet this trips people up all the time.. so if you could just include the Celsius as well, anytime you include only the Fahrenheit, this would go a long way to not make this article so america-specific (and prevent non-americans from from doing foolish things like me)
Hello Aleks. I’m sorry to hear you messed up a batch 🙁 But yes, I will add celsius equivalents to our team’s to-do list and hopefully get these numbers up soon. Thanks for the suggestion!
Hi Emily,
Why the need to use “unsalted” butter over salted ???
Steve, you can use salted if you really want to, but unsalted has a higher butterfat content, meaning more opportunity for infusion and fewer impurities to remove.
Easy to follow thank you so much Emily. My Cannabutter turned out wonderful. I had it on English muffin as well as Bagel. Next will be the Peanut butter Cookies. Is there a place to share photos? Thank you again
I am so happy it turned out well for you, Christopher! Please feel free to share your photos over in the membership community 😀
Hi! I’m in the middle of making this recipe, and I’m wondering if the crock pot and water is supposed to heat up to 180 degrees before I put the butter and cannabis inside, or is it okay to heat them all together and reach 180 degrees? I know croc pots take a very long time to heat water. could you help me out with this? thanks!
Hey Maddy, it’s best to start with the water already at 160-180°F. I know crockpots take a long time to heat up, so feel free to fill the pot with water that is already hot 🙂
Is there as much variation in the taste of raw cannabis strains as there is aroma and crazy names?
Thanks!
Hey Jennifer, great question! Some people find that the terpenes really influence the flavor, while other’s don’t notice a difference 🙂
Hello, are the temps for decarbing for conventional ovens or convection ovens?
Hey Linden – conventional 🙂 Thanks for asking.
Oh my God,! Oh my God! I’m new to the pot stuff, my son is really unto everything pot so I want to make some pot butter and my friend told me how but I put one ingredient in the mix and screwed it all up. WATER, I THOUGHT HE SAID BOIL the weed in water and butter , so I have all this weed boiled in water and butter is there any way I can save it. Please help me out with this.
Hi Honey, no worries, water is not harmful to cannabis. Simply place everything in the refrigerator and let the butter harden. Then pour off the water, leaving just the butter and flower behind. Then proceed with the process as usual. I hope this helps!
It says THC 84.6 percent
CBD .809 percent
THC 951.690 mg CBD 9.100 mg
I put the butter on toast. I want it to help pain of arthritis and neuropathy.
This means the entire syringe contains 952mg of THC. Have you ever had THC before? Do you know how much you want to aim for per serving? If not, I would say that 5mg of THC is a good place to start. If you’re putting butter on toast, let’s say you’re doing 1/2 teaspoon per serving. There are 48 teaspoons in 1/2 cup of ghee. 48 teaspoons = 48 servings. 48 servings at 5mg each would be 240mg. Your whole syringe contains 952/240 = 3.9 so this means you would want to use approximately 1/4 of the syringe. If it is already labeled with measurements, it should be easy to do. Following this math, you can adjust the servings and how much butter you need to get the perfect ratio. I hope this helps! I emailed you, as well.
I am new to this. I have medical THC liquid and I want to use it in ghee. I have 1 gram vials. Please advise proportions.
Hello Anne. Does your vial state how many mg of THC are in each one? That would be helpful to know because then you can do the math from there. Then you will want to know what you’re going to be making and how strong you want it to be. For example, if you want to make brownies with 10mg THC each, and one vial contained 1,000mg – you would want to use 1/10th of your vial. I hope that makes sense!
Can I skip the step of removing water? Making cookies and I usually add water anyway, figured I could just leave it in?
Yes Björn – I don’t see why not 🙂
I’d like to know the proportion of cannabis to butter, ratio.
Say 1 cup of butter, should I use 2 oz of decarbolyzed bud, cook them up together to make the butter for my MJ cookies?
Hey Scroller49 – This Flower to Oil Ratio Guide will help you determine how much to use 😀
Hi Emily,
I used this recipe to infuse 3.5 grams of flower with 1/2 cup of butter. Which I then used in a boxed cookie mix. The boxed recipe called for 1/2 cup of butter, so I used my whole infused batch. Based on your calculator, each cookie should have about 21mg of THC. My issue is that that have a VERY strong weed flavor. Is this due to the potency or could I have made a mistake to cause such a strong flavor?
Thanks for all the great info and recipes!
Hey Sam! Thanks for the kind words. The flavor is not related to potency, or process, but rather the amount of chlorophyll and terpenes that have made their way into your infusion. You can read more about chlorophyll and how to reduce the flavor here.
I tried this recipe and I’m mind blown!! I followed every step and used 3.5 grams of cannabis.
After decarboxylating the weed at 250 degrees for 25 minutes, i put it in an old pickle jar with 1 stick of butter. I placed the jar in water in a pot on the stove and for 4 hours, I monitored the water making sure it stayed between 180 -190 degrees.
I used the cannabutter to make rice crispy treats. About 90 min later I felt high, about 2 hrs later I was in another dimension.
Great Recipe!!! Thanks so much!!
I am so happy you enjoyed this recipe, Sum, thanks so much for letting us know how your experience went 😀
I did this last weekend and made chocolate kringle cookies. I was afraid there would be a weird taste but my Hubby said he didn’t taste anything other than the cookies. I was pleasantly surprised that it worked so well.
I am so glad you had such a great experience, Barb! Thanks for letting us know 😀
Can I used pre-decarbed bud from vaping?
Yes, you can, Sarah! Here is a full guide for making edibles with already vaped bud – if you need it 🙂
I have a very small crockpot that will only hold one 1 cup mason jar, so I’m gonna cut out the jar and just use straight crock pot. We’ll see how it goes!!!;
Good luck, Melody, it should be just fine. Let us know how it turns out 🙂
What size mason jars did you use?
Nina, I used pint-sized mason jars 🙂
can you take cannabutter out of freezer and re make it to make it stronger I made a few batches with shake but now I have a good lot of bud and would like to redo it by adding the cannabuttre to the water and creboxelated weed and recook it
Yes, Peggy, you can re-infuse to try and make it stronger. Good luck 🙂